cf-for-k8s -> Run Cloudfoundry on Azurestack AKS

cf-for-k8s pipeline for concourse-ci Concourse CI

this is a short run tru my cf-for-k8s deployment on azurestack on AKS. it will be updated continously. to understand the scripts i use, the the included links :-)

Before getting started: cf-for-k8s installation is pretty straight forward. In this example i am using concourse-fi Concourse CI, and the dployment scripts are custom tasks based out of my github repo azs-concourse, where the pipeline used is platform automation

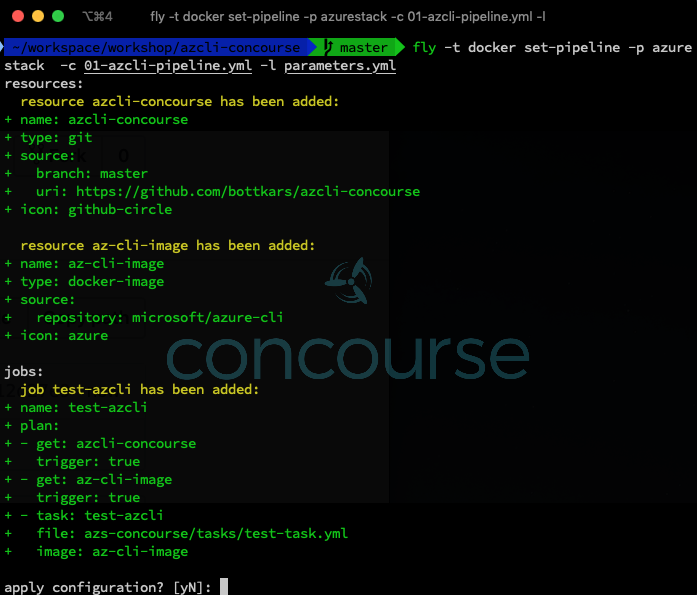
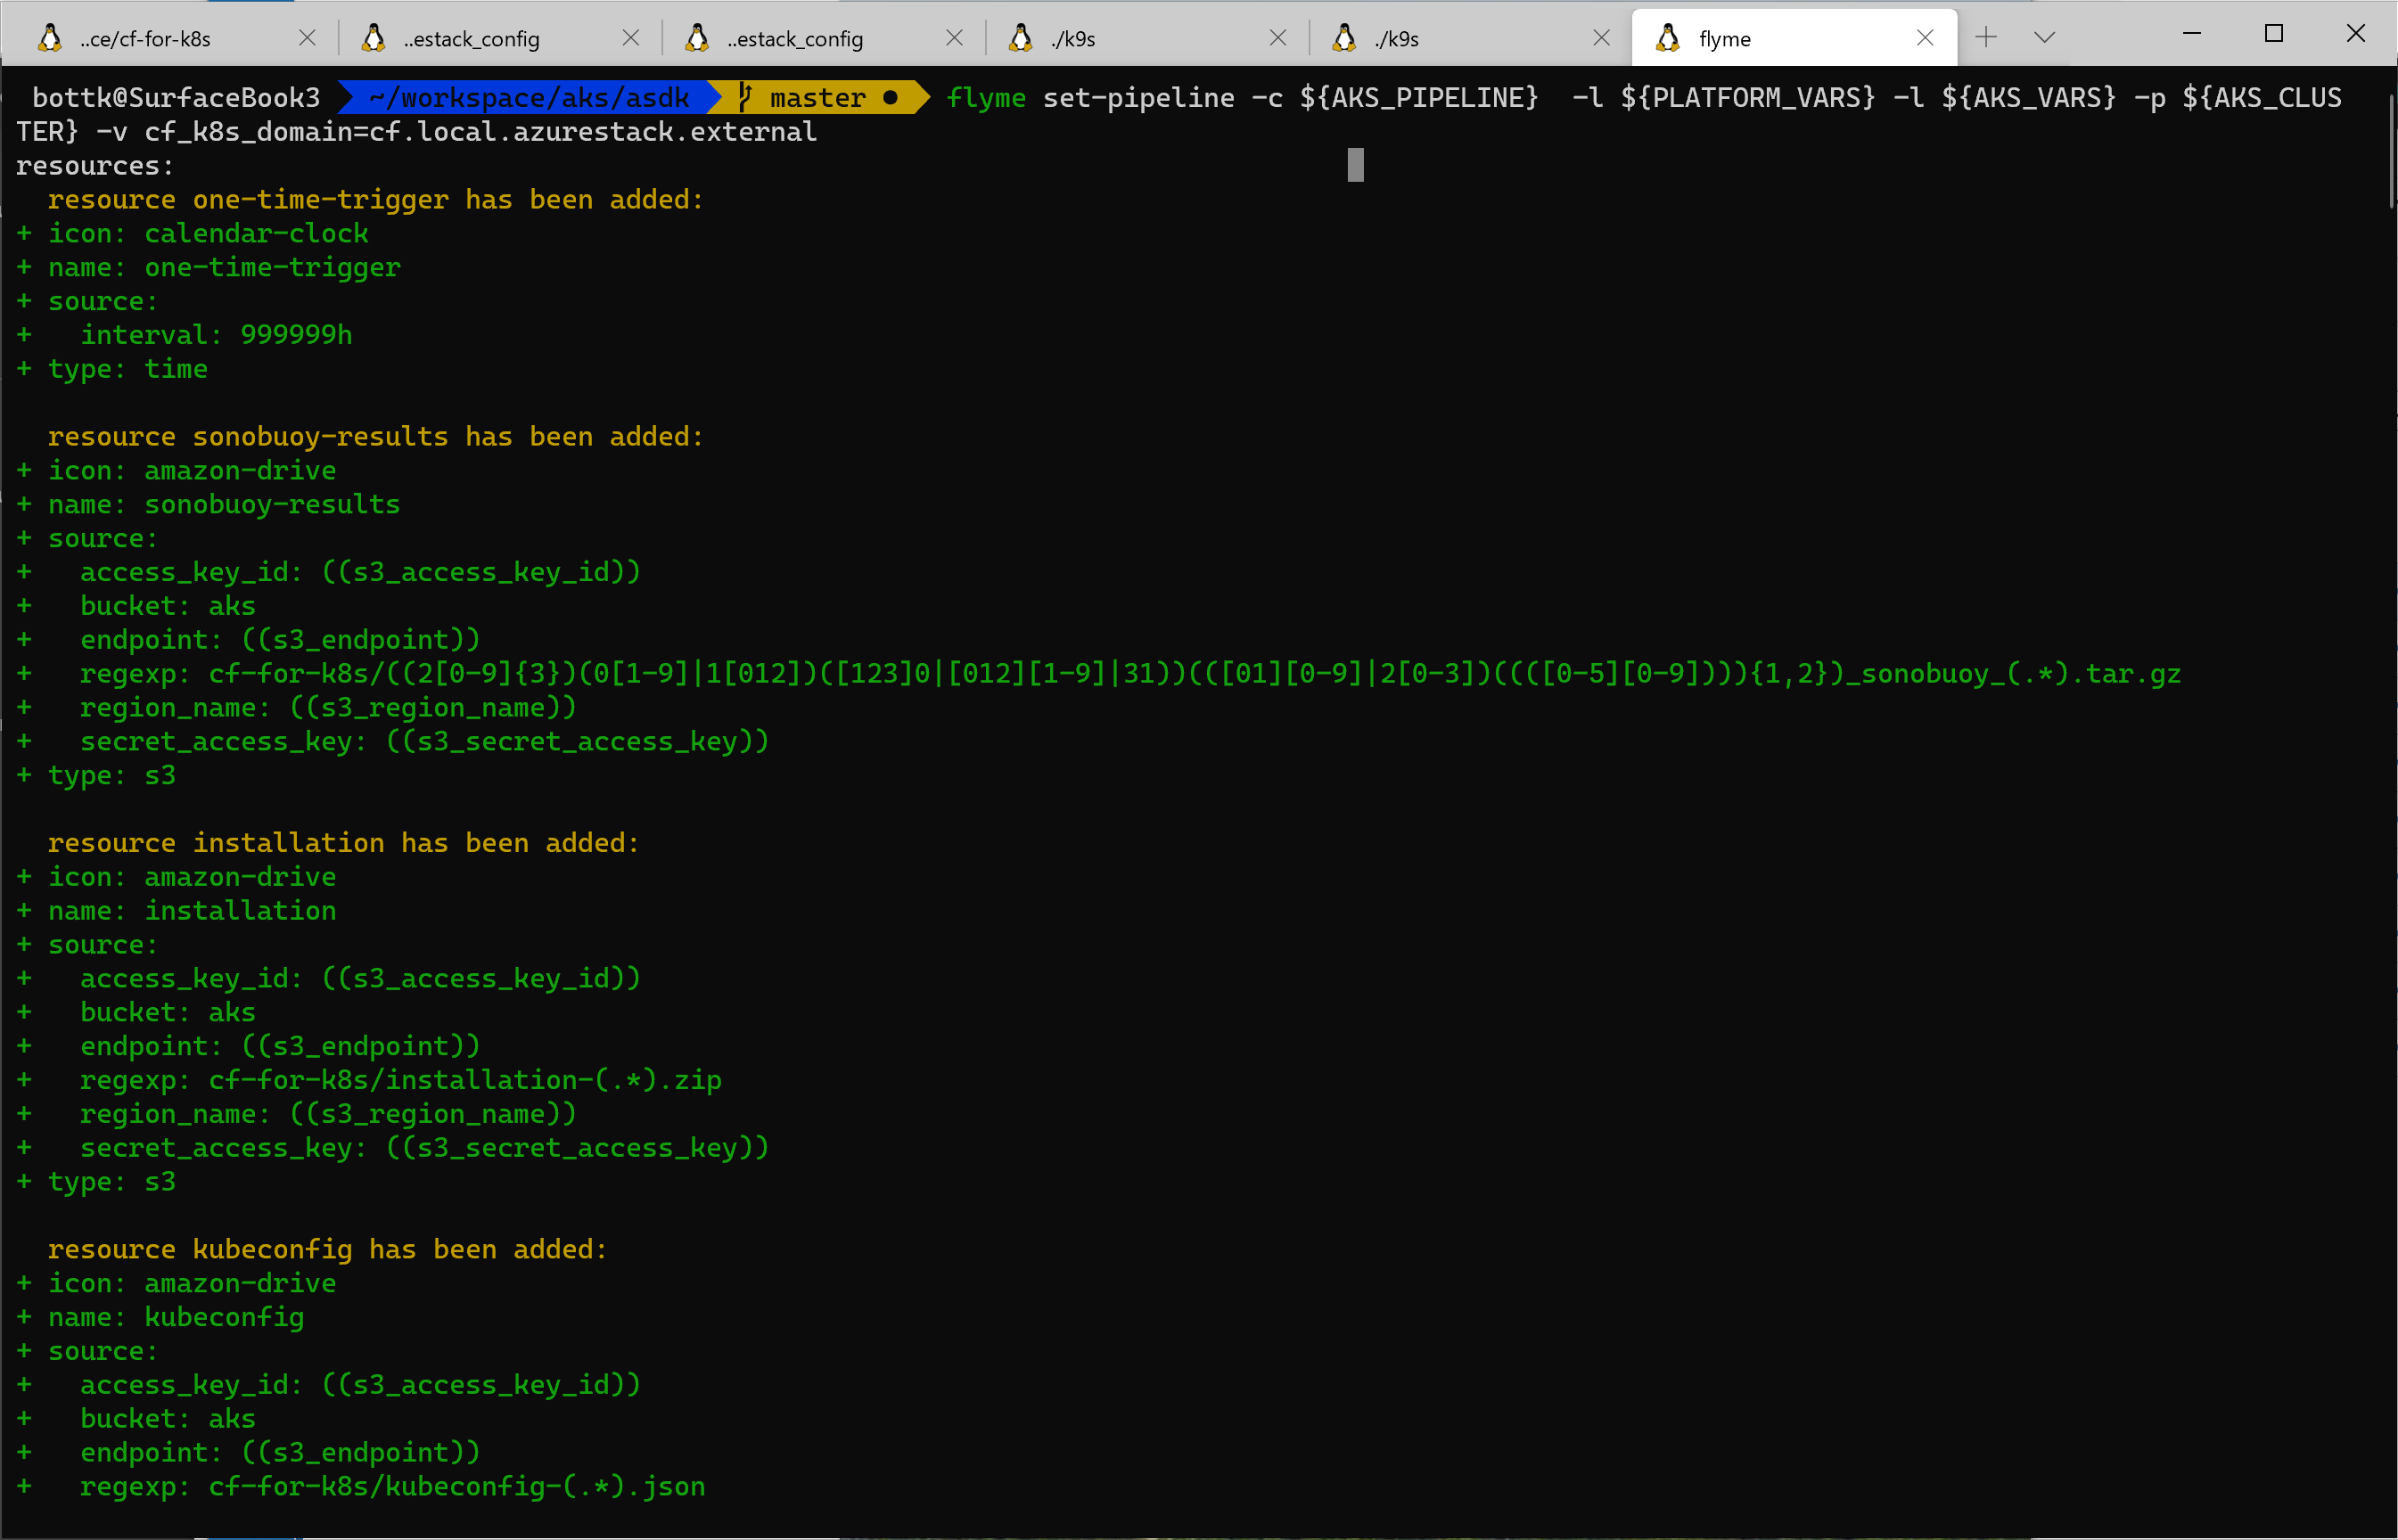
So we actually start with setting the Pipeline:

fly -t concourse_target set-pipeline -c ${AKS_PIPELINE}  -l ${PLATFORM_VARS} -l ${AKS_VARS} -p ${AKS_CLUSTER} -v cf_k8s_domain=cf.local.azurestack.external

in the above call, the following aliases / variables are used:

AKS_PIPELINE: is the pipeline file PLATFORM_VARS: Variables containing essential, pipeline independent Environment Variable, e.G. AzureStack Endpoints ( leading with AZURE_) and general var´s this must resolve:

  azure_env: &azure_env
    PROFILE: ((azs.arm_profile))
    CA_CERT: ((azs_ca.certificate))
    AZURE_CLI_CA_PATH: /opt/az/lib/python3.6/site-packages/certifi/cacert.pem
    ENDPOINT_RESOURCE_MANAGER: ((endpoint-resource-manager))
    VAULT_DNS:  ((azs.vault_dns))
    SUFFIX_STORAGE_ENDPOINT: ((azs.suffix_storage_endpoint))
    AZURE_TENANT_ID: ((tenant_id))
    AZURE_CLIENT_ID: ((client_id))
    AZURE_CLIENT_SECRET: ((client_secret))
    AZURE_SUBSCRIPTION_ID: ((subscription_id))
    RESOURCE_GROUP: ((aks.resource_group))
    LOCATION: ((azs.azurestack_region))

AKS_VARS : essentially, vars to control the AKS Engine ( cluster, size etc.. ) Example AKS_VARS:

azs_concourse_branch: tanzu
aks:
    team: aks
    bucket: aks
    resource_group: cf-for-k8s
    orchestrator_release: 1.15
    orchestrator_version: 1.15.4
    orchestrator_version_update: 1.16.1
    engine_tagfilter: "v0.43.([1])"
    master:
      dns_prefix: cf-for-k8s
      vmsize: Standard_D2_v2
      node_count: 3 # 1, 3 or 5, at least 3 for upgradeable
      distro: aks-ubuntu-16.04
    agent:
      0:
        vmsize: Standard_D3_v2
        node_count: 3
        distro: aks-ubuntu-16.04
        new_node_count: 6
        pool_name: linuxpool
        ostype: Linux
    ssh_public_key: ssh-rsa AAAAB... 
set-pipeline

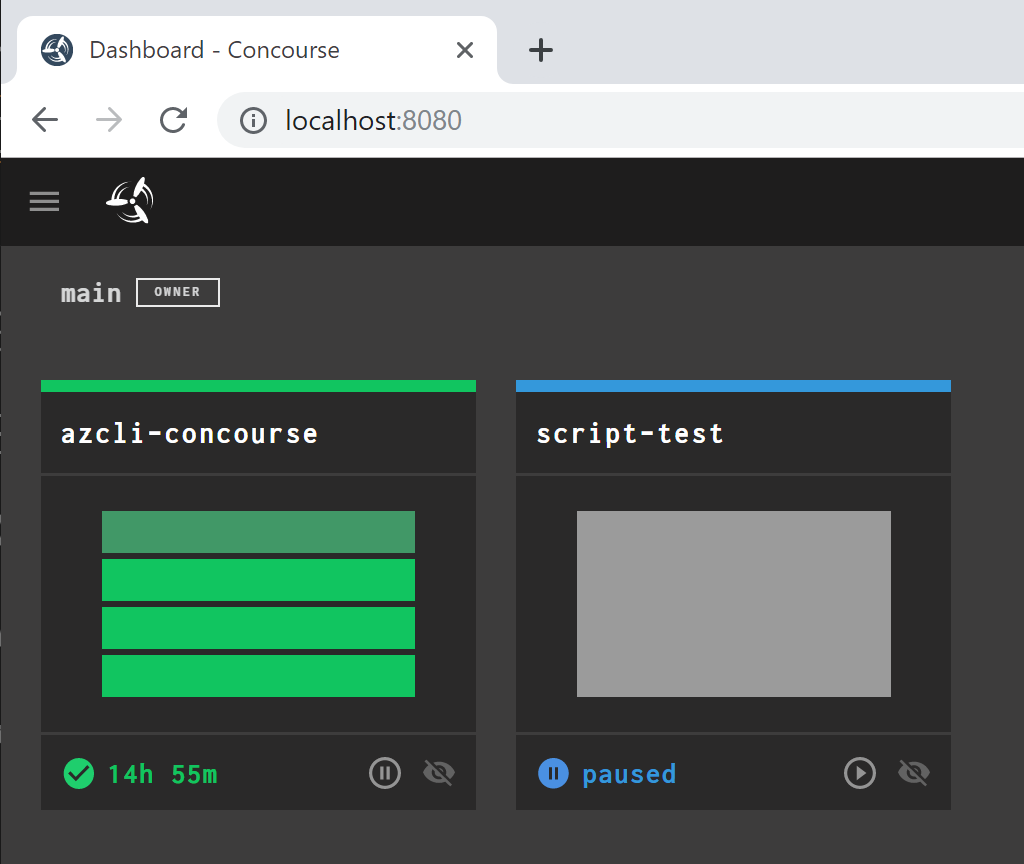
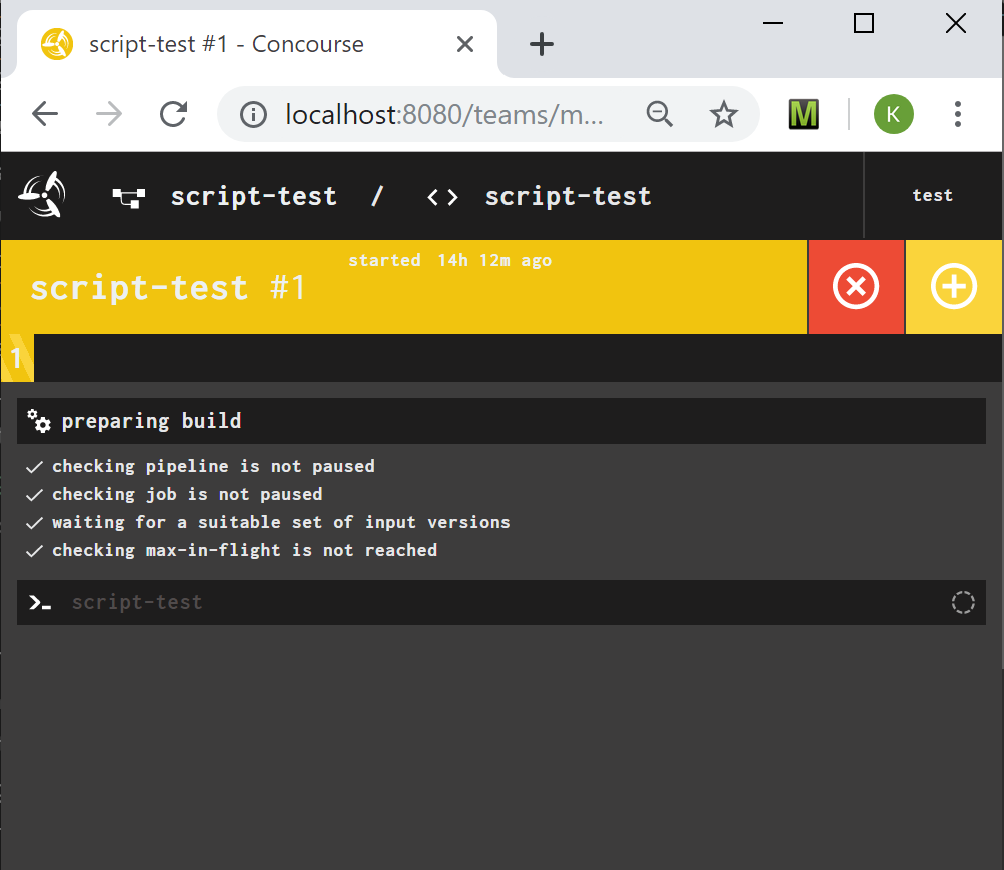
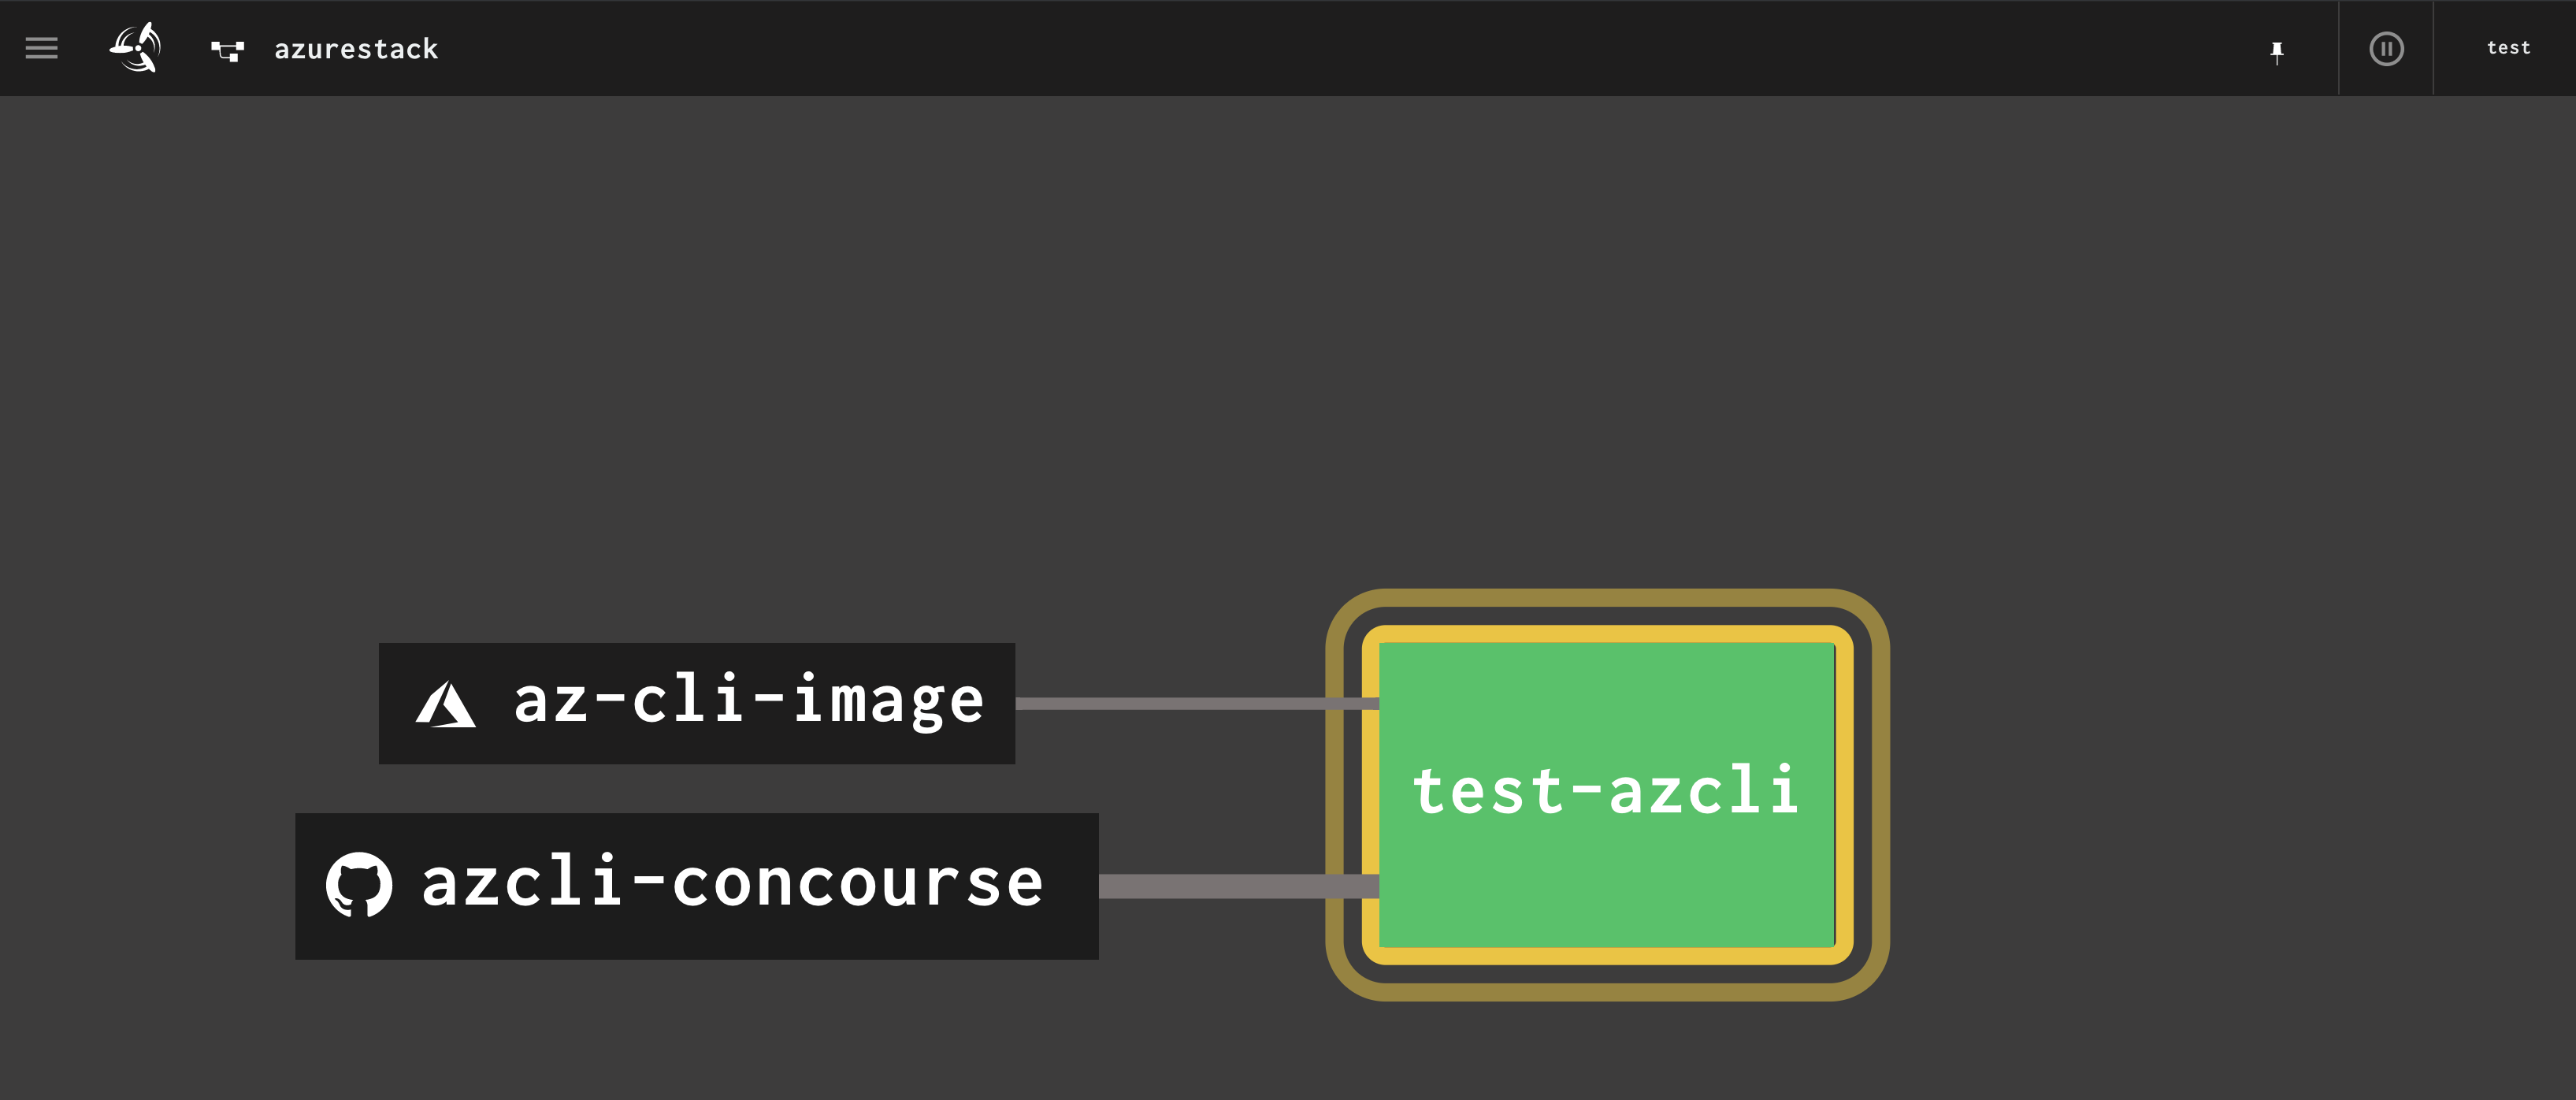
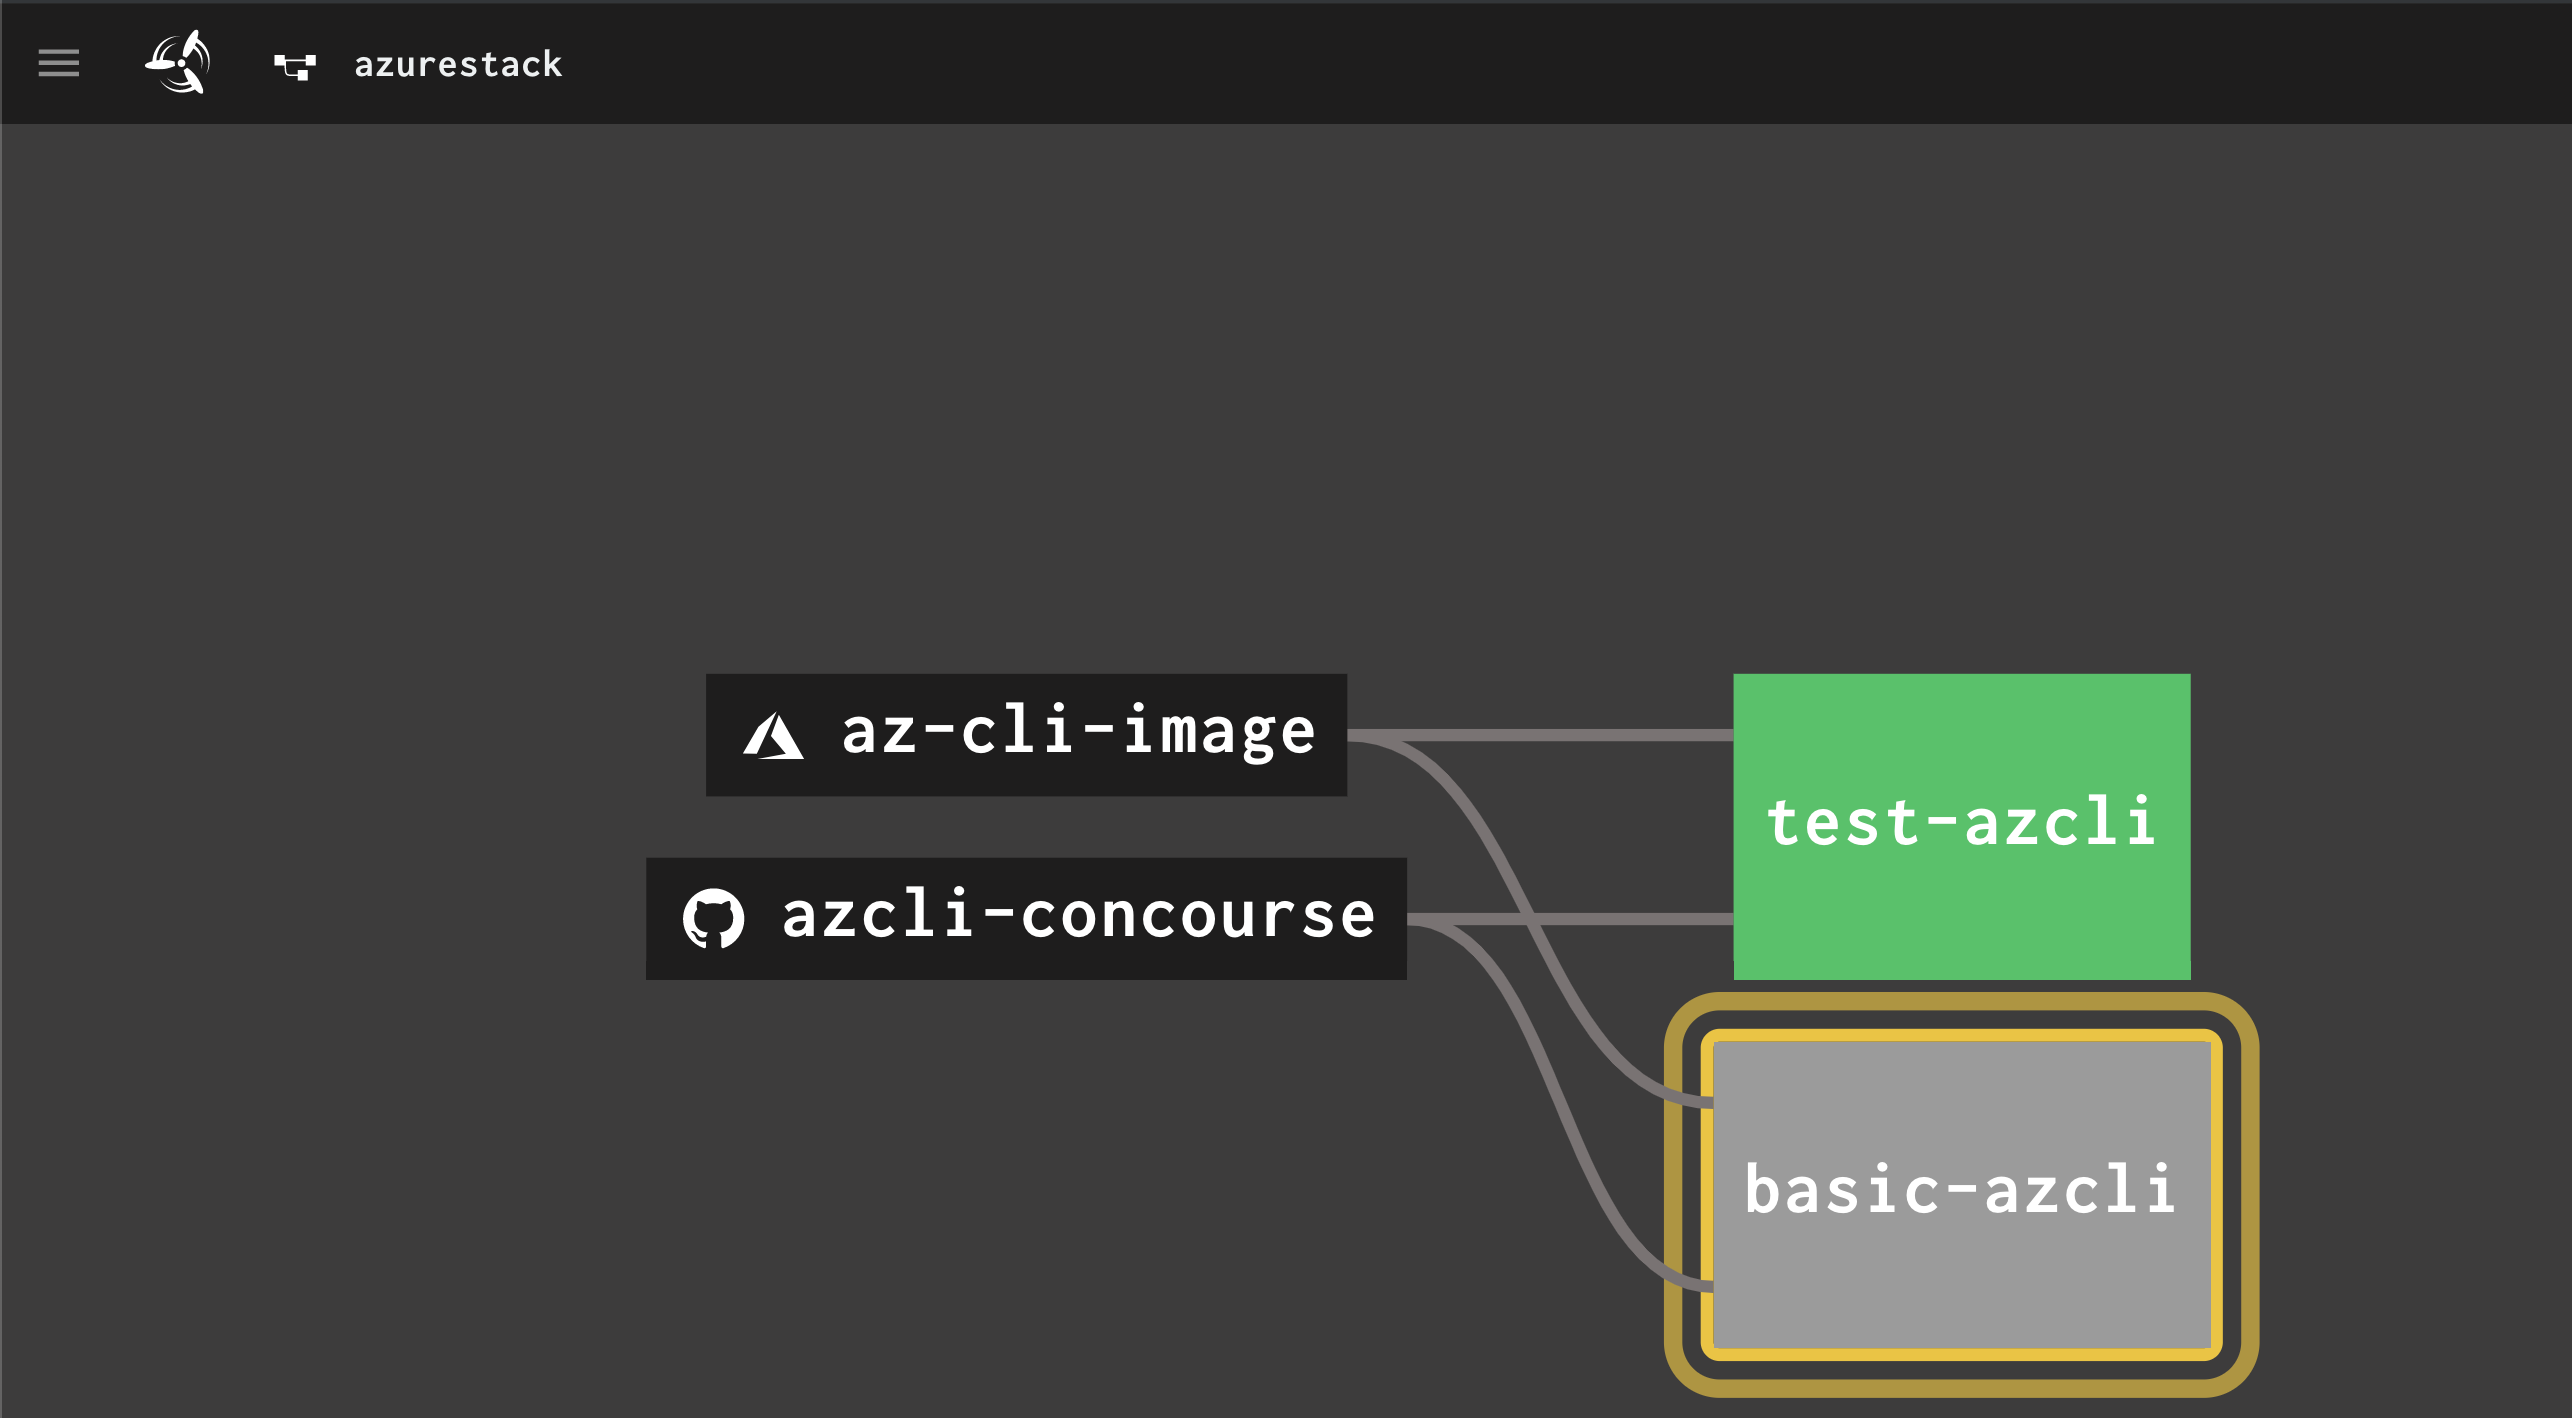
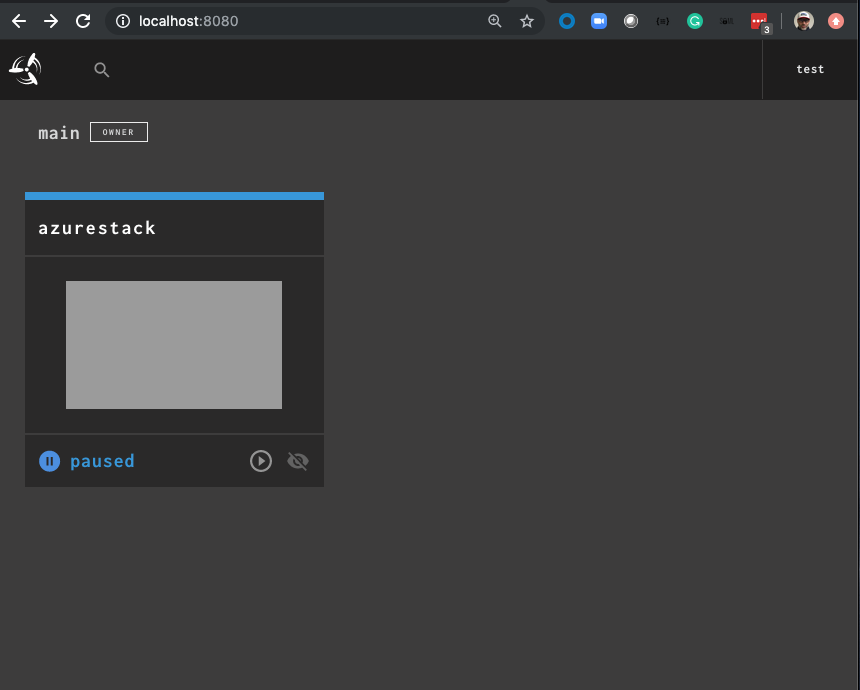
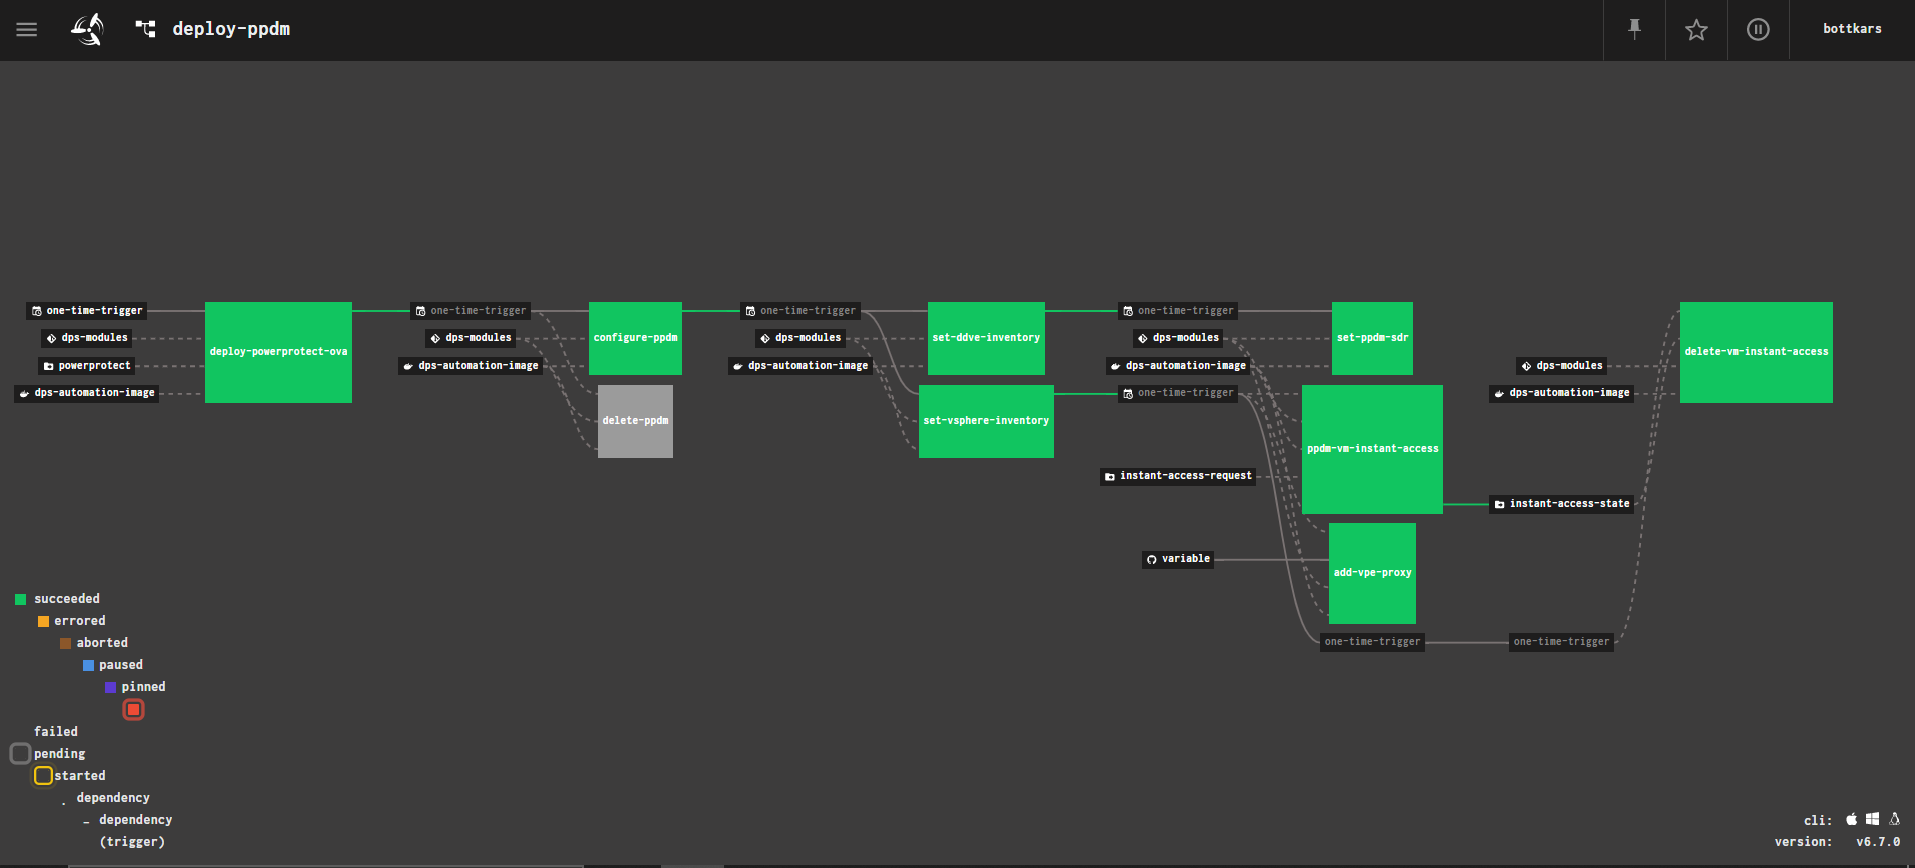
we should now have a Paused cf-for-k8s Pipeline in our UI :

paused pipeline

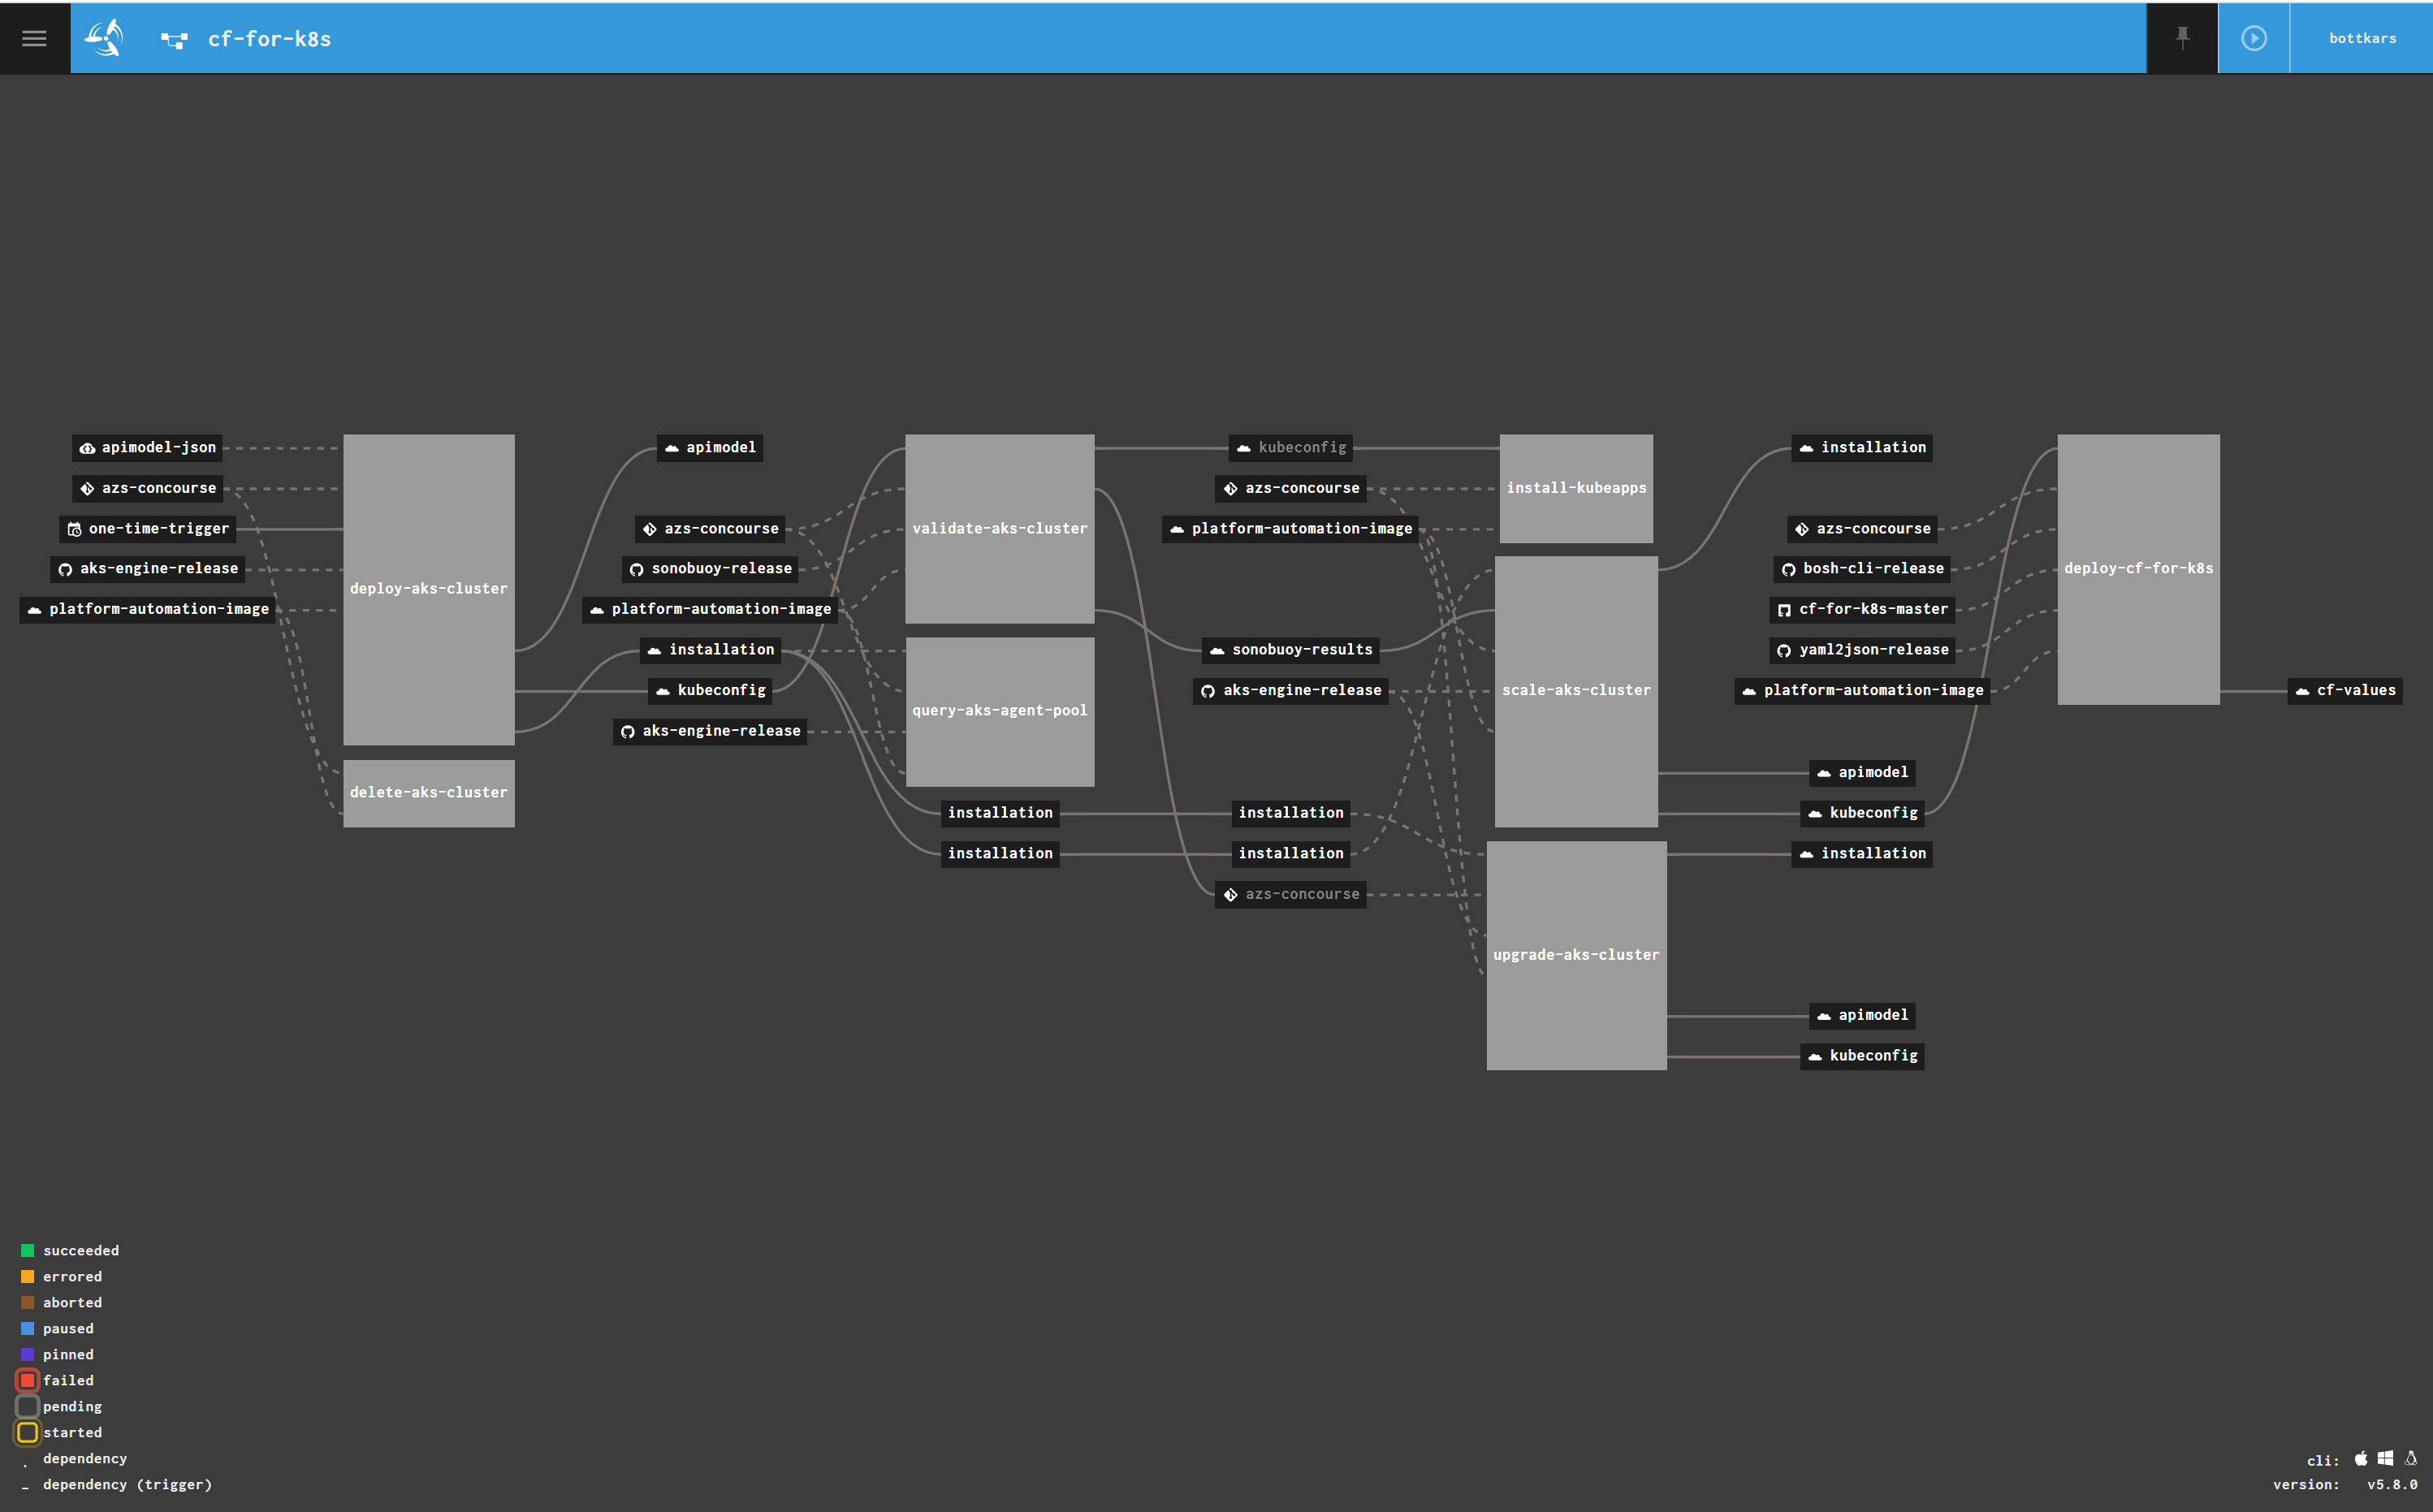
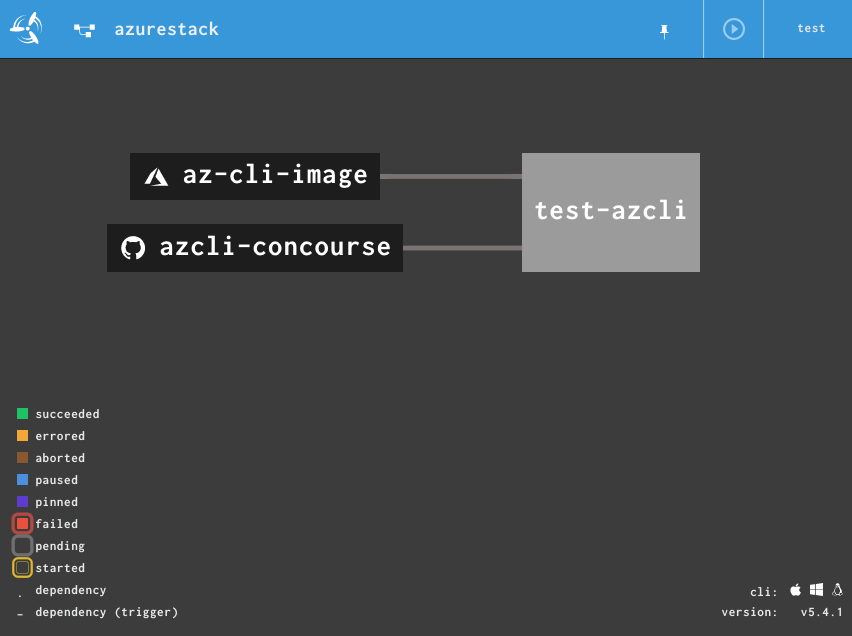
the Pipeline has the folllowing Task Flow:

  • deploy-aks-cluster ( c.a. 12 Minutes)
  • validate-aks-cluster ( sonobuoy basic validation, ca. 5 minutes)
  • install kubeapps ( default in my clusters, bitnami catalog for HELM Repo´s)
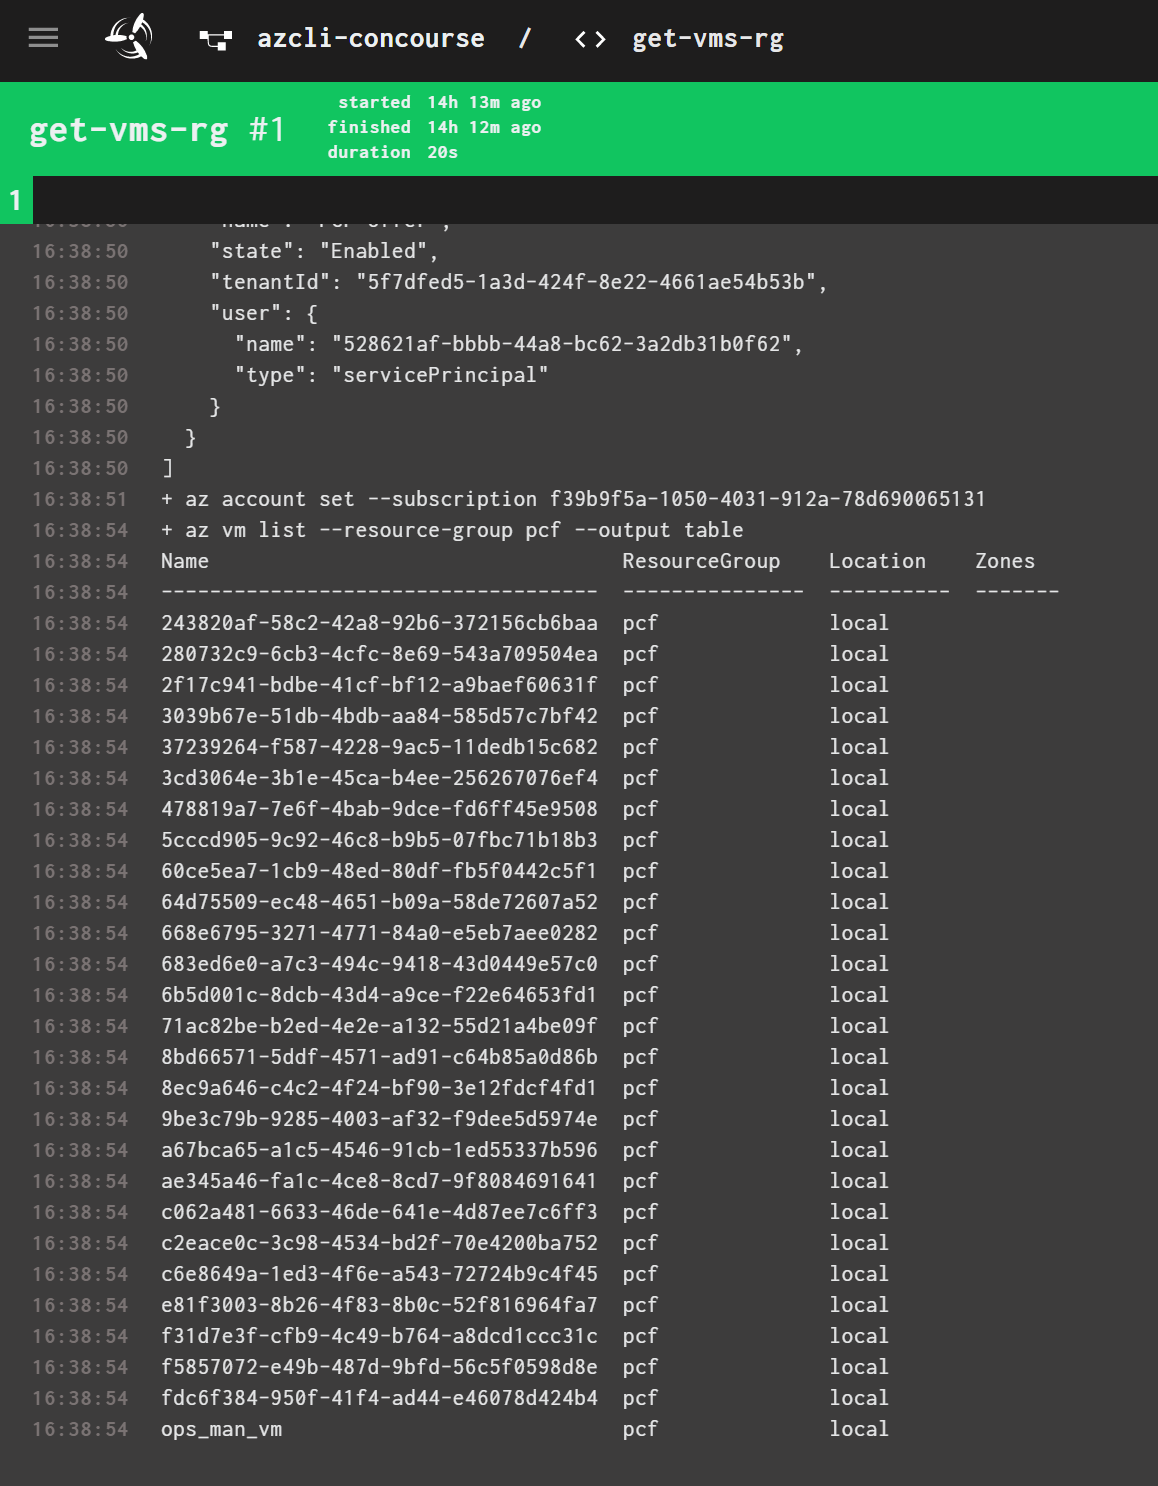
  • scale-aks-clusters ( for cf-for-k8s, we go to add some more nodes :-) )
  • deploy-cf-for-k8s

While the first 4 Tasks are default for my AKS Deployments, we will focus on the deploy-cf-for-k8s task ( note i will write about the AKS Engine Pipeline soon !)
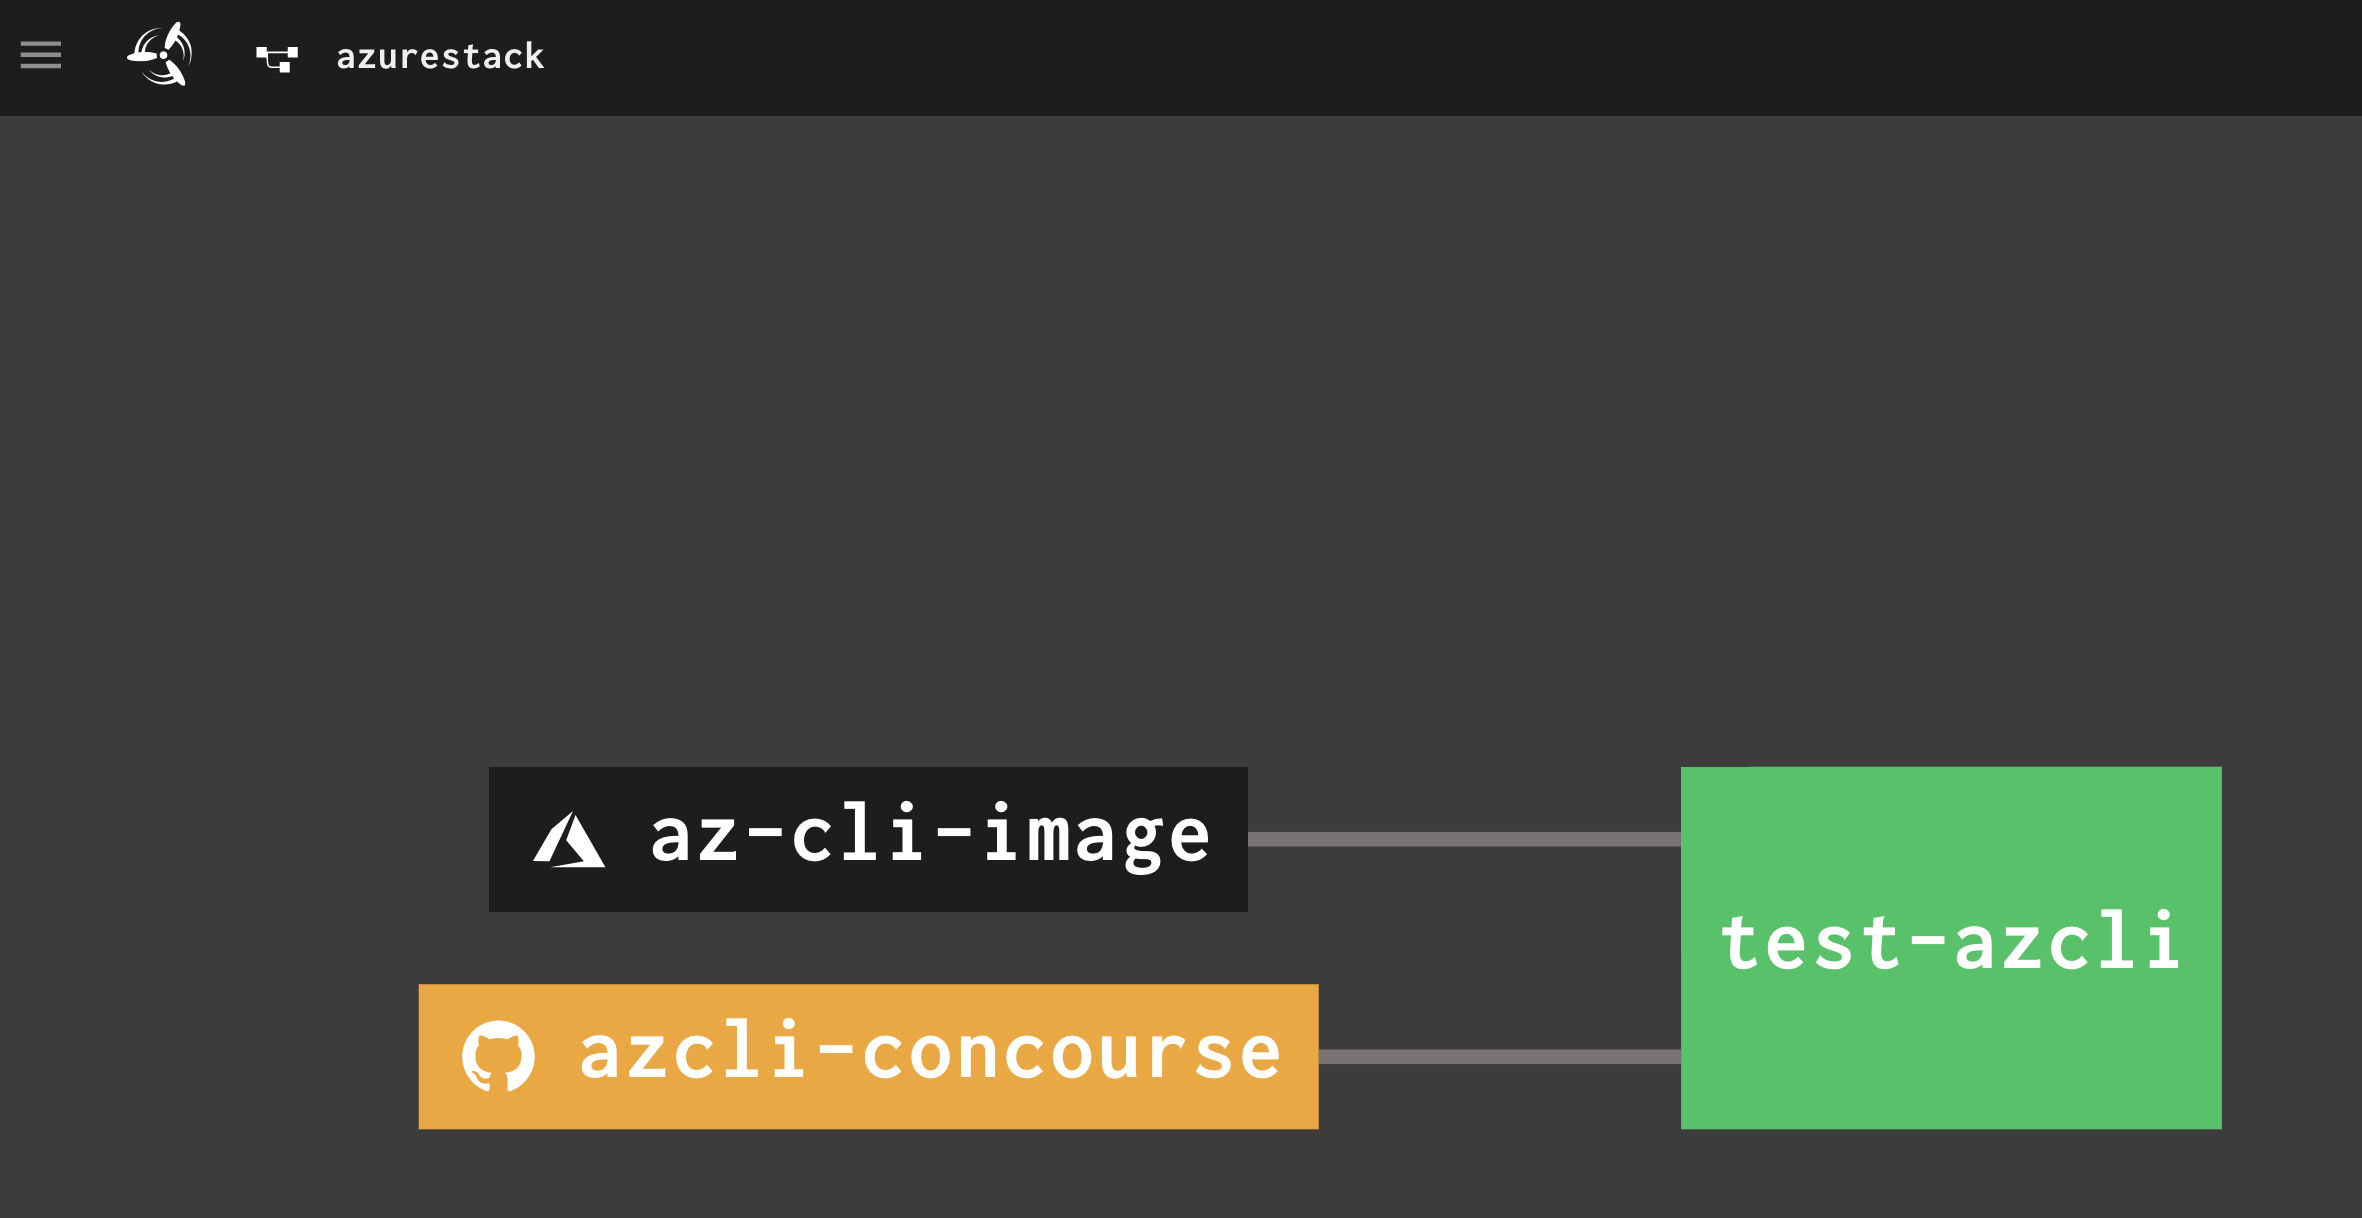
deploy-cf-for-k8s

the deploy-cf-for-k8s task requires the following resources from either github or local storage:

  • azs-concourse (required tasks scripts)
  • bosh-cli-release ( latest version of bosh cli)
  • cf-for-k8s-master ( cf-for-k8smaster branch)
  • yml2json-release ( yml to json converter)
  • platform-automation-image (base image to run scripts)

also, the following variables need to be passed:

  <<: *azure_env # youre azure-stack enfironment 
  DNS_DOMAIN: ((cf_k8s_domain)) # the cf domain
  GCR_CRED: ((gcr_cred)) # credentials for gcr

where GCR_CRED contains the credentials to you Google Container Registry. You can provide them either form a secure store like credhub ( preferred way ), therefore simply load the credtials JSON file obtained from creating the secret with:

credhub set -n /concourse/<main or team>/gcr_cred -t json -v "$(cat ../aks/your-project-storage-creds.json)"

or load the variable to the pipeline from a YAML file in this example, gcr.yaml):

gcr_cred:
  type: service_account
  project_id: your-project_id
  private_key_id: your-private_key_id
  private_key: your-private_key
  client_email: your-client_email
  client_id: your-client_id
  auth_uri: your-auth_uri
  token_uri: your-token_uri
  auth_provider_x509_cert_url: your-auth_provider_x509_cert_url
  client_x509_cert_url: your-auth_uri

and then

fly -t concourse_target set-pipeline -c ${AKS_PIPELINE} \
  -l ${PLATFORM_VARS} \
  -l gcr.yml \
  -l ${AKS_VARS} \
  -p ${AKS_CLUSTER} \
  -v cf_k8s_domain=cf.local.azurestack.external

the tasks

tbd

Monitoring the installation

cf-for-k8s will be deployed using k14tools for an easy composable deployment. the pipeline does that during the install

kapp-deploy

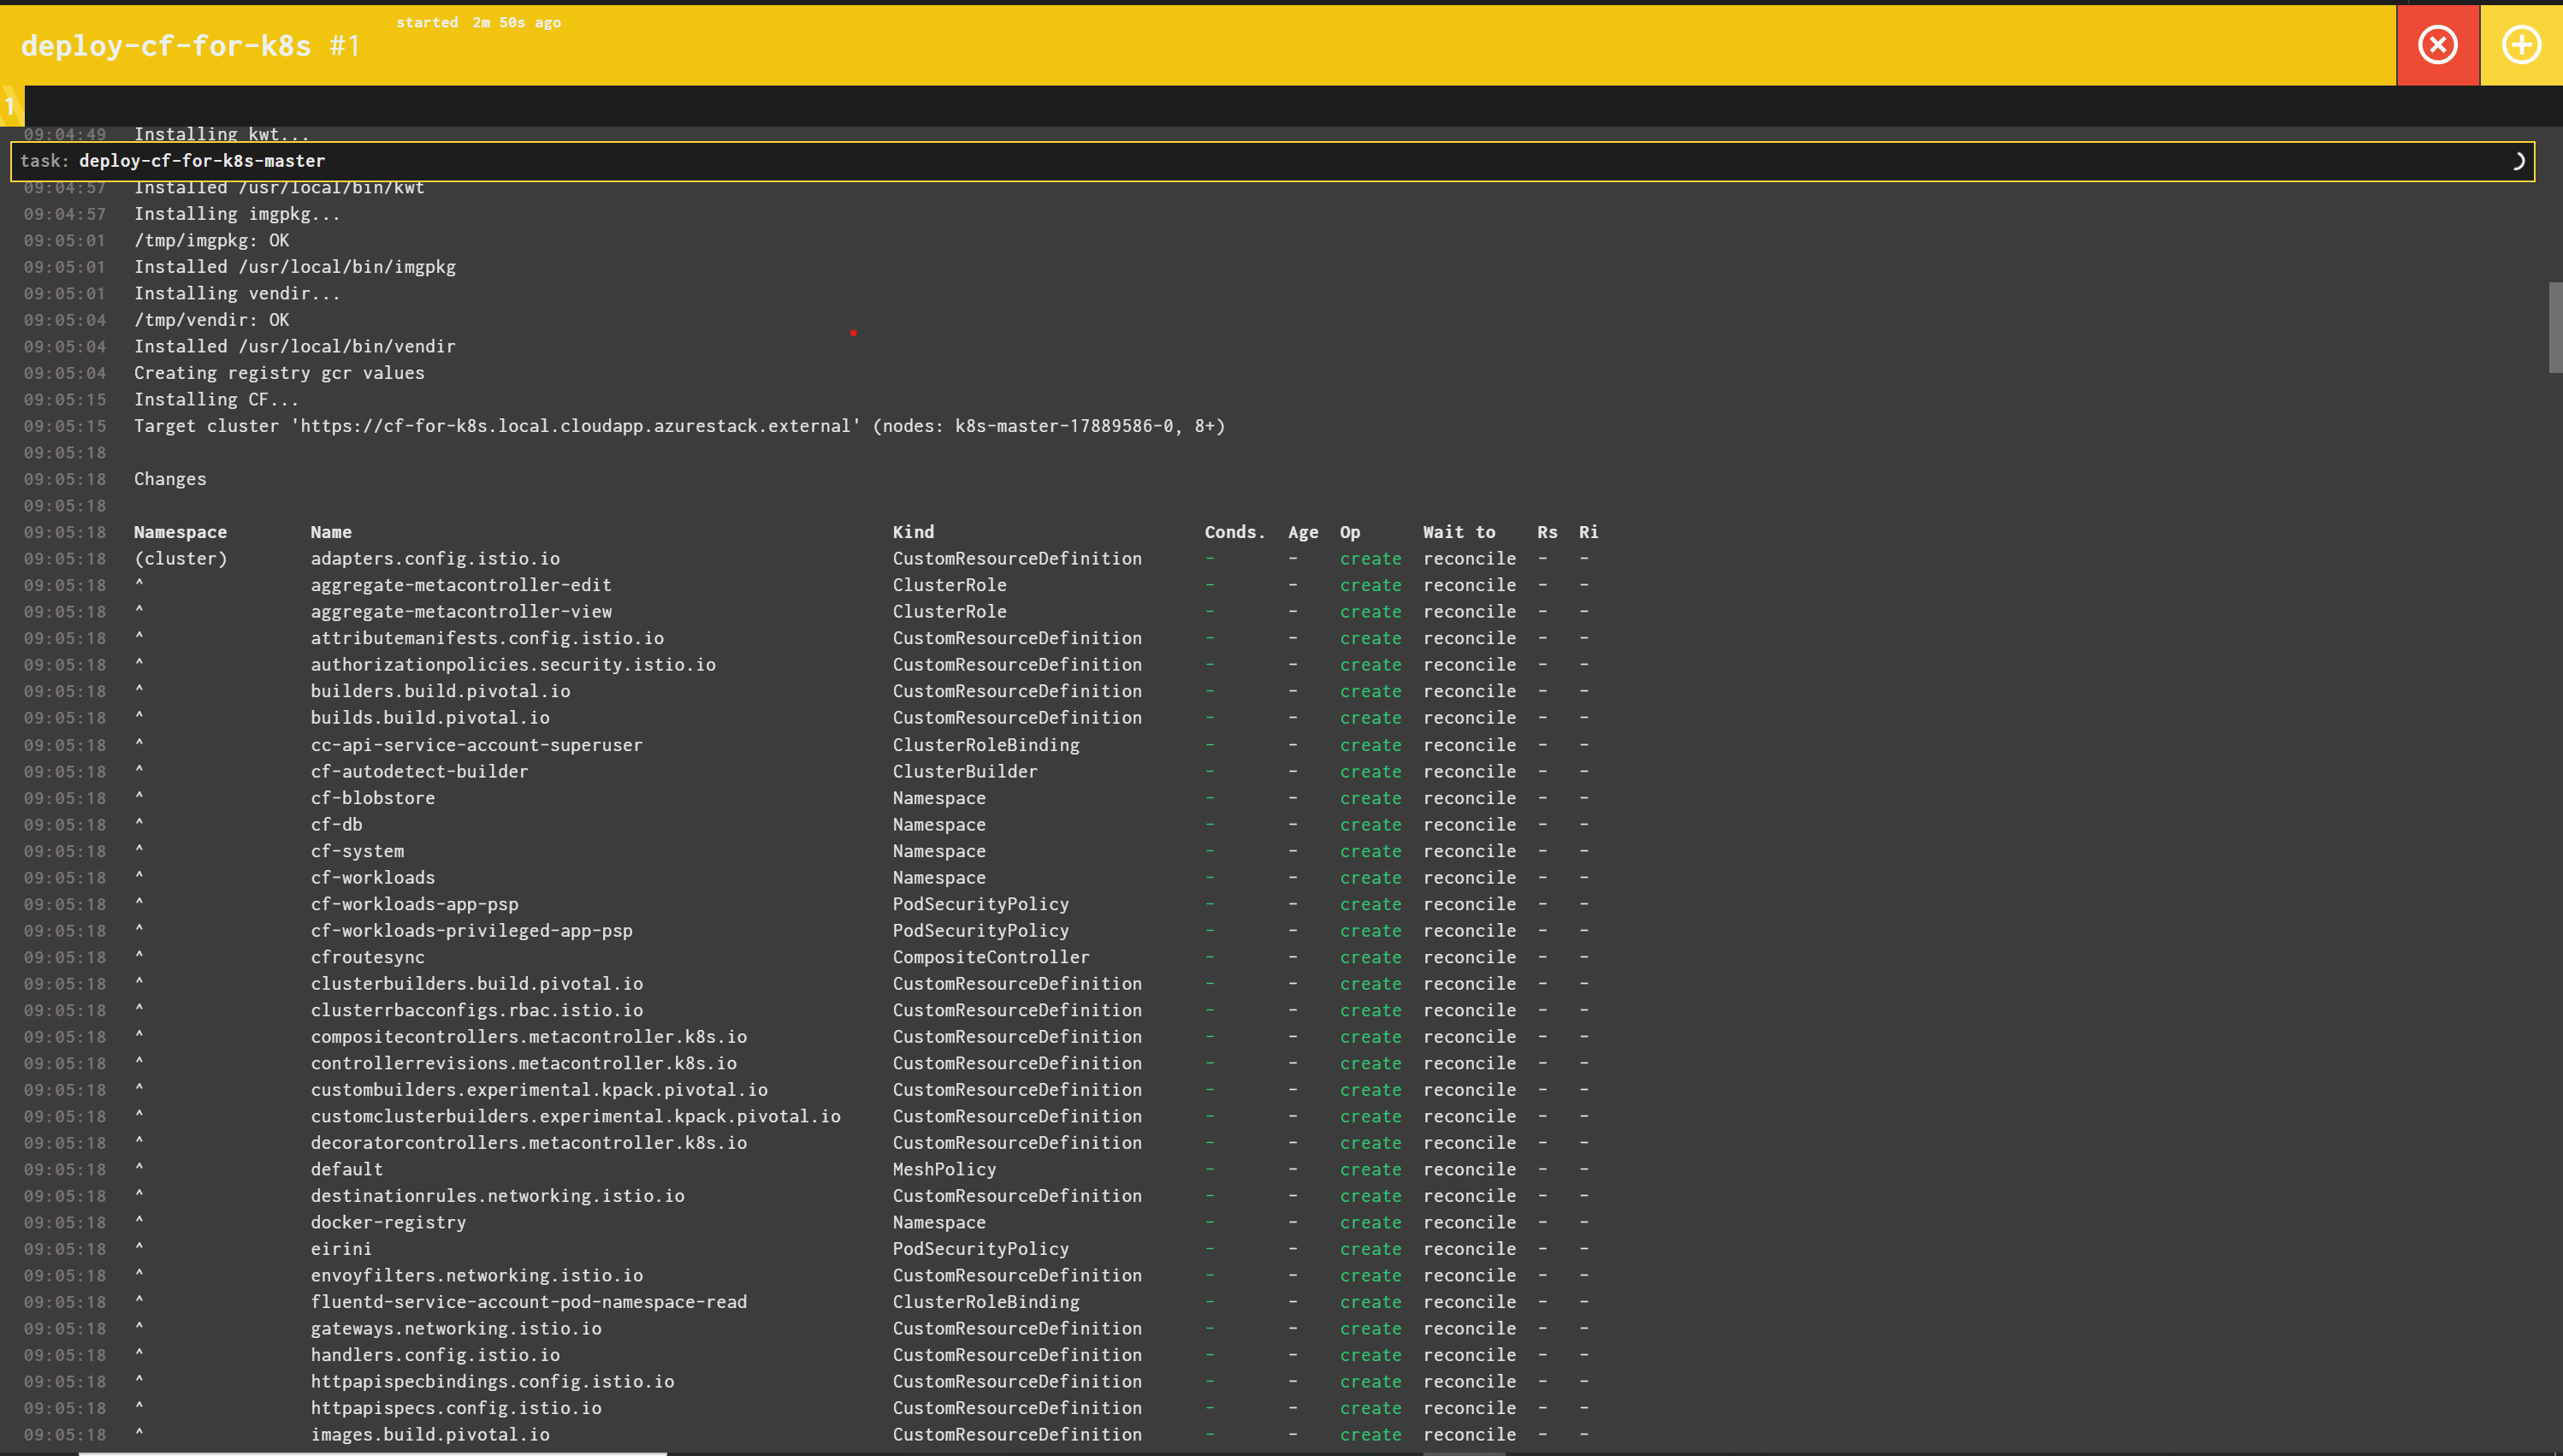
the pipeline may succeed, with cf-for-k8s not finished deploying. the deployment time varies on multiple factors including internet speed. however, the kapp deployment may still be ongoing when the pipeline is finished.

to monitor the deployment on your machine, you can install k14tools on your machine following the instructions on their site. kapp requires a kubeconfig file to access your cluster. copy you kubeconfig file ( the deploy-aks task stores that on your s3 store after deployment)

i have an alias that copies my latest kubeconfig file:

get-kubeconfig
get-kubeconfig

to monitor / inspect the deployment, run

kapp inspect -a cf
kapp-inspect

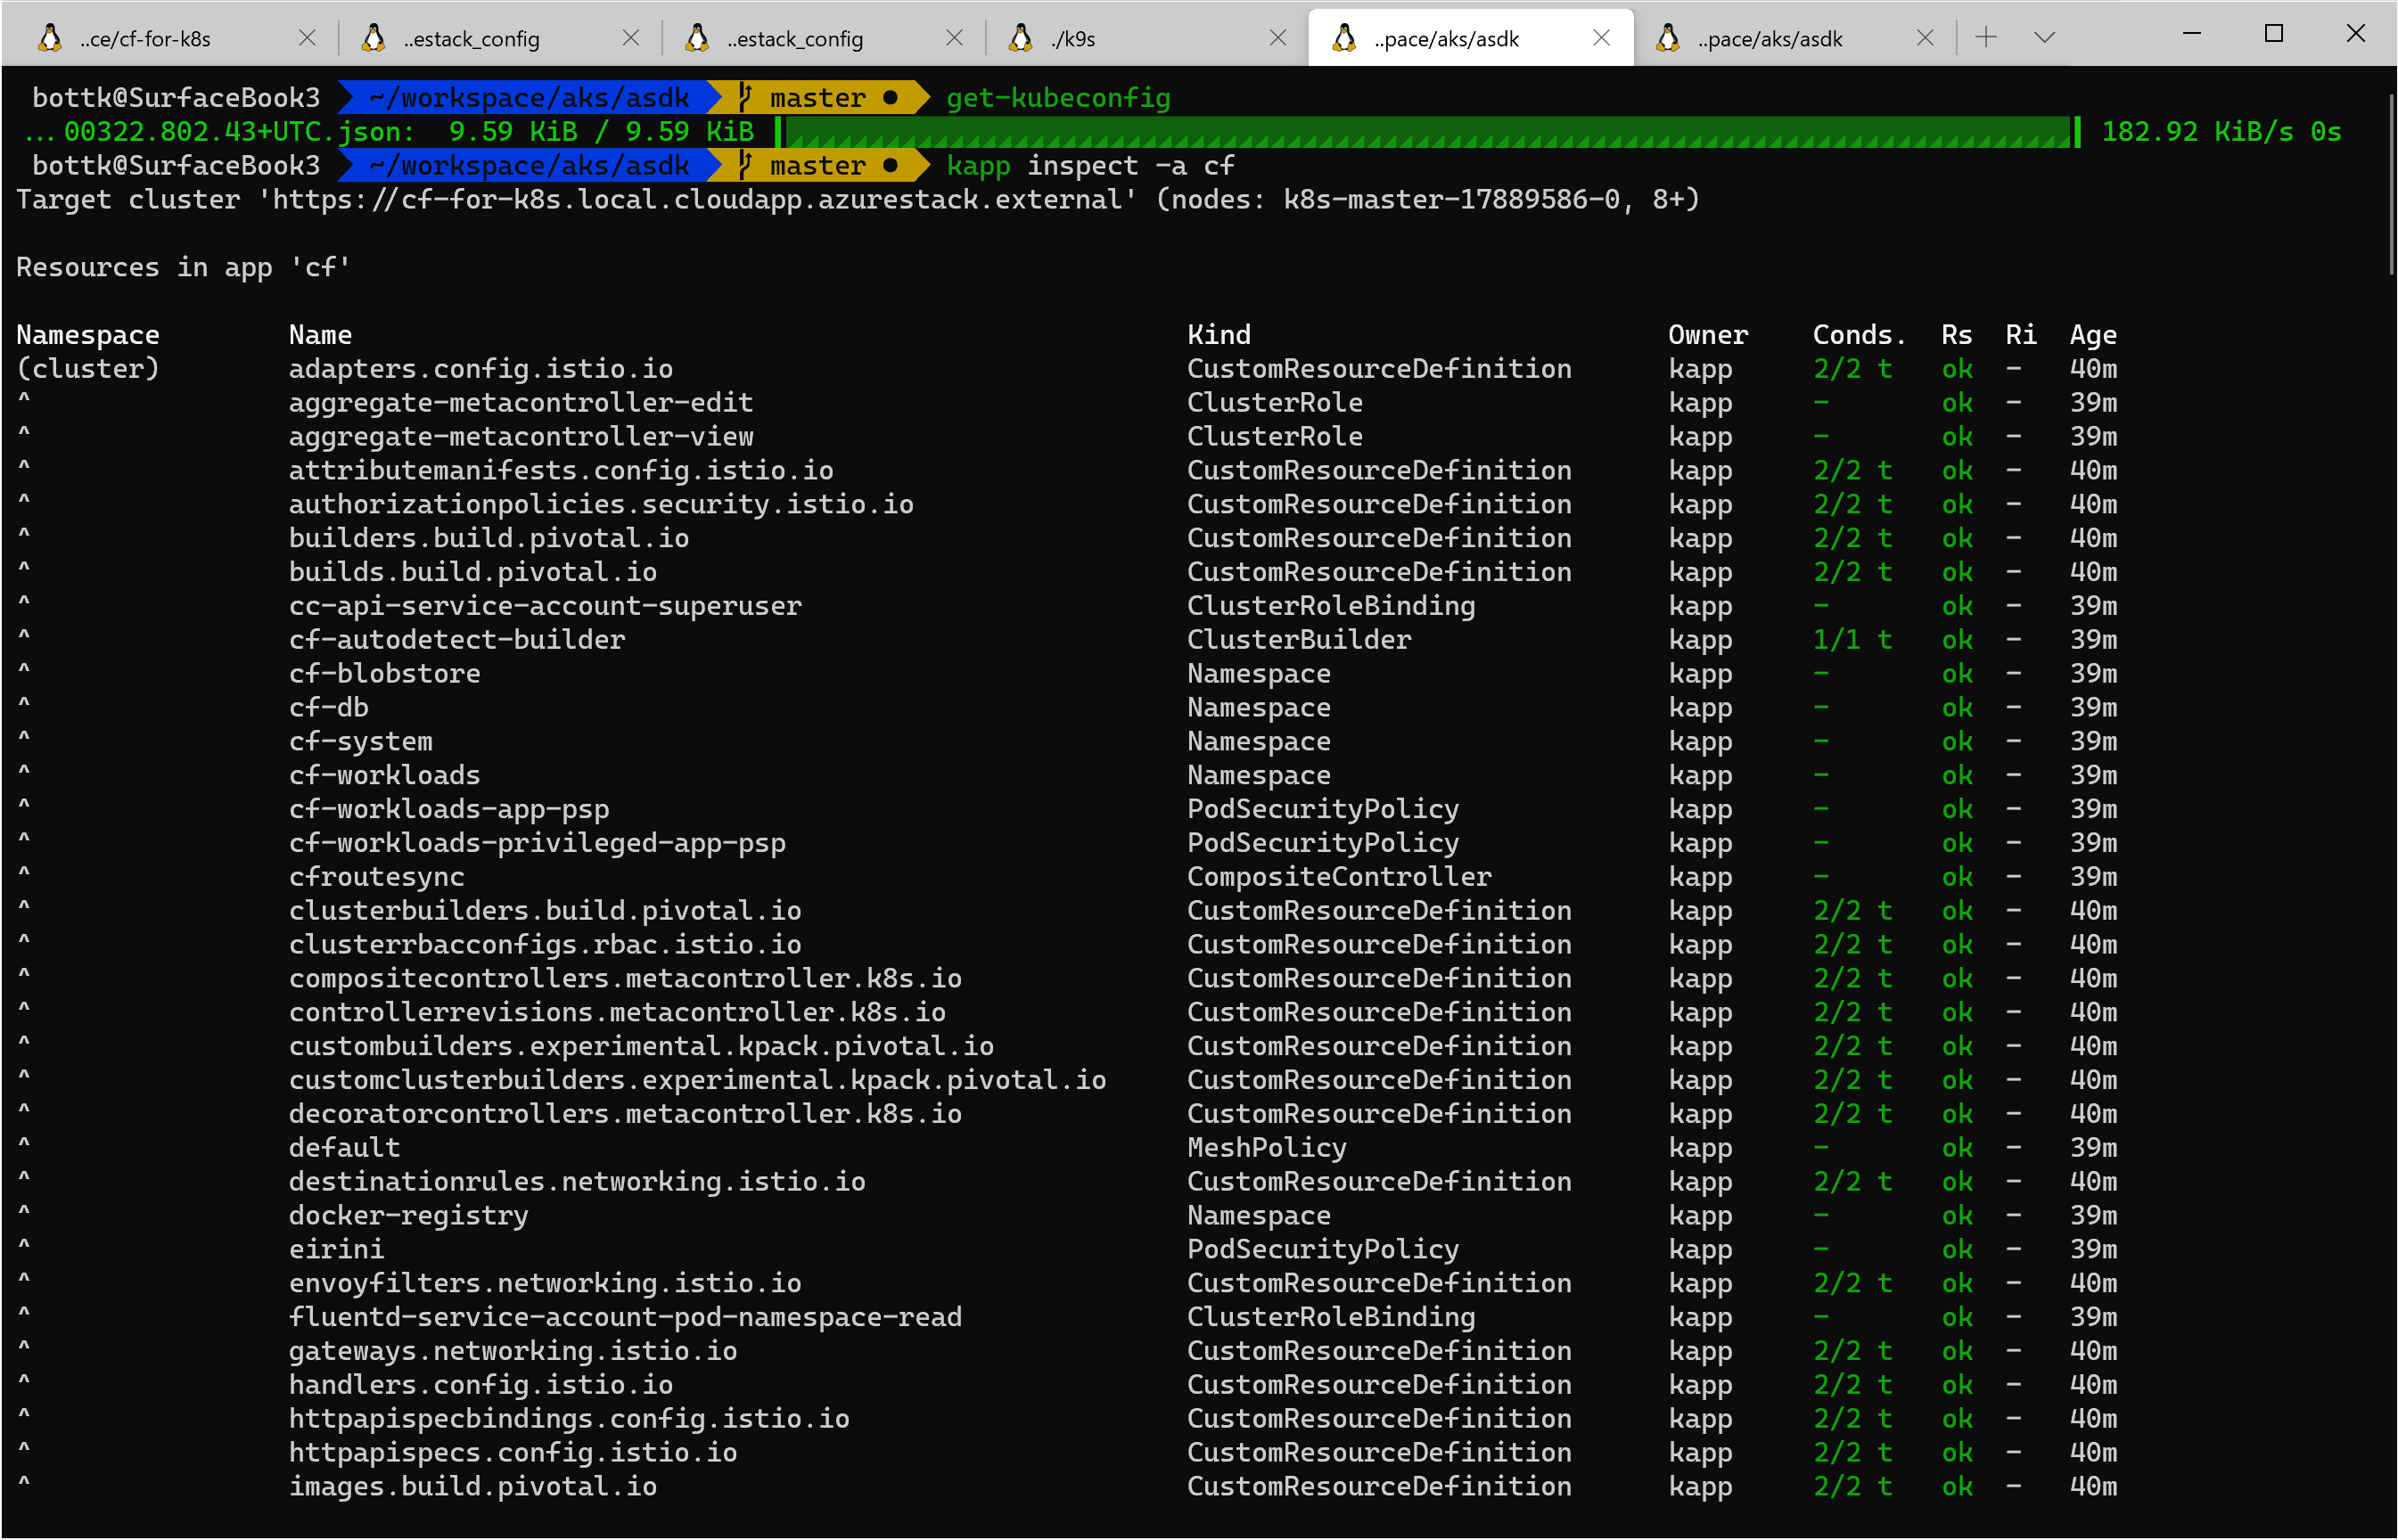
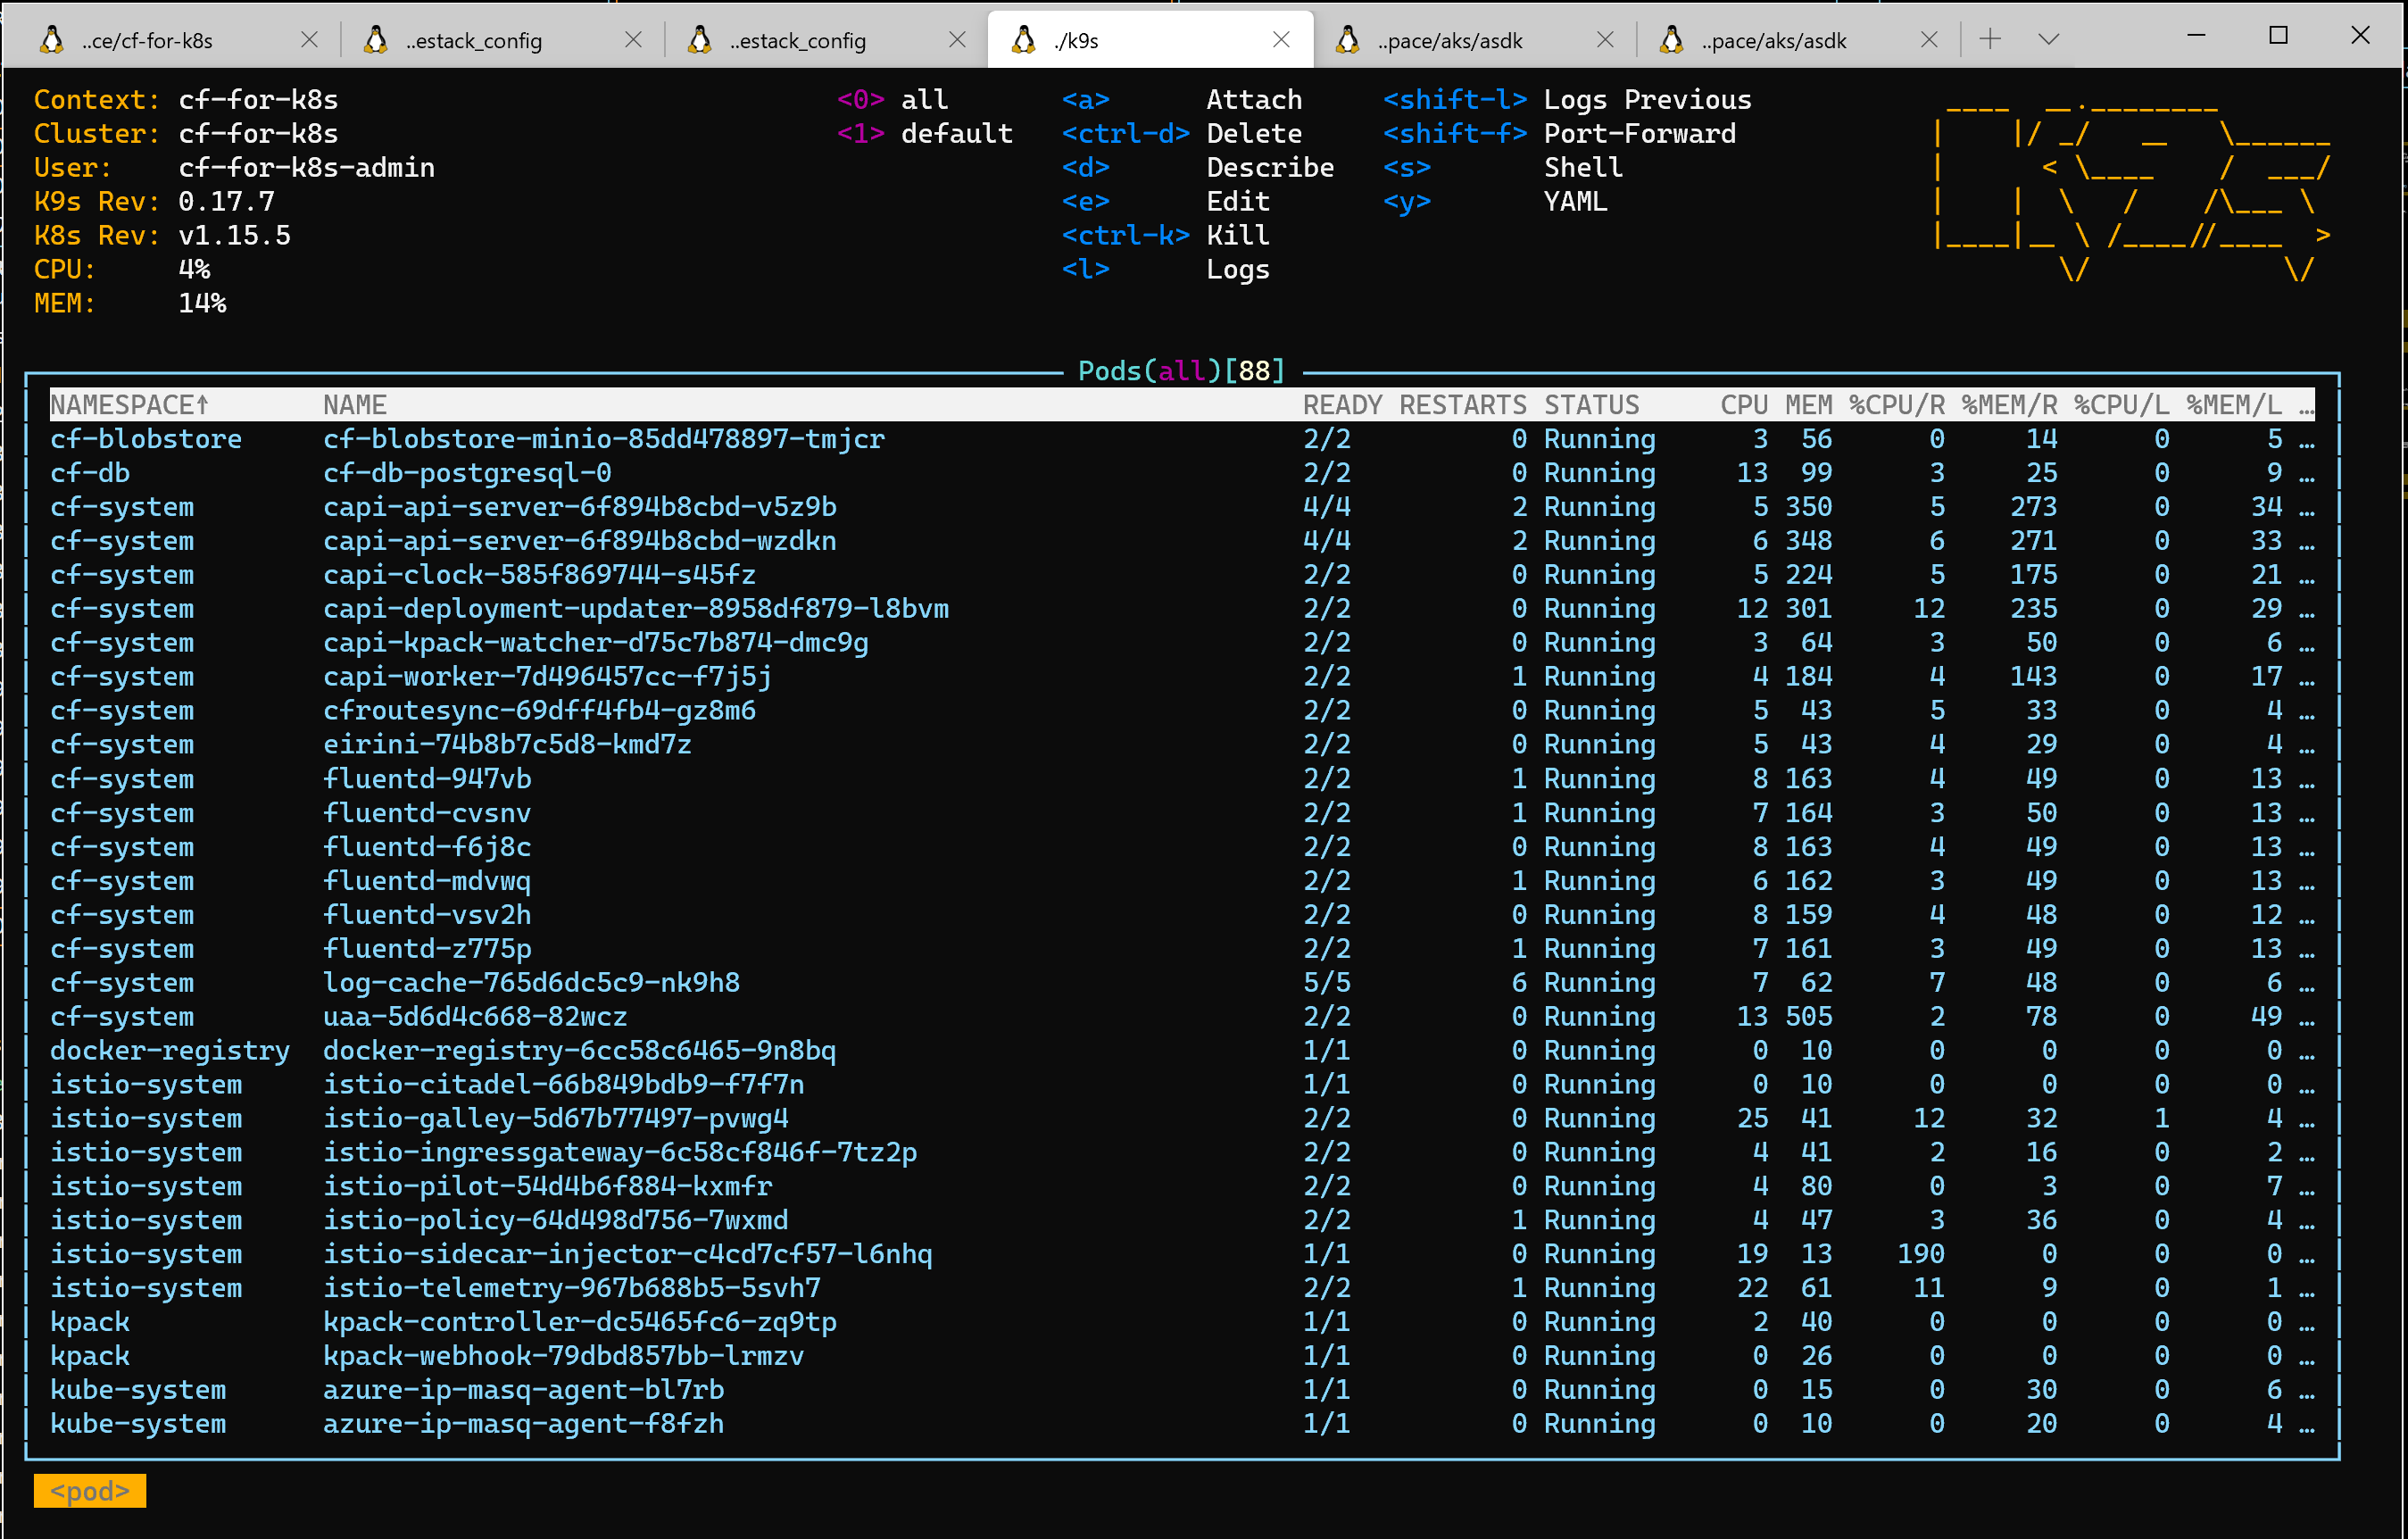
in short, oince all pods in namespace cf-system are running, the system should be ready ( be aware, as there are daily changes, a deployment might fail)

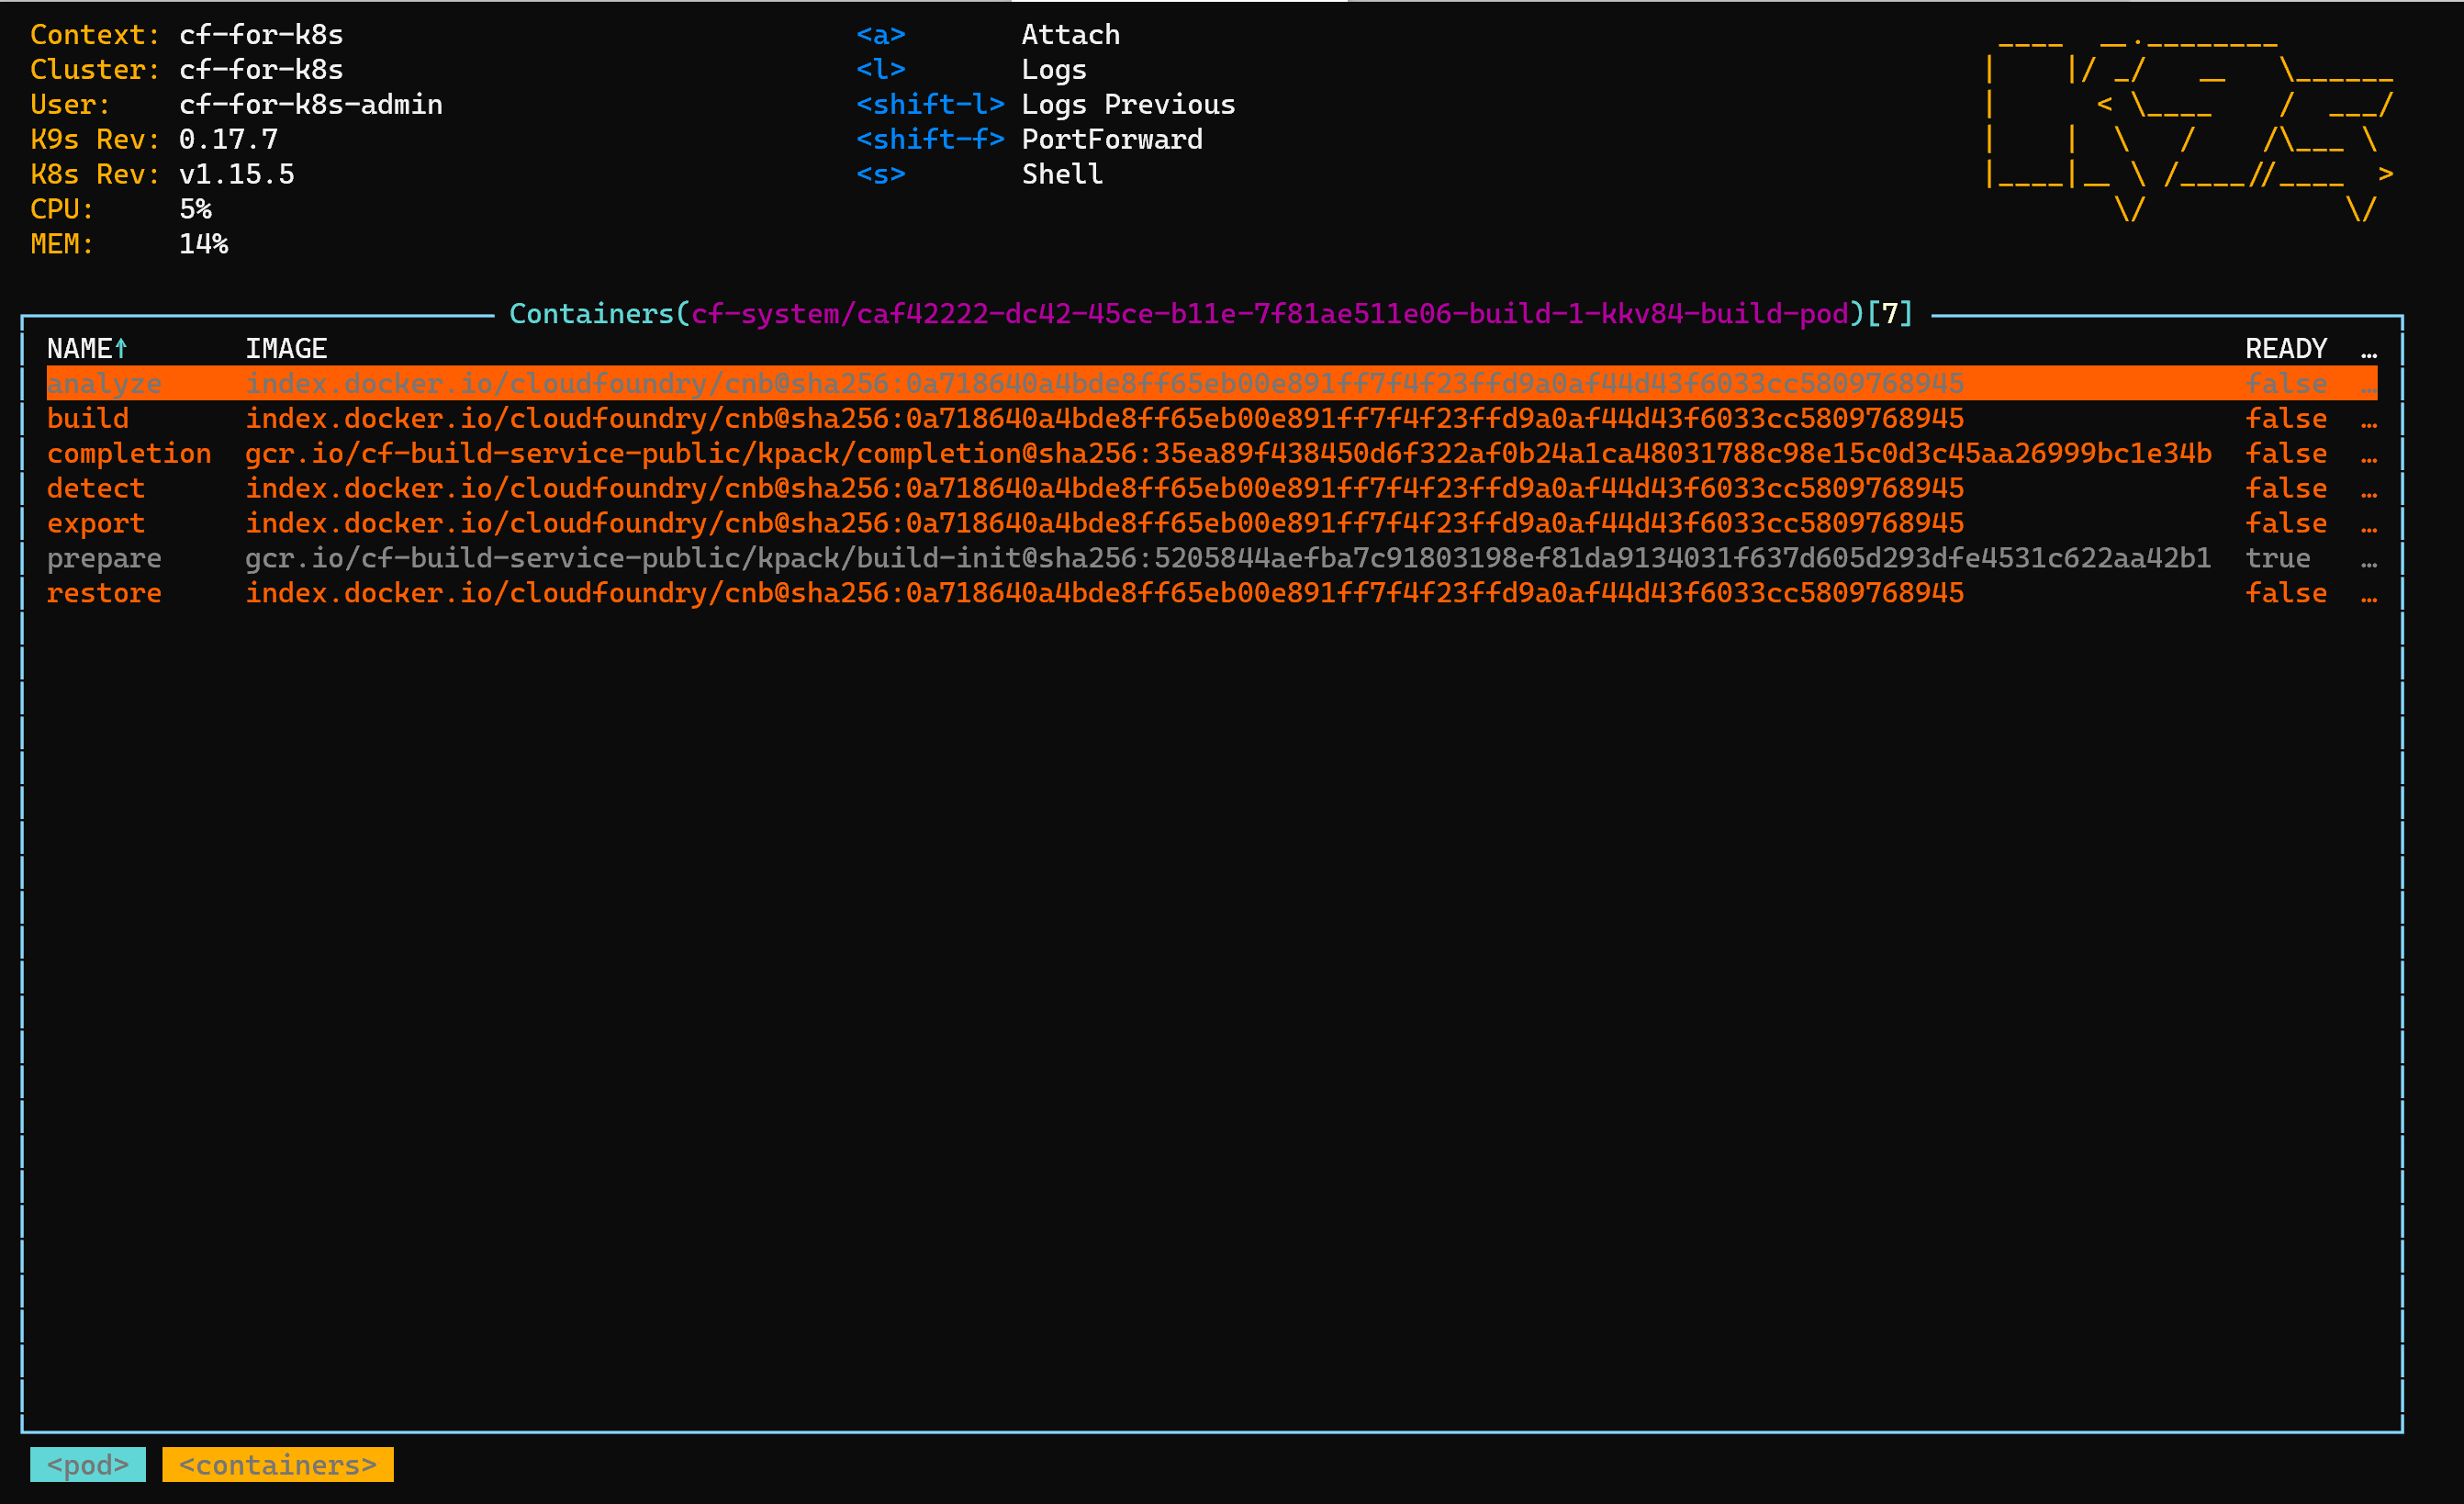
k9s can give you a great overview of the running pods

get-kubeconfig

connect to you cloudfoundry environment

cf-for-k8s depoloy´s a Service Type Loadbalancer per default. the Pipeline create a dns a record for the cf domain you specified for the pipeline.

the admin´s password is autogenerated and stored in the cf-yalues.yml that get stored on your s3 location. in my (direnv) environment, i receive the firl / the credentials with
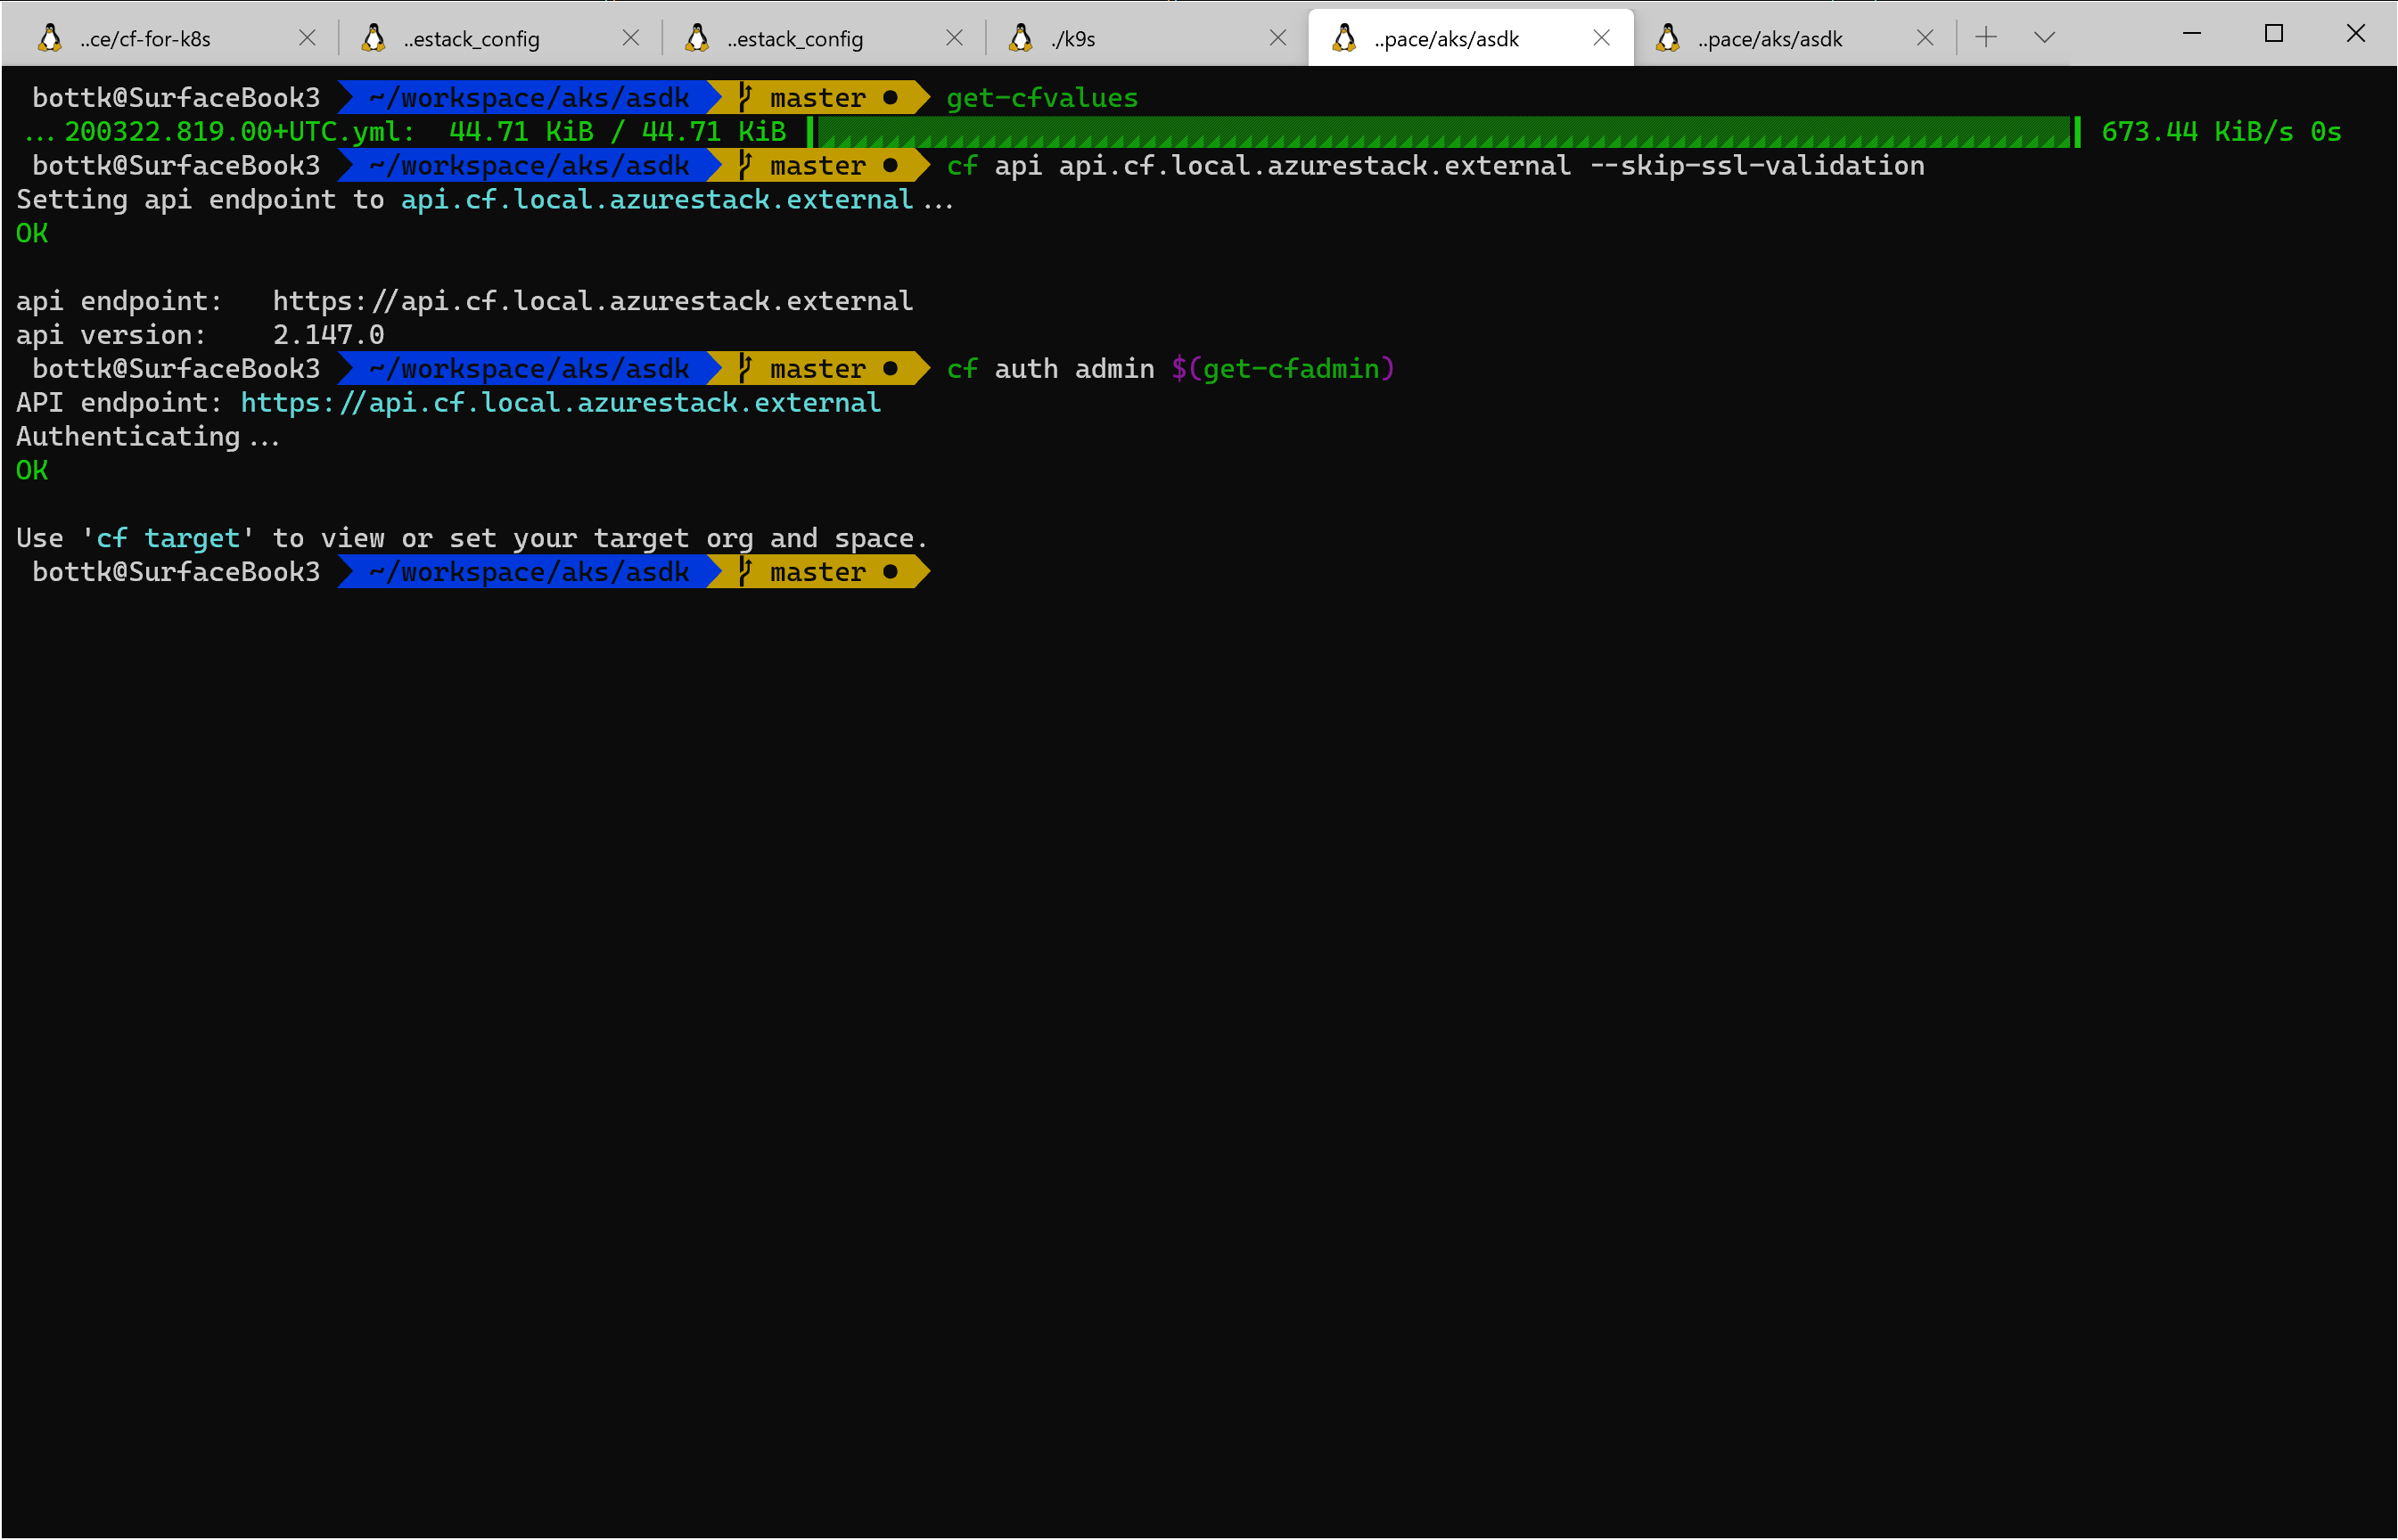
get-cfvalues
get-cfadmin

connecting to cf api and logging in

get-cfvalues
cf api api.cf.local.azurestack.external --skip-ssl-validation
cf auth admin $(get-cfadmin)
cf_auth

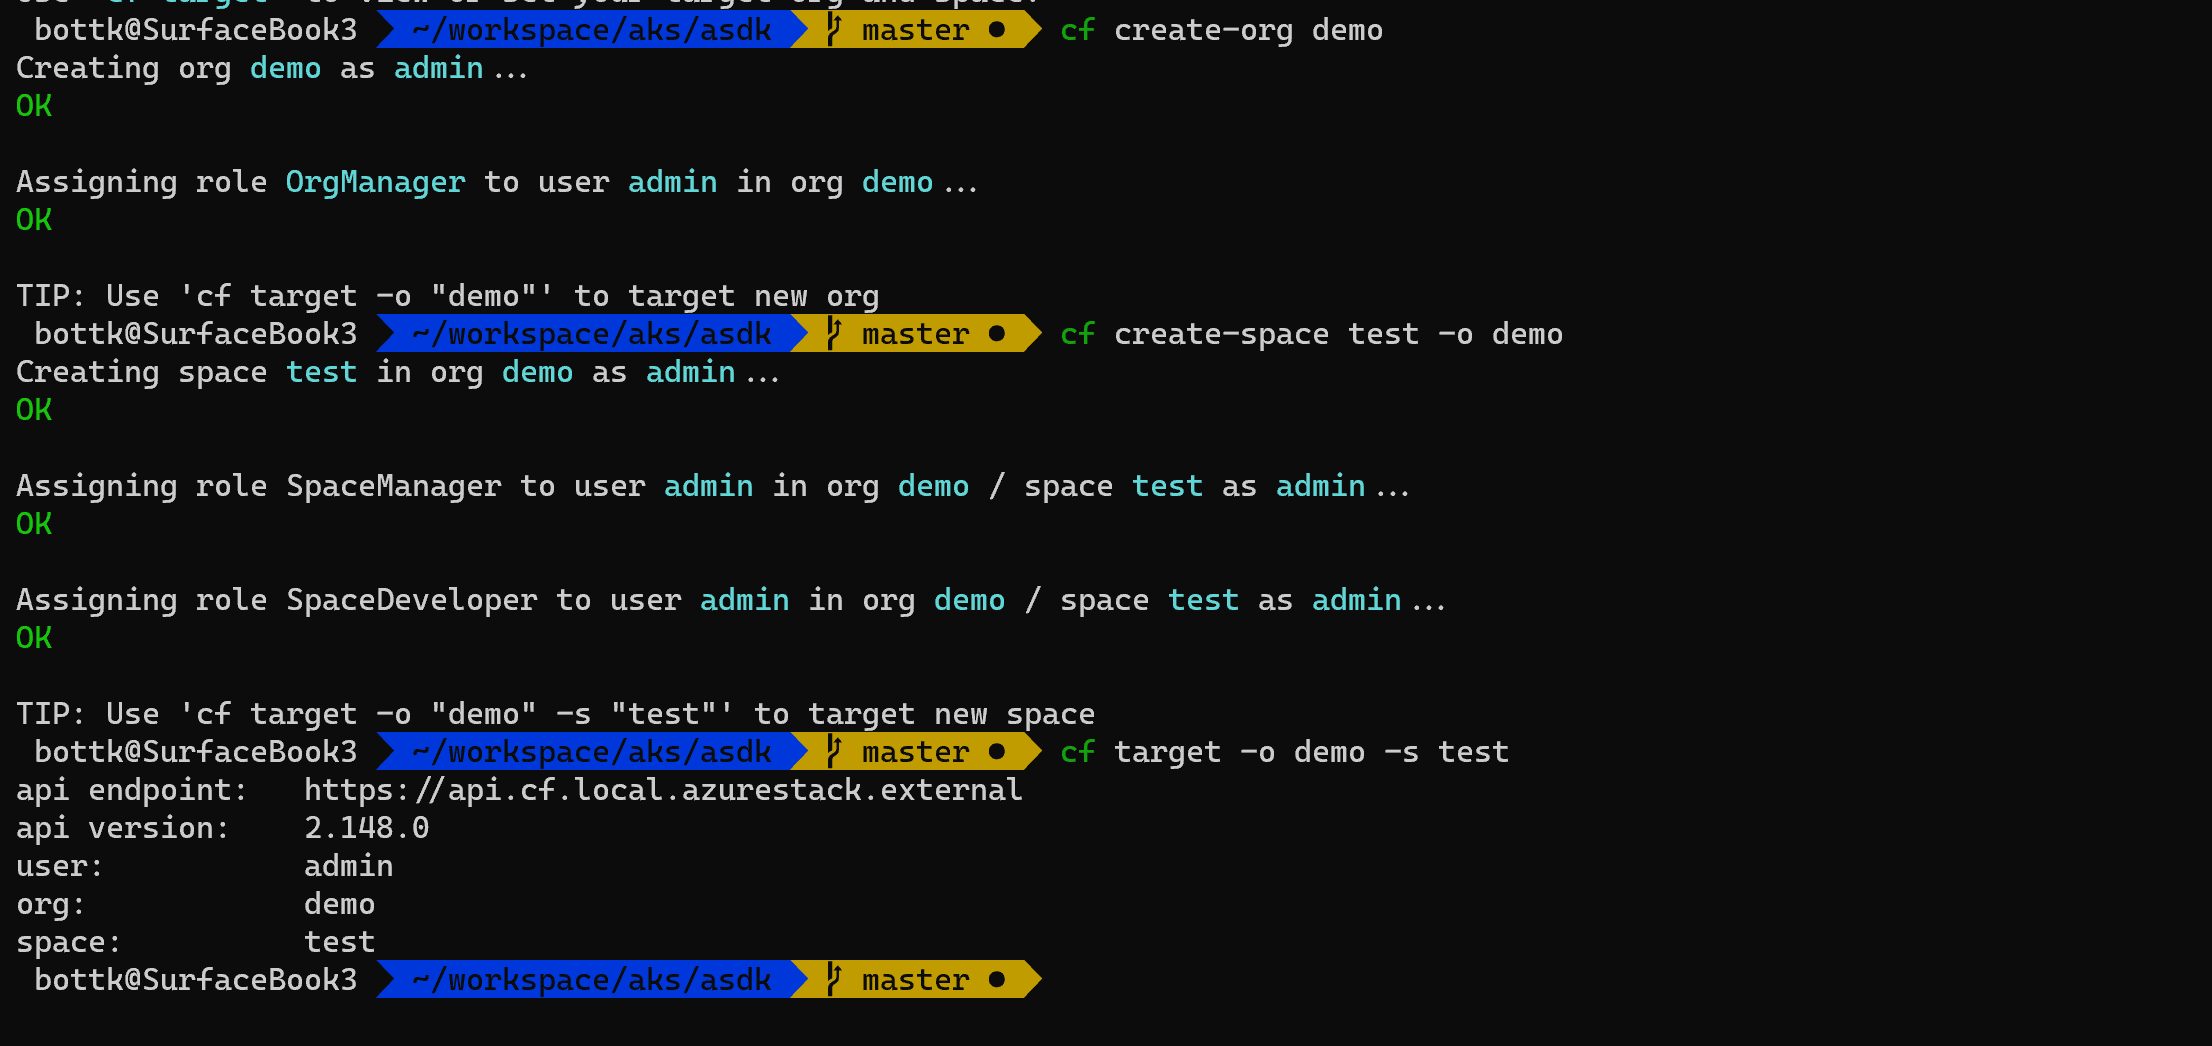
there are no orgs and spaces defined per default, so we are going to create:

cf create-org demo
cf create-space test -o demo
cf target -o demo -s test
cf-create-org

push a docker container

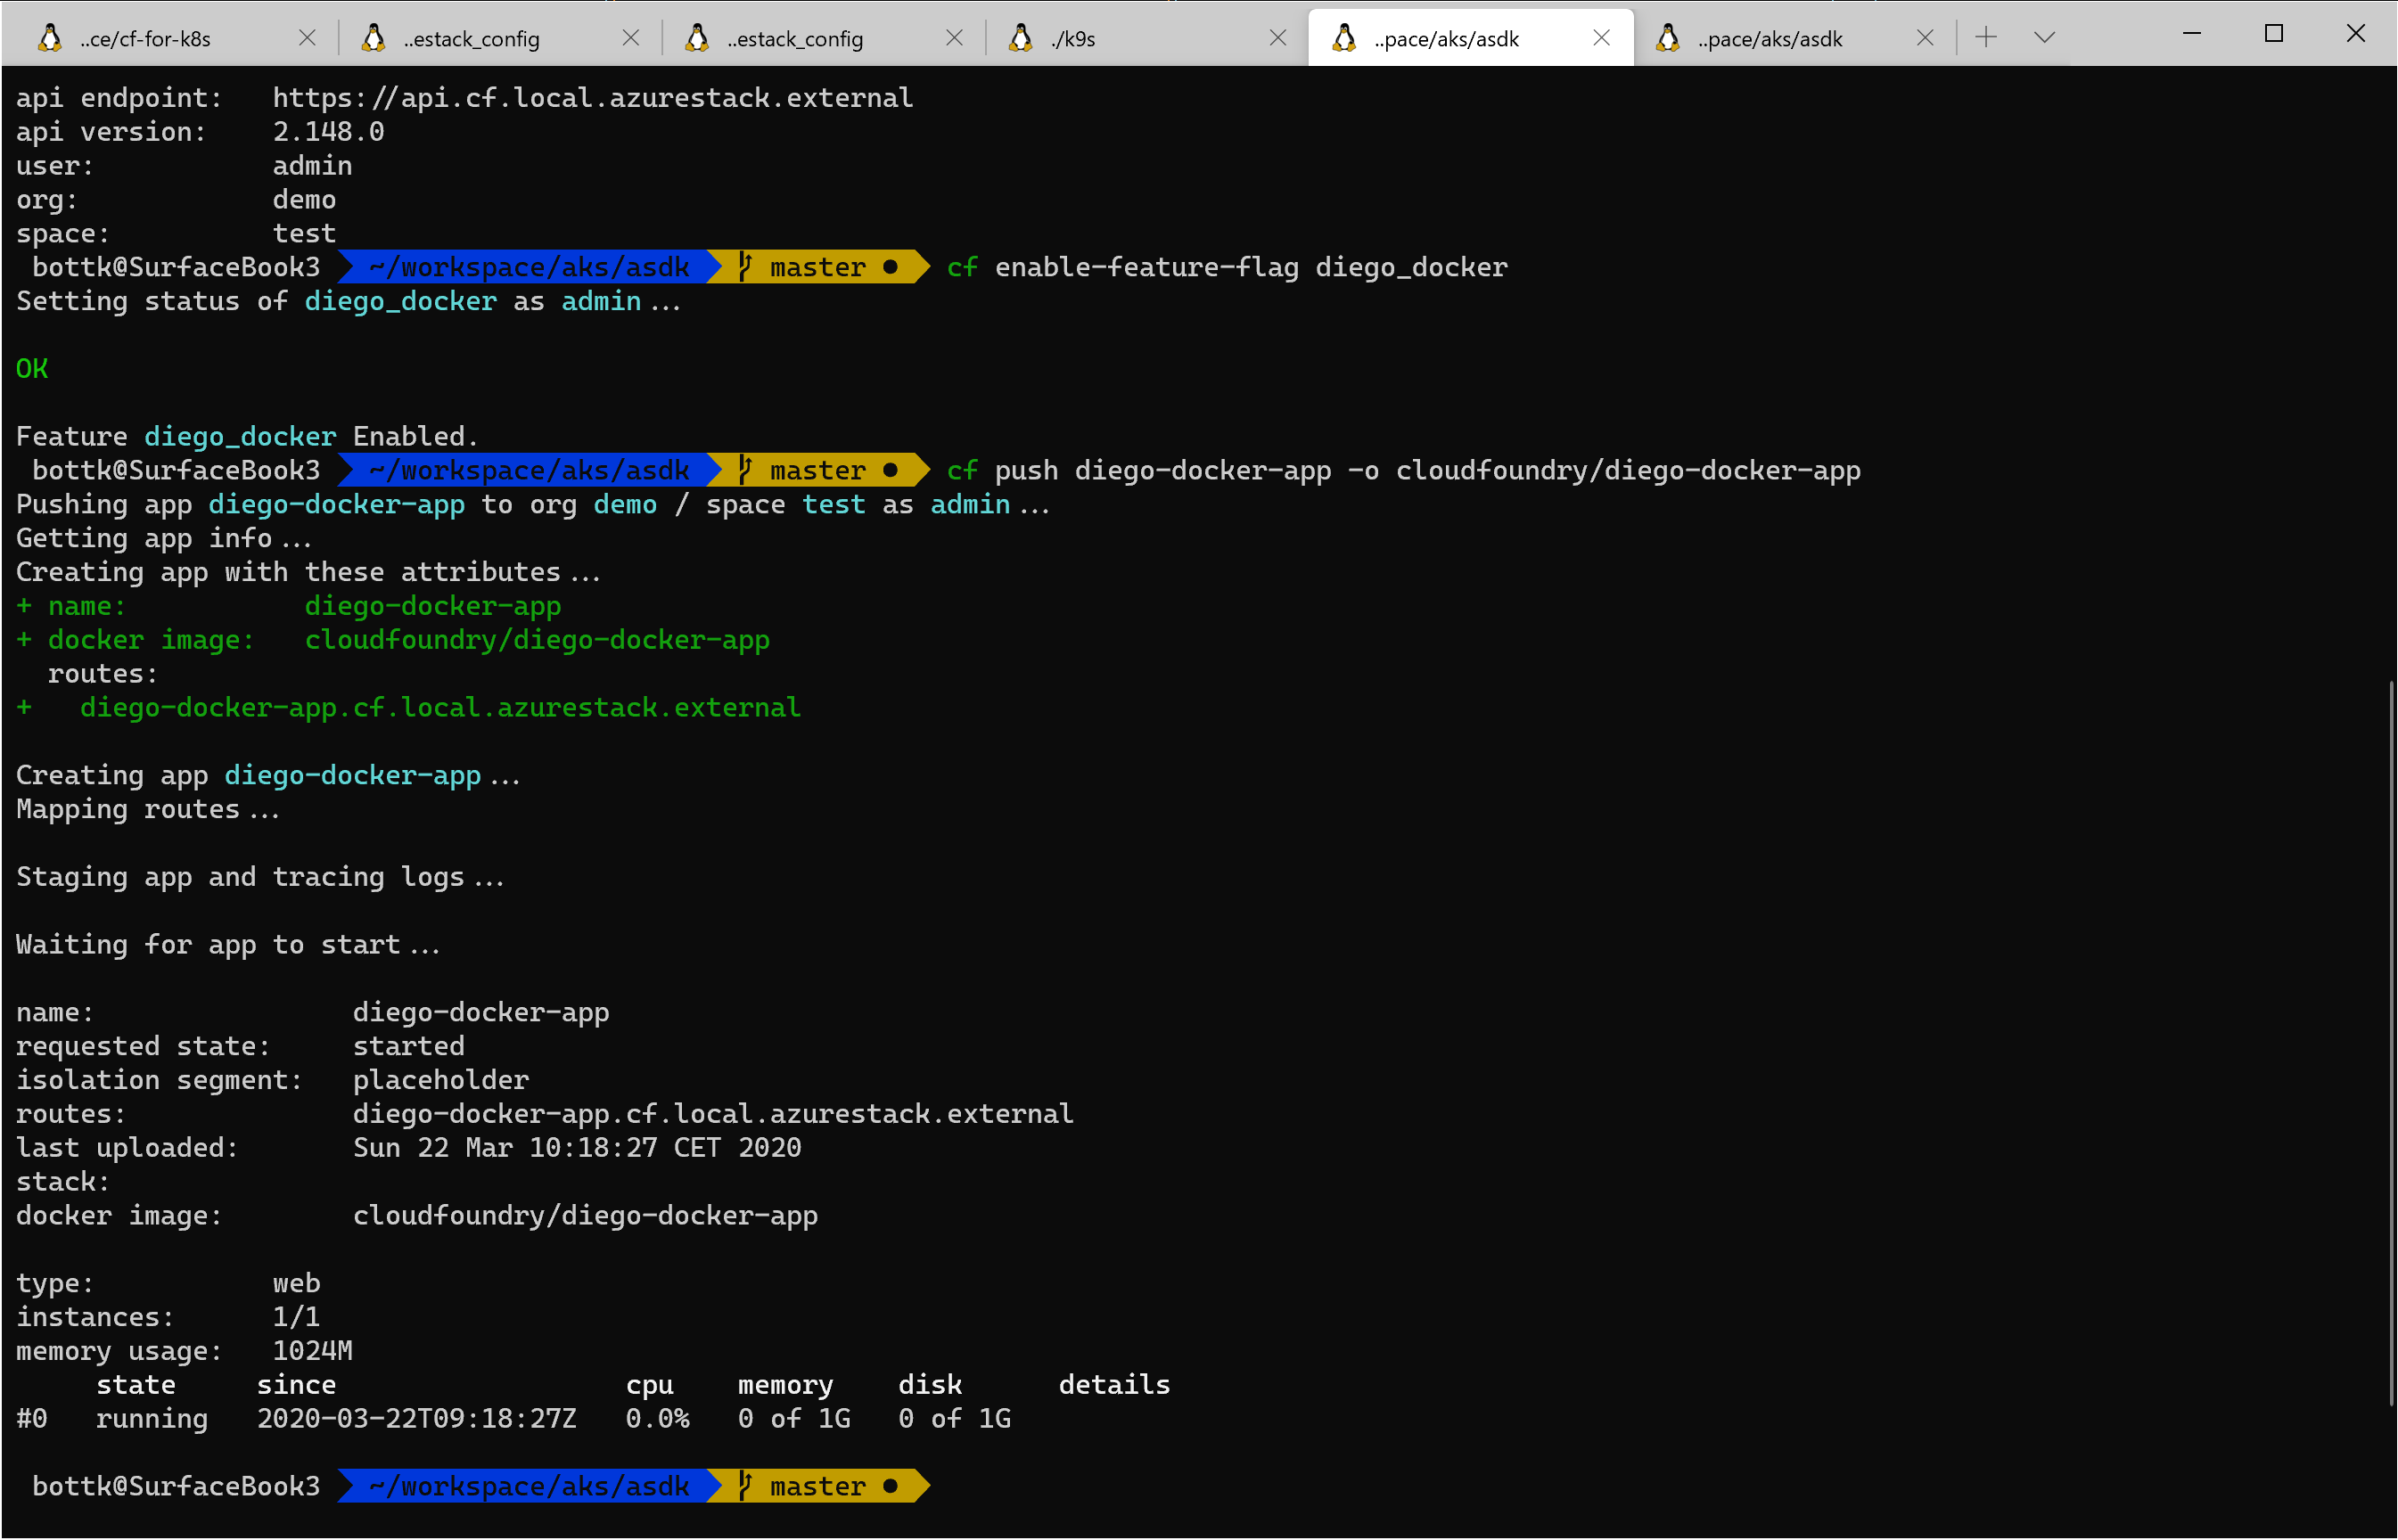
to run docker containers in cloudfoundry, you also have to

cf enable-feature-flag diego_docker

now it is time deploy our first docker container to cf-for-k8s

push the diego-docker-app from the cloudfoundry project on dockerhub

cf push diego-docker-app -o cloudfoundry/diego-docker-app
cf-diego-docker

we can now browse the endpoint og the demo app http://diego-docker-app.cf.local.azurestack.external/env
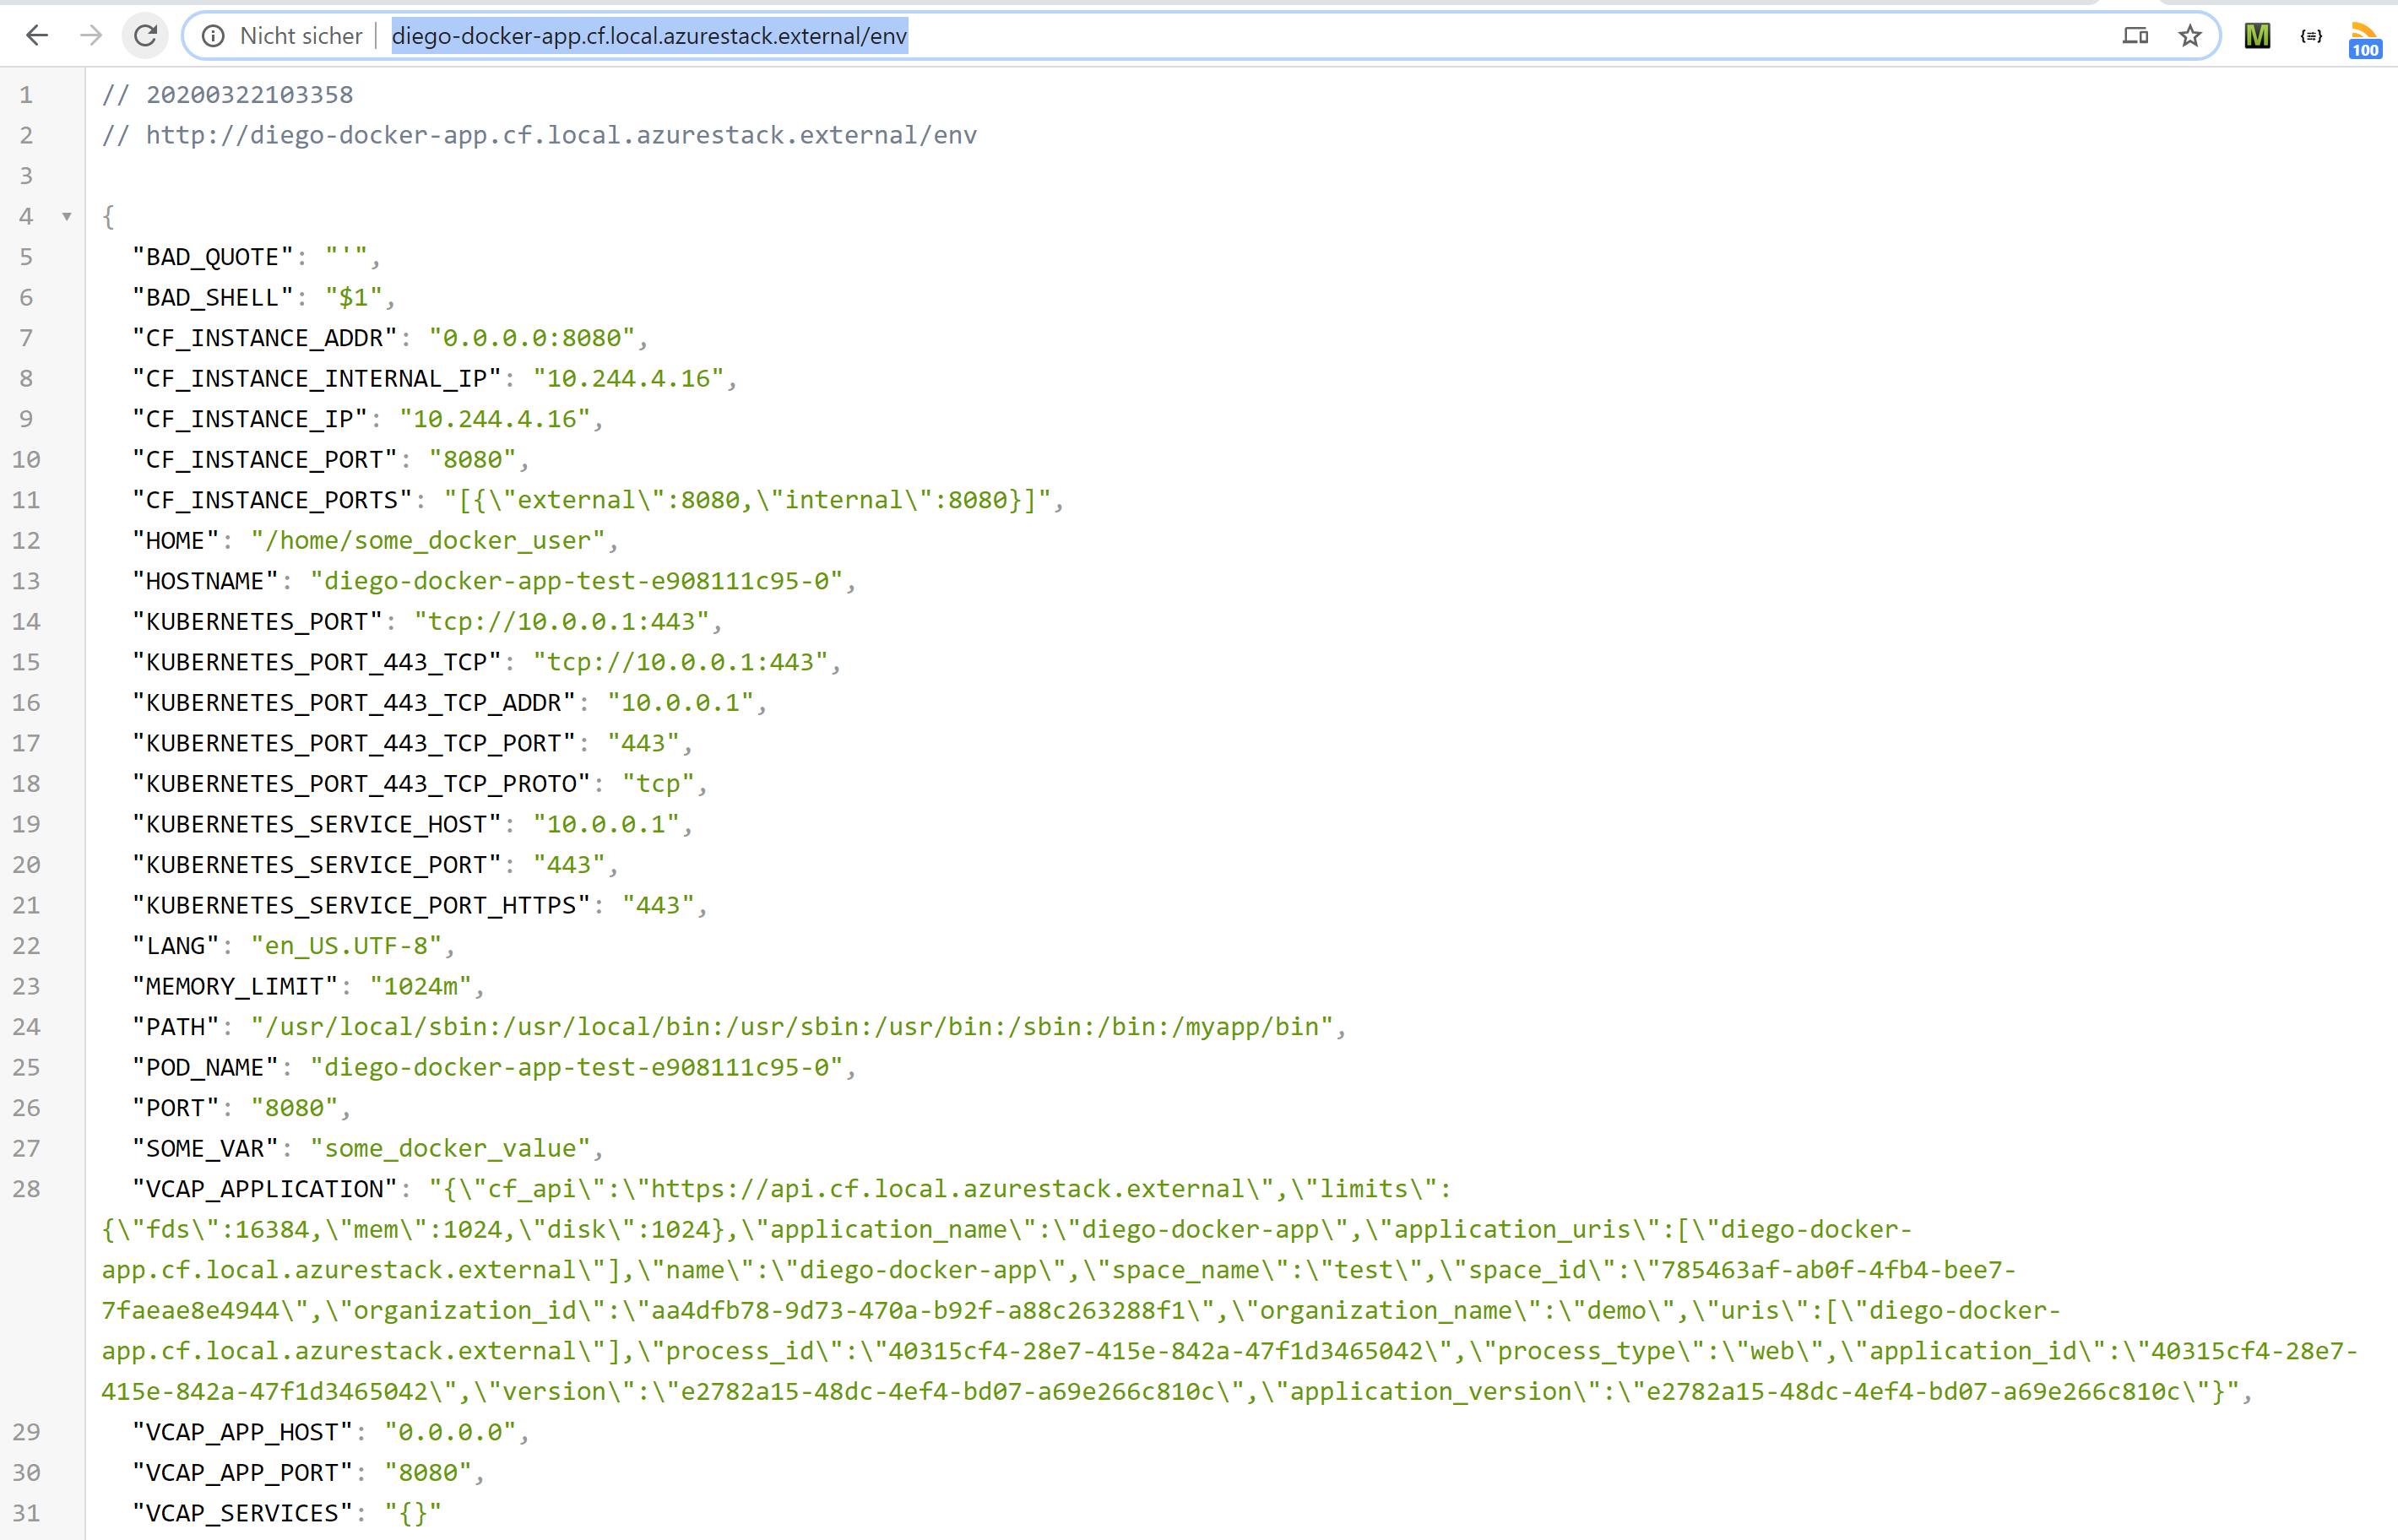
cf-browser

or use curl:

curl http://diego-docker-app.cf.local.azurestack.external/env

pushing an app from source

cf-for-k8s utilizes cloudnative buildpacks using kpack In essence, a watcher it running in the kpack namespace to monitor new build request from cloudcontroller. a “build pod” will run the build process of detecting, analyzing building and exportin the image

once a new request is detected, the clusterbuilder will create an image an ship it to the (gcr) registry. from there

cf-build-pod

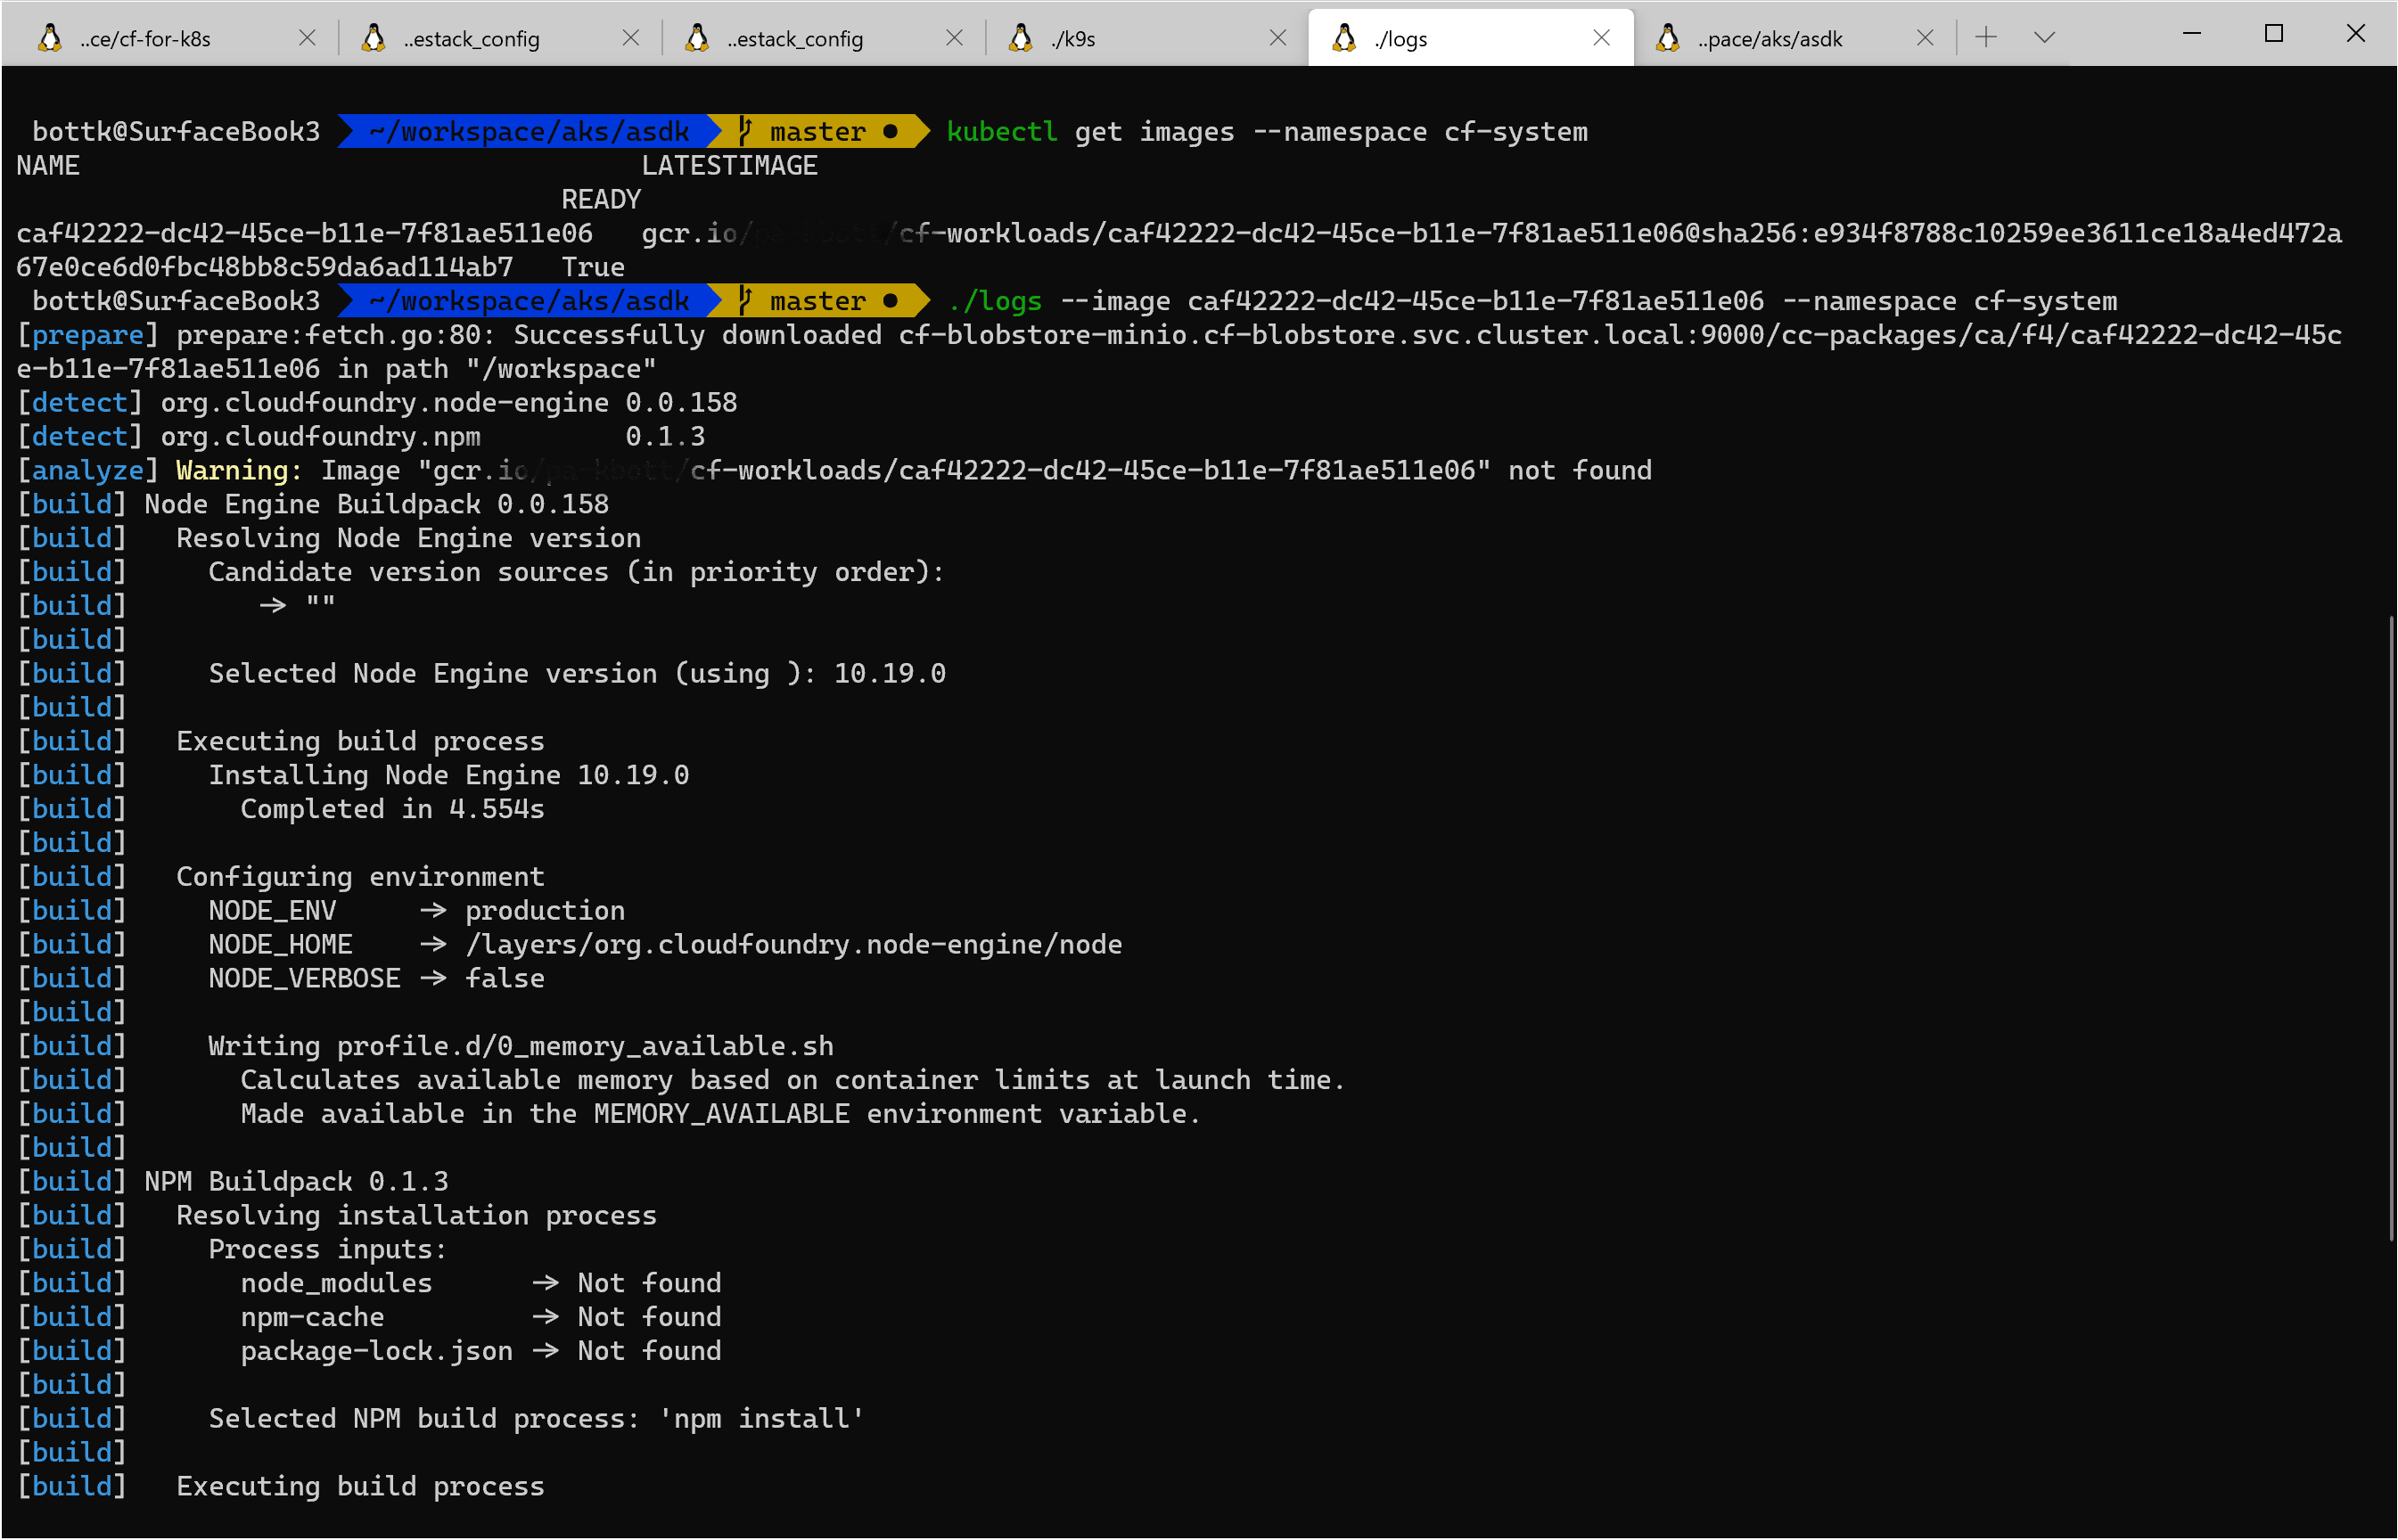
you can always view and monitor the image builder process by viewing the image and use the log_tail utility to view the builder logs:

kubectl get images --namespace cf-system
logs --image caf42222-dc42-45ce-b11e-7f81ae511e06 --namespace cf-system
kubectl-image-log
fly set-hybrid -> automation for azure and azurestack chapter 3

Use Concourse CI to automate Azure and AzureStack - Chapter 3 - working with Scripts, Tasks and Anchors

This Chapter will we will create out first Task that let us

  • use Anchors to streamline pipelines
  • create some tasks
  • write a short script in a second Pipeline

Tasks and Anchors

First of all, we copy last weeks 03-azcli-pipeline.yml into 04-azcli-pipeline.yml

The first new task we are going to create should list all vm´s in a given resource group. Therefore, copy the basic-task.yml in your tasks folder to get-vms-rg.yml We will use the same Parameter set to initialize Azure/AzureStack, but this time we also need to add a parameter for the resource group.

edit the parameter section in the taskfile and add

  RESOURCE_GROUP:

right under AZURE_CA_PATH.

In the run Part, right under az account set –subscription ${AZURE_SUBSCRIPTION_ID}, add the following code:

 az vm list --resource-group ${RESOURCE_GROUP} --output table

you new Task File should look like this now:

---
# this a task to get vm´s of a certain resource croup
platform: linux

params:
  PROFILE:
  CLOUD:
  # AzureStack AzureCloud AzureChinaCloud AzureUSGovernment AzureGermanCloud
  CA_CERT:
  ENDPOINT_RESOURCE_MANAGER:
  VAULT_DNS:
  SUFFIX_STORAGE_ENDPOINT:
  AZURE_TENANT_ID:
  AZURE_CLIENT_ID:
  AZURE_CLIENT_SECRET:
  AZURE_SUBSCRIPTION_ID:
  AZURE_CLI_CA_PATH:
  RESOURCE_GROUP:

run:
  path: bash
  args:
  - "-c"
  - |
    set -eux
    case ${CLOUD} in

    AzureStackUser)
        if [[ -z "${CA_CERT}" ]]
        then
            echo "no Custom root ca cert provided"
        else
            echo "${CA_CERT}" >> ${AZURE_CLI_CA_PATH}
        fi
        az cloud register -n ${CLOUD} \
        --endpoint-resource-manager ${ENDPOINT_RESOURCE_MANAGER} \
        --suffix-storage-endpoint ${SUFFIX_STORAGE_ENDPOINT} \
        --suffix-keyvault-dns ${VAULT_DNS} \
        --profile ${PROFILE}
        ;;

    *)
        echo "Nothing to do here"
        ;;
    esac

    az cloud set -n ${CLOUD}
    az cloud list --output table
    set +x
    az login --service-principal \
     -u ${AZURE_CLIENT_ID} \
     -p ${AZURE_CLIENT_SECRET} \
     --tenant ${AZURE_TENANT_ID}
     # --allow-no-subscriptions
    set -eux
    az account set --subscription ${AZURE_SUBSCRIPTION_ID}
    az vm list --resource-group ${RESOURCE_GROUP} --output table

Commit your changes

git add tasks/get-vms-rg.yml
git commit -a -m "added get-vms-rg"
git push

adding the task to our pipeline and create anchors

The call of the task from the pipeline will essentially look like our basic task, just we have to add a parameter and change the name of the taskfile. as this will create a lot of overhead in the Parameters, we create a YAML anchor for our “Standard” Parameters of the task.

At the beginning of our 04-azcli-pipeline.yml, create the following Anchor: (it should name your environment, in my case, the asdk, so azurestack_asdk_env)

azurestack_asdk_env: &azurestack_asdk_env
  CLOUD: ((asdk.cloud))
  CA_CERT: ((asdk.ca_cert))
  PROFILE: ((asdk.profile))
  ENDPOINT_RESOURCE_MANAGER: ((asdk.endpoint_resource_manager))
  VAULT_DNS:  ((asdk.vault_dns))
  SUFFIX_STORAGE_ENDPOINT: ((asdk.suffix_storage_endpoint))
  AZURE_TENANT_ID: ((asdk.tenant_id))
  AZURE_CLIENT_ID: ((asdk.client_id))
  AZURE_CLIENT_SECRET: ((asdk.client_secret))
  AZURE_SUBSCRIPTION_ID: ((asdk.subscription_id))
  AZURE_CLI_CA_PATH: "/usr/local/lib/python3.6/site-packages/certifi/cacert.pem"

in our existing Task fo AzureSTack, we replace the parameters in the params section with

params:
 <<: *azurestack_asdk_env

now mark and copy the the basic task of your pipeline file.

insert it as a new task. change the task name to get-vms-rg, and change the path of the task file to get-vms-rg.yml Add a Parameter for the Resource Group, in my case asdk.resource group the new task should look like this: (note, i am using the parameters with prefix asdk. in this example as this is my set of specific parameters for my asdk)

- name: get-vms-rg
  plan:
  - get: azcli-concourse
    trigger: true
  - get: az-cli-image
    trigger: true
  - task: get-vms-rg
    image: az-cli-image
    file: azcli-concourse/tasks/get-vms-rg.yml
    params:
      <<: *azurestack_asdk_env
      RESOURCE_GROUP: ((asdk.resource_group))

The Anchor will instruct fly to insert the Section from the Anchor definition edit the Parameter file to include the resource_group parameters:

asdk:
  tenant_id: "your tenant id"
  client_id: "your client id"
  client_secret: "your very secret secret"
  subscription_id: "your subscription id"
  endpoint_resource_manager: "https://management.local.azurestack.external"
  vault_dns: ".vault.local.azurestack.external"
  suffix_storage_endpoint: "local.azurestack.external"
  cloud: AzureStackUser
  profile: "2019-03-01-hybrid"
  azure_cli_ca_path: "/usr/local/lib/python3.6/site-packages/certifi/cacert.pem"
  ca_cert: |
    -----BEGIN CERTIFICATE-----
    <<you root ca>>
    -----END CERTIFICATE-----
  resource_group: "you resource group"

save the files

Load the updated pipeline

we load Version 4 of our Pipeline now with

fly -t docker set-pipeline -p azurestack  -c 04-azcli-pipeline.yml -l parameters.yml 
get-vms-rg

You may now create / apply anchors and tasks for your different Azure/AzureStack Environments

Do I need to write a task file each and every time ?

No, you do not have. Originally, the run Part of the task was Part of the Pipeline as well. And for testing Purposes, i would even recommend to create a short test-pipeline for you task including the run statement. That would allow you for easier testing and scripting WITHOUT applying changes to your master pipeline.

Example

create a pipeline file called script-test.yml .

Put in your Anchor(s). We do not need resource definitions, as we even call the image to use from within the Task. We to not trigger the job, as we want to run it manually.

This is a basic task i user for script testing. Modify the run section to your needs.

---
# script developement pipeline
azurestack_asdk_env: &azurestack_asdk_env
  CLOUD: ((asdk.cloud))
  CA_CERT: ((asdk.ca_cert))
  PROFILE: ((asdk.profile))
  ENDPOINT_RESOURCE_MANAGER: ((asdk.endpoint_resource_manager))
  VAULT_DNS:  ((asdk.vault_dns))
  SUFFIX_STORAGE_ENDPOINT: ((asdk.suffix_storage_endpoint))
  AZURE_TENANT_ID: ((asdk.tenant_id))
  AZURE_CLIENT_ID: ((asdk.client_id))
  AZURE_CLIENT_SECRET: ((asdk.client_secret))
  AZURE_SUBSCRIPTION_ID: ((asdk.subscription_id))
  AZURE_CLI_CA_PATH: "/usr/local/lib/python3.6/site-packages/certifi/cacert.pem"

jobs:

- name: script-test
  plan:
  - task: script-test
    config:
      platform: linux
      params:
        <<: *azurestack_asdk_env
        RESOURCE_GROUP: ((asdk.resource_group))
      image_resource:
        type: docker-image
        source: {repository: microsoft/azure-cli}
      outputs:
      - name: result
      run:
          path: bash
          args:
          - "-c"
          - |
            set -eux
            case ${CLOUD} in

            AzureStackUser)
                if [[ -z "${CA_CERT}" ]]
                then
                    echo "no Custom root ca cert provided"
                else
                    echo "${CA_CERT}" >> ${AZURE_CLI_CA_PATH}
                fi
                az cloud register -n ${CLOUD} \
                --endpoint-resource-manager ${ENDPOINT_RESOURCE_MANAGER} \
                --suffix-storage-endpoint ${SUFFIX_STORAGE_ENDPOINT} \
                --suffix-keyvault-dns ${VAULT_DNS} \
                --profile ${PROFILE}
                ;;

            *)
                echo "Nothing to do here"
                ;;
            esac
            az cloud set -n ${CLOUD}
            az cloud list --output table
            set +x
            az login --service-principal \
              -u ${AZURE_CLIENT_ID} \
              -p ${AZURE_CLIENT_SECRET} \
              --tenant ${AZURE_TENANT_ID}
              # --allow-no-subscriptions
            set -eux
            RESULT=$(az vm list --output json)
            echo $RESULT
            echo $RESULT > ./result/result.json

Now start a new pipeline called script-test with the new Pipeline file

fly -t docker sp -p script-test -c .\script-test.yml -l .\parameters.yml

The new Pipeline should be in a paused mode. Press the Play Button to start

paused-script-pipe

when you click in the script-test pipeline, you will see only one job, no dependencies, no triggers. Trigger a build by clicking the plus button

script-test-trigger

This should run your script. You can see from the pipeline file that inline Scripting makes you pipeline quite large.
My preferred method is to put the scripts in task files and load them from GitHub.
You even can have versioned scripts zipped on external resources.
That will also allow to trigger a new build on script change.

We will dive into that in one of the next Chapters.

For now, familiarize yourself with Anchors, internal and external tasks, and even have a look at the fly cli for method´s to pass tasks from directories

fly set-hybrid -> automation for azure and azurestack chapter 2

Use Concourse CI to automate Azure and AzureStack - Chapter 2 - Configuring Cloud Endpoints

This Chapter will we will create out first Task that let us

  • make the git resource secure
  • connect to the Cloud (Azure/AzureStack )
  • template a task
  • create Jobs

Going Secure from now

Before we edit our parameter file, it is time to go secure from now.

Note: In this example we put credentials in parameter files. we secure them with private Github repositories. Concourse, however, allows to integrate with Vaults like Hashi Vault or Credhub. We will do that once we move from the docker based setup to a Cloud Based setup.

  1. create a ssh key for your Pipeline Repository
  2. Set the repository to private
  3. add the ssh key to Deploy Keys
  4. set the ssh key for the github resource

to create an ssh key for your Pipeline Repository, run

ssh-keygen -t rsa -b 4096 -C mypipeline@github.com -f ~/.ssh/azcli_demo_key -N ""

Set the repository to private Browse to your Github Repository. Go to the settings in the upper right:

git settings

scroll down to the “Danger Zone” and click on make Private:

danger zone

Add the Deploy key Go to the Deploy key Section on the right

deploy key

Click on Add Key to add you ssh public key created in step 1. Insert you Key Check allow Write access and click Add Key

We will change the Pipeline Git Resource later accordingly.

commit the current files

Before we edit the pipeline, it is time to commit you work.

use vscode or git cli to do so:

git add tasks/basic-task.yml
git commit -a -m "added basic-task"
git push

adding the ssh key to the Pipeline

if you look at you pipeline in the Browser now, you will notify the Git resource changed to orange.

git orange

this is expected behavior, as it can no longe check the private git repository for changes. click on the orange resource to the the failure detail.

git error

Now, edit you Pipeline to include your ssh Private Key

change your git resource to

  • add private_key: ((azcli-concourse.private_key))
  • change uri: ((azcli-concourse-uri)) to uri: ((azcli-concourse.uri)) this will allow us to use a name.parameter map for ease of use
- name: azcli-concourse
  type: git
  icon: github-circle
  source:
    uri: ((azcli-concourse.uri))
    branch: master
    private_key: ((azcli-concourse.private_key))

Now, we edit you Parameter File

change your parameters file to:

azcli-concourse:
  uri: git@github.com:<<you username here>>/azcli-concourse
  private_key: |
    -----BEGIN OPENSSH PRIVATE KEY-----
    << your private key here >>
    -----END OPENSSH PRIVATE KEY-----
  • this will use ssh authentication for git
  • creates a variable map for azcli concourse that we can access with name.parameter from concourse

Now that we have edited the Pipeline and Parameters file to include the changes, we can update the Pipeline on Concourse using

fly -t docker set-pipeline -p azurestack  -c 01-azcli-pipeline.yml -l parameters.yml
secure_pipeline

creating a new Task

in the Previous chapter we use the test-task that i Provided in the github template. From now on, we are writing the Tasks on our own …

let us start with the “base” task, that basically will test if we can connect to the cloud (s). in this post i explained how to use azcli for AzureSTack with Docker. we will basically meme the same for our basic task From now on i recommend using Visual Studio Code for all edit´s You might want to install the Concourse Pipeline Extension

the basic task

create a new file ./tasks/basic-task.yml

ad the following lines to the file:

platform: linux

params.
  PROFILE:
  CLOUD:
  CA_CERT:
  ENDPOINT_RESOURCE_MANAGER:
  VAULT_DNS:
  SUFFIX_STORAGE_ENDPOINT:
  AZURE_TENANT_ID:
  AZURE_CLIENT_ID:
  AZURE_CLIENT_SECRET:
  AZURE_SUBSCRIPTION_ID:
  AZURE_CLI_CA_PATH:

the platform parameter identifies the platform stack ( worker type ) to run on.

The parameters section contains the (possible) Parameters we can provide to our task. We will provide the Parameters later from our Pipeline As we are going to define a Custom Cloud Profile in case of AzureStack, this will also define our custom endpoints

For good reasons, you should NOT put any default values in here.

Next, we add a “run” section. The run section is essence is the Script to be executed. if the script exits with a failure code, the Build Task will considered failed.

add the following lines to the task file:

run:
  path: bash
  args:
  - "-c"
  - |
    set -eux
    case ${CLOUD} in

    AzureStackUser)
        if [[ -z "${CA_CERT}" ]]
        then
            echo "no Custom root ca cert provided"
        else
            echo "${CA_CERT}" >> ${AZURE_CLI_CA_PATH}
        fi
        az cloud register -n ${CLOUD} \
        --endpoint-resource-manager ${ENDPOINT_RESOURCE_MANAGER} \
        --suffix-storage-endpoint ${SUFFIX_STORAGE_ENDPOINT} \
        --suffix-keyvault-dns ${VAULT_DNS} \
        --profile ${PROFILE}
        ;;

    *)
        echo "Nothing to do here"
        ;;
    esac

    az cloud set -n ${CLOUD}
    az cloud list --output table
    set +x
    az login --service-principal \
     -u ${AZURE_CLIENT_ID} \
     -p ${AZURE_CLIENT_SECRET} \
     --tenant ${AZURE_TENANT_ID}
    set -eux
    az account set --subscription ${AZURE_SUBSCRIPTION_ID}

This will evaluate the cloud type and load the appropriate Profile. For Azure Stack, we create a Cloud Profile with the endpoints passed from the Parameters.

Adding the Task to the Pipeline

Now we are adding the task to the Pipeline.

instead of edition the pipeline file, copy the existing file into 02-azcli-pipeline.yml. this is one of my personal tip’s. whenever i make additions to a pipeline file, I copy it into a new one. this one is for people having an AzureStack. For Azure, continue reading only up to the Azure Section

now, add the following to 02-azcli-pipeline.yml

- name: basic-azcli 
  plan:
  - get: azcli-concourse
    trigger: true
  - get: az-cli-image
    trigger: true
  - task: basic-azcli
    image: az-cli-image
    file: azcli-concourse/tasks/basic-task.yml
    params:
      CLOUD: ((asdk.cloud))
      CA_CERT: ((asdk.ca_cert))
      PROFILE: ((asdk.profile))
      ENDPOINT_RESOURCE_MANAGER: ((asdk.endpoint_resource_manager))
      VAULT_DNS:  ((asdk.vault_dns))
      SUFFIX_STORAGE_ENDPOINT: ((asdk.suffix_storage_endpoint))
      AZURE_TENANT_ID: ((asdk.tenant_id))
      AZURE_CLIENT_ID: ((asdk.client_id))
      AZURE_CLIENT_SECRET: ((asdk.client_secret))
      AZURE_SUBSCRIPTION_ID: ((asdk.subscription_id))
      AZURE_CLI_CA_PATH: "/usr/local/lib/python3.6/site-packages/certifi/cacert.pem"

Note that in my example, i prefix the parameter Variable´s with asdk, as i am going to maintain multiple Azurestack´s in my Parameter File. This again is for ease of use

edit the Parameter file

add the following lines to your parameter file:

asdk:
  tenant_id: "your tenant id"
  client_id: "your client id"
  client_secret: "your very secret secret"
  subscription_id: "your subscription id"
  endpoint_resource_manager: "https://management.local.azurestack.external"
  vault_dns: ".vault.local.azurestack.external"
  suffix_storage_endpoint: "local.azurestack.external"
  cloud: AzureStackUser
  profile: "2019-03-01-hybrid"
  azure_cli_ca_path: "/usr/local/lib/python3.6/site-packages/certifi/cacert.pem"
  ca_cert: |
    -----BEGIN CERTIFICATE-----
    <<you root ca>>
    -----END CERTIFICATE-----

save the file.

load the updated pipeline

fly -t docker set-pipeline -p azurestack  -c 02-azcli-pipeline.yml -l parameters.yml

Your Pipeline should now have a Second Task:

second_task

The task should start a new build automatically.

see the build log by clicking in the task build:

second_task_run

Excellent, now you has you first task to an Azure Stack

Adding Azure

copy the existing pipeline file into 03-azcli-pipeline.yml.

Using the basic Task, we add a new Job but with fewer Parameters to 03-azcli-pipeline.yml:

- name: basic-azcli-azure
  plan:
  - get: azcli-concourse
    trigger: true
  - get: az-cli-image
    trigger: true
  - task: basic-azcli-azure
    image: az-cli-image
    file: azcli-concourse/tasks/basic-task.yml
    params:
      CLOUD: ((azure.cloud))
      PROFILE: ((azure.profile))
      AZURE_TENANT_ID: ((azure.tenant_id))
      AZURE_CLIENT_ID: ((azure.client_id))
      AZURE_CLIENT_SECRET: ((azure.client_secret))
      AZURE_SUBSCRIPTION_ID: ((azure.subscription_id))

edit the Parameter file to include the azure parameters:

azure:
  tenant_id: "your tenant id"
  client_id: "your client id"
  client_secret: "your very secret secret"
  subscription_id: "your subscription id"
  cloud: AzureCloud
  profile: "latest"

save the files

Load the updated pipeline

we load Version 3 of our Pipeline now with

fly -t docker set-pipeline -p azurestack  -c 03-azcli-pipeline.yml -l parameters.yml 

This should start the new Job :

basic azure task

Now we have successfully setup Connections to Azure And AzureStack´s In the next Chapter, we will write some tasks to work with Azure/Stack resources, and create some yaml templates to make our Pipelines more Handy and start working with triggers

fly set-hybrid -> automation for azure and azurestack chapter 1

Use Concourse CI to automate Azure and AzureStack - Chapter 1 - The Basic Setup

This Chapter will focus on:

  • getting a base Concourse System using Docker
  • create and run a basic test pipeline
  • get az-cli container up and running

This is the Base Setup we will use for the upcoming chapters where we create :

  • Customized Tasks
  • ARM Jobs
  • some other cool Stuff for AzureStack

What, Concourse ?

Concourse is a CI/CD Pipeline that was developed with ease of use in Mind. Other than in well-known CI/CD Tools, it DOES NOT install plugins or agents. Concourse runs Tasks in OCI Compatible Containers. All in and output´s of Jobs are resources, and are defined by a Type. Based on the Resource Type, concourse will detect Version Changes of the resources. Concourse comes with a view built-in-types like git and S3, but you can very easy integrate you own Types.

read more about Concourse at Concourse-CI

First things first

Create a Directory of your choice in my case Workshop, and cd into it Before we start with our first pipeline, we need to get concourse up and running. The easiest way to get started with concourse is using docker. Concourse-CI provides a generic docker-compose file that will fit our needs for that course.

download the file

linux/OSX users simply enter

wget https://concourse-ci.org/docker-compose.yml

if you are running Windows, set docker desktop to linux Containers and run

Invoke-Webrequest https://concourse-ci.org/docker-compose.yml -OutFile docker-compose.yml

run the container(s)

Once the file is downloaded, we start Concourse with docker-compose up ( in attached mode ) that will load the required containers and start concourse with the web-instance running on 8080. If you want to run on a different Port, check the docker-compose.yml

docker-compose up
docker-compose up

Download the CLI

Now that we have concourse up and running, we download the fly cli commandline for concourse. therefore, we use the browser to browse to http://localhost:8080

concourse ui

Click on the Icon for your Operating System to Download the fly cli to your computer Copy the fly cli into your path

Connect to Concourse

Open a new Shell ( Powershell, Bash ) to start with our first commands.

As we can target multiple instances of Concourse, we first need to target our instance and log in.

therefore, we use fly -t «targetname» login -c «url» -b

fly -t docker login -c http://localhost:8080 -b
concourse ui

the -b switch will open a new Browser Window and point you to the login. Login with user: test, password: test.

This should log you in to concourse at cli and Browser Interface.

My First Pipeline

For our First pipeline, I created a template repository on Github. go to azurestack-concourse-tasks-template, and click on the Use this template button.

template

Github will ask you for a Repository name, choose azcli-concourse. Once the repository is created, clone into the repository from commandline, eg git clone https://github.com/youruser/azcli-concourse.git

repo

cd into the directory you just cloned.

you will find yml files in that directory. open the parameter.yml file

azcli-concourse-uri: <your github repo>

replace the ** with your repo url.

have a look at 01-azcli-pipeline.yml

---
# example tasks
resources:
- name: azcli-concourse
  type: git
  icon: github-circle
  source: 
    uri: ((azcli-concourse-uri))
    branch: master

- name: az-cli-image
  icon: azure
  type: docker-image
  source: 
    repository: microsoft/azure-cli

jobs:
- name: test-azcli 
  plan:
  - get: acli-concourse
    trigger: true
  - get: az-cli-image
    trigger: true
  - task: test-azcli
    image: az-cli-image
    file: azcli-concourse/tasks/test-task.yml

---

this is our first pipeline. it has 2 resources configured:

  • azcli-concourse, a git resource that hold´s our tasks
  • az-cli-image, a docker image that contains the az cli

Now tha we have edited the Parameter to point to our github repo, we can load the pipeline into concourse

fly -t docker set-pipeline -p azurestack  -c 01-azcli-pipeline.yml -l parameters.yml
set-pipeline

Apply the Pipeline configuration by confirming with y

No go Back to the Web Interface. You should now see the pipeline named azurestack in a paused state

set-pipeline

Hover over the Blue box and click on the name azurestack. this should open the pipeline view.

pipeview

You can see the 2 resources az-cli-image and azcli-concourse

if you click on each of them, you will notice they have been checked successfully

checked resource

concourse will automatically check for new version of the resources ( git fetch, docker, s3 ..), and this could trigger a build in a Pipeline.

Now, it is time to unpause our Pipeline. In the web-interface, click on the start button. Then click on the test-azcli job and manually trigger the build by pushing the + button.

this will trigger you build….

first build

Now, as we have setup the first Pipeline, take you time to explore the fly cli and read on concourse-ci.org before we start with customized tasks an jobs.

docker run - running the az cli in a container for AzureStack

Use az-cli from Docker to connect to AzureStack

in this post I will explain how to use the microsoft/azure-cli container image programmatically to connect to AzureStack

the basics

The easiest way to start the AzureCLI Container interactively is by using

docker run -it microsoft/azure-cli:latest
azcli from docker

the Idea

While this might be just enough to run some commands in Azure or AzureStack one time, it is not sufficient to scale Multiple Sessions or different Cloud Environments.

So we need to have a more efficient way to run the Container. One way would be passing Environment Variables o the Container, but I was looking for a more flexible approach.

The idea here is to use docker volumes to mount local directories into the docker container.

By leveraging docker run -it -v «volume»:/path, we should be able to pass environments, variables, files and scripts to the container. Example:

WORKSPACE=wokspace
docker run -it --rm \
    -v $(pwd)/vars:/${WORKSPACE}/vars \
    -v $(pwd)/scripts:/${WORKSPACE}/scripts \
    -v $(pwd)/certs:/${WORKSPACE}/certs \
    -w /${WORKSPACE} microsoft/azure-cli

to do so, i create 3 Directories:

  • certs, contains the Azure Stack root ca
  • vars, contains environment specific vars
  • scripts, contains the startup script for the azure env

the vars directory file

the vars directory will hold

  • .env.sh
  • .secrets a typical env.sh file would contain:
AZURE_CLI_CA_PATH="/usr/local/lib/python3.6/site-packages/certifi/cacert.pem"
PROFILE="2019-03-01-hybrid"
CA_CERT=root.pem
ENDPOINT_RESOURCE_MANAGER="https://management.local.azurestack.external"
VAULT_DNS=".vault.local.azurestack.external"
SUFFIX_STORAGE_ENDPOINT="local.azurestack.external"
AZURE_TENANT_ID=""
AZURE_SUBSCRIPTION_ID=""

the .secrets file is and option, and will hold and Azure Service Principle to login programmatically.

it contains:

#!/bin/bash
export AZURE_CLIENT_ID=""
export AZURE_CLIENT_SECRET=""

If you do not want to expose the secrets in a file, you may pass them ass environment Variables.

the scripts directory

the Script Directory in essence host the start script /scripts/run.sh that you will execute from within the Container

it will

  • append the root ca cert to the az cli certificates
  • Create the Cloud Environment for you AzureStack
  • Signs in to AZS with the Service Principal, if provided
!/bin/bash
pushd $(pwd)
cd "$(dirname "$0")"
source ../vars/.secrets
set -eux
source ../vars/.env.sh
if [ -z "${CA_CERT}" ]
then
    echo "no custom root ca found"
else
    cat ../certs/${CA_CERT} >> ${AZURE_CLI_CA_PATH} 
fi

az cloud register -n AzureStackUser \
--endpoint-resource-manager ${ENDPOINT_RESOURCE_MANAGER} \
--suffix-storage-endpoint ${SUFFIX_STORAGE_ENDPOINT} \
--suffix-keyvault-dns ${VAULT_DNS} \
--profile ${PROFILE}
az cloud set -n AzureStackUser
set +eux
if [ -z "${AZURE_CLIENT_ID}" ] || [ -z "${AZURE_CLIENT_SECRET}"  ]
then
    echo "no Client Credentials found, skipping login"
else
    az login --service-principal \
    -u ${AZURE_CLIENT_ID} \
    -p ${AZURE_CLIENT_SECRET} \
    --tenant ${AZURE_TENANT_ID}  
    az account set --subscription ${AZURE_SUBSCRIPTION_ID}
fi

putting it all together

with the above files in place, we would start docker with

WORKSPACE=workspace
docker run -it --rm \
    -v $(pwd)/vars:/${WORKSPACE}/vars \
    -v $(pwd)/scripts:/${WORKSPACE}/scripts \
    -v $(pwd)/certs:/${WORKSPACE}/certs \
    -w /${WORKSPACE} microsoft/azure-cli
azcli from docker

once in, we can start our environment and connect to our AzureStack endpoint:

./srcipts/run.sh
connect to AzureStack

The Script templates can be found on my Github

azcli-docker-template