
Summary
Modern enterprises depend on reliable, fast, and auditable data protection—especially as more business-critical data ends up in the cloud. Ensuring this data is backed up securely, with full auditability and seamless integration to on-premises data protection infrastructure, is essential. Let’s look at how Dell’s PowerProtect Data Manager and DataDomain BoostFS help you easily orchestrate and automate these cloud-to-datacenter backup workflows—using a practical, script-driven example.
Automating Cloud Backups: The Script Workflow
This backup automation script enables IT teams to automatically protect cloud or remote data by transferring it directly to secure, high-performance Dell DataDomain storage using BoostFS. The process is simple, yet robust—ideal for both full system backups and incremental “change-only” protection.
How the Workflow Operates
-
Source Selection via rclone:
The script uses [rclone], a flexible command-line tool, to connect to virtually any cloud or remote storage. With pre-set cloud profiles, it’s easy to target the right buckets or directories with the right credentials. -
Backup Target – Dell DataDomain BoostFS:
Backups are sent to a local mount point, provided by BoostFS. This mount absorbs cloud data and writes it directly to your DataDomain system, bringing enterprise-grade deduplication, performance, and reliability to the workflow. -
Orchestration with PowerProtect Data Manager (PPDM) Generic Application Agent:
PowerProtect’s agent manages, schedules, and monitors the backup, integrating cloud data protection into your overall enterprise backup policy. -
Automation & Auditability:
Choose between full or incremental backups (backup of all files or only files recently changed), schedule parallel transfers for efficiency, and leverage fully timestamped, auto-rotating logs for regulatory and troubleshooting needs.
Script Features at a Glance
- Full & Incremental Backups: Select ‘FULL’ for comprehensive protection or ‘LOG’ for rapid, incremental changes (ideal for nightly or near-continuous backup).
- Support for Any Cloud: Any rclone-compatible storage is supported—public, private, or hybrid clouds.
- Efficient Parallel Transfers: Adjust the number of simultaneous copy operations for faster backups.
- Intelligent Log Rotation: Automatic retention and clean-up of logs removes hassle and helps with compliance.
- Customizable Age Filters: Limit which files are backed up (e.g., only files changed in the last day—perfect for large object storage).
- Fail-Safe Operation: Strong error handling ensures you know right away if a backup didn’t complete as planned.
Dell Product Functionality in Action
PowerProtect Data Manager Generic Application Agent
-
Flexible Orchestration:
PowerProtect’s Generic Application Agent enables you to define and control custom backup jobs—even from outside-the-box sources like cloud storage—within your existing enterprise data protection framework. -
Policy-Driven Protection:
Integrate ad-hoc cloud backup into centralized, policy-based enterprise backup schedules and compliance reporting. -
Monitoring & Reporting:
All backups, regardless of origin, are visible and managed from a single dashboard—simplifying audits and troubleshooting.
DataDomain BoostFS
-
Seamless Filesystem Integration:
BoostFS lets you mount your DataDomain system as a standard Linux directory, making it simple for scripts and applications to send backups without having to know about underlying deduplication or replication mechanics. -
Enterprise Data Services:
Data is instantly protected with DataDomain’s powerful deduplication, security, and high-speed ingest—reducing storage reserve needs and backup windows. -
High-Speed, Low-Impact:
BoostFS optimizes backup throughput, minimizes network utilization, and ensures data is ready for fast restore if disaster strikes.
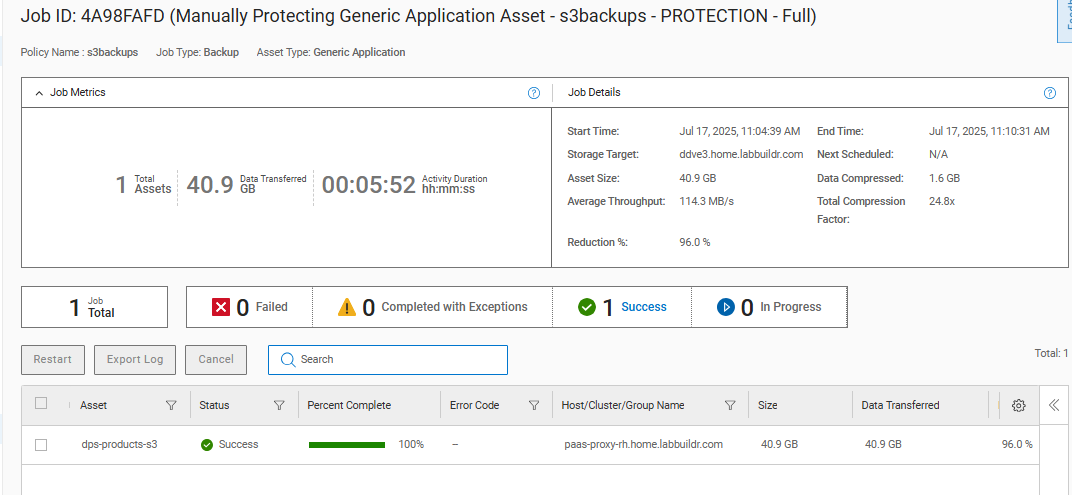
Example: Cloud-to-DataDomain Backup in Action
Here’s how a typical backup looks in practice:
export DD_TARGET_DIRECTORY="/mnt/ddboost/my_backups"
export BACKUP_LEVEL="FULL"

./s3_backup_rclone.sh \
  -b my-cloud-bucket \
  -c company-cloud-profile \
  -p "/2025/July/" \
  -s 8 \
  -i 24h \
  -f 168h
- This backs up everything from a specific cloud bucket (limited by prefix, if desired), using 8 parallel copy streams.
- Full and Incremental options are set with
-fand-i, determining the age range of files for each backup type. - Logs for each run are kept and rotated automatically—the 5 most recent backup reports are always available for compliance and troubleshooting.
Why It Matters: Robust Cloud Data Protection, Simplified
With cloud data now central to so many IT operations, organizations need to bridge the gap between cloud and on-prem storage without creating silos or complexity. By combining this script-driven workflow with Dell’s PowerProtect Data Manager and DataDomain BoostFS:
- Protect cloud and SaaS data in-place, using your own trusted infrastructure
- Apply unified compliance, policy, and audit controls across all data sources
- Automate, monitor, and report on everything—no manual gaps
- Minimize cost and maximize speed with industry-leading deduplication and throughput
Technical Details
Key Features
- Full & Incremental Backups: Choose between complete or recent-changes-only backups.
- Cloud Agnostic: Works with any rclone-compatible cloud provider.
- Parallel Transfers: Speed up backups with configurable streams.
- Log Rotation: Keeps only the latest logs for easy diagnostics.
- Fail-fast: Errors are logged and the script exits on failure.
Prerequisites
- Linux/UNIX system with Bash
- rclone installed and configured
- PowerProtect DataManager Generic Application Agent
- Environment variables:
DD_TARGET_DIRECTORY(BoostFS mountpoint)BACKUP_LEVEL(FULLorLOG)
Usage Example
export DD_TARGET_DIRECTORY="/data/company_backups"
export BACKUP_LEVEL="FULL"

./backup-script.sh \
    -b my-databucket \
    -c my-cloud-profile \
    -p "/nightly" \
    -s 8 \
    -i 24h \
    -f 168h
How It Works
- Rotates logs for troubleshooting.
- Validates parameters and environment.
- Runs either a full or incremental backup using rclone.
- Transfers files with parallel streams and age filters.
- Logs all actions and exits on error.
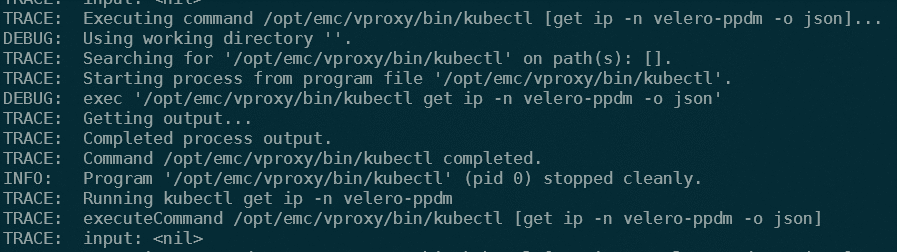
Troubleshooting
Check /var/log/rclone.log for details. Only the 5 most recent logs are kept.
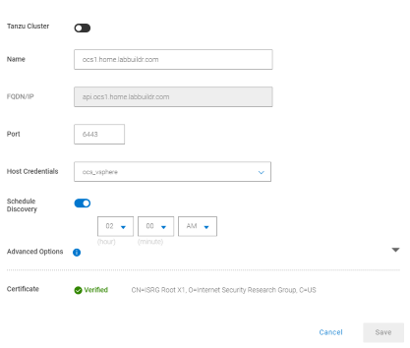
Onboarding the Asset into PPDM
1. Verify Compatibility
- Ensure both your PPDM instance and intended application workload are supported.
- Review the official support matrix for OS and application compatibility.
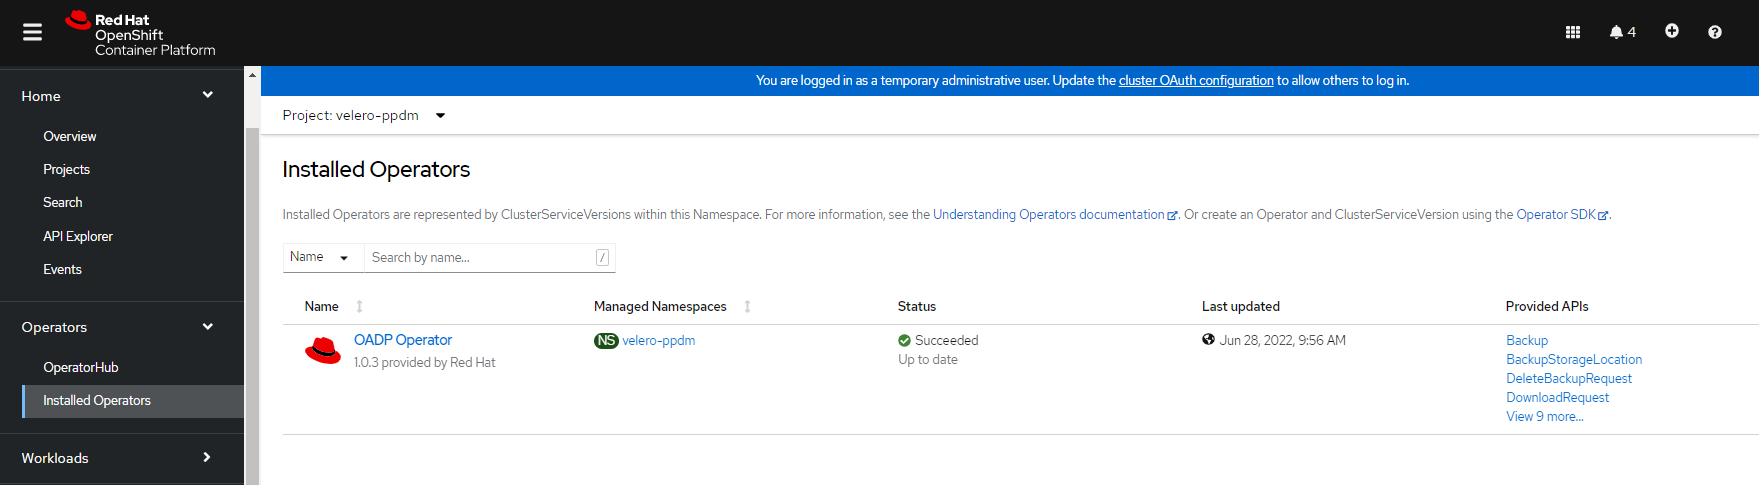
2. Install the Generic Application Agent
- Download the agent package from PPDM’s software repository.
- Install the agent on the host system where the application resides, following the platform-specific installation steps found in the official user guide.
3. Configure Backup Scripts
- Create and configure scripts for backup operations, tailored to your application’s requirements.
- Store these scripts in a directory accessible to both the agent and PPDM.
4. Discover and Register the Agent in PPDM
- Approve the application host in PPDM. The system should automatically recognize the installed agent.
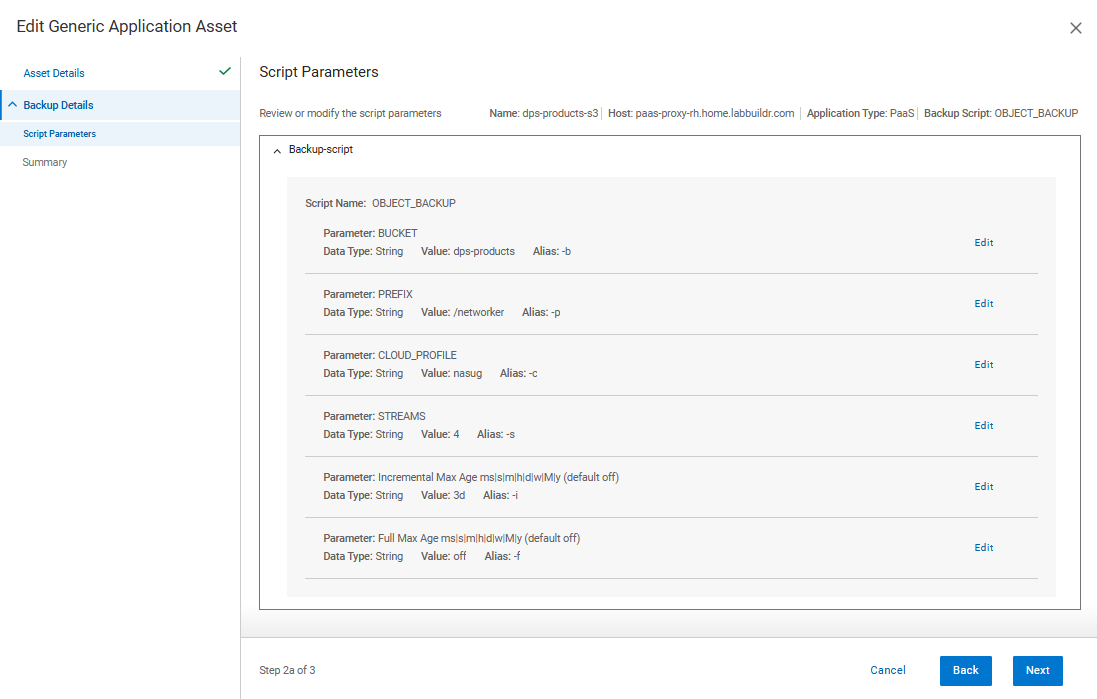
5. Create an Asset for Generic Application
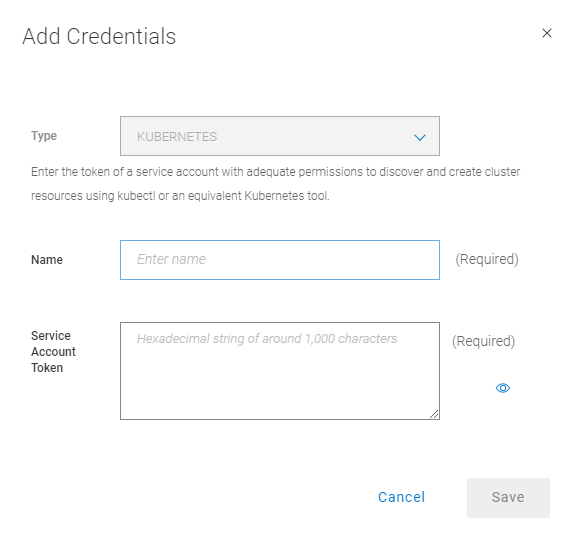
- In PPDM, define a new Asset for generic Agent, this includes:
- Connection Credentials
- Asset Host that acts as a Proxy Datammover
- Selection the Backup Script to use
- Parameters for the Backup Script
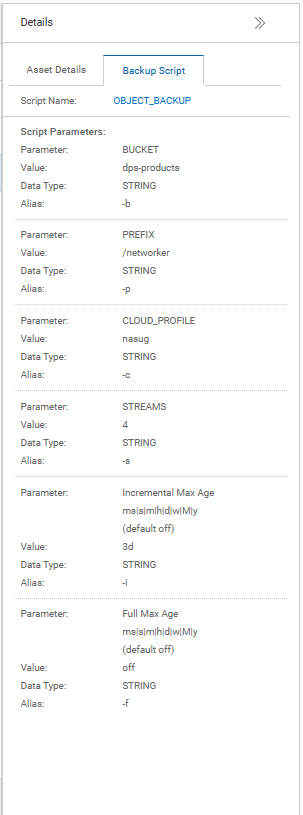
Assign the Asset to the desired Policy, or create a New Policy for generic Agent
Best Practices
- Set required environment variables.
- Pre-configure rclone profiles.
- Use appropriate file age formats (
24h,7d, etc.). - Run as a user with necessary permissions.
Example Script Link
you can find my Example Script here Dell Examples Github
Closing Thoughts
Cloud-native data protection doesn’t have to mean re-inventing your backup strategy. With Dell’s PowerProtect Data Manager Generic Application Agent and DataDomain BoostFS, you can extend your trusted enterprise data protection to the cloud—simply, securely, and with total control.
This ready-to-use backup automation script is just one example of how Dell continues to help organizations safeguard their modern, hybrid environments. Looking for a tailored demo or deeper integration advice? Dell’s data protection specialists are ready to help you architect and optimize your solution.
License & Author
© 2025 Dell Inc.
Author: Karsten Bott (karsten.bott@dell.com)