Using DELLEMC Powerprotect to Backup and Protect Managed AKS Clusters on Azure
This month we released the new PowerProtect Datamanager 19.6
Along with new and improved feature sets, we also released our first version of PPDM to the Azure Marketplace.
This allows Organizations to Protect the following workloads natively on Azure:
- Vanilla Kubernetes and AKS
- Applications (Oracle, SQL, SAP Hana)
- Windows and Linux FS
Todays Blogpost will focus on the Protection of Managed Azure Kubernetes Service, AKS. We will do so by fisrt Creating Protection Policies and Add Namespace Assts to ist, amd in a second Step add Namespaces automatically from Kubernetes Namespace Labels using Protection Rules
In order to get Started with PPDM on Azure, we will require 2 Solutions to be deployed to Azure:
- DataDomain Virtual Edition (>= 6.0), DDVE ( AKA PPDD )
- PowerProtect Datamanager, PPDM
Deployment from Marketplace
Yes, we got you covered. Our Marketplace Temlate Deploys PPDM and PPDD in a One Stop Shopping Experience to your Environment.
Simply Type PPDM into the Azure Search and it directly take you to the Dell EMC PowerProtect Data Manager and Dell EMC PowerProtect DD Virtual Edition Marketplace Item PPDM 19.6 Deployment
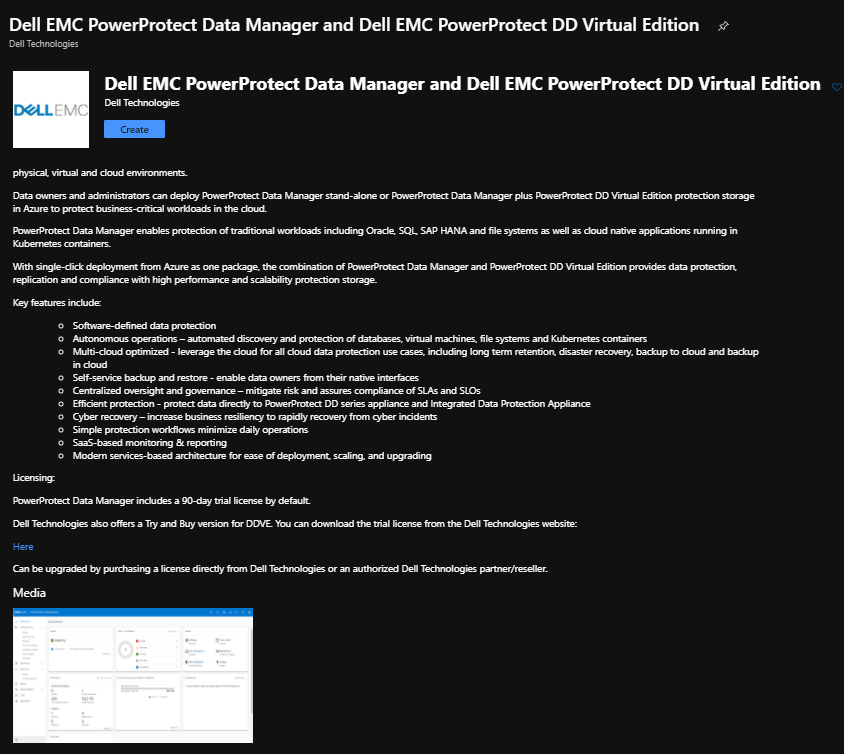
The Deployment will only allow you to select validated Machine Types, and will deploy the the DataDomain for using ATOS (Active Tier on Object Store) I am not going into the Details of Basic PPDM od PPDD Configuration, so Please refer to our PowerProtect Data Manager Azure Deployment Guide takes you to all the details you may want/need to configure.
Using CLI ? We got you covered. Simply download the ARM Template using the Marketplace Wizard and you are good to go
You can always get a list of all DELLEMC Marketplace Items using
az vm image list --all --publisher dellemc --output tsvIf you feel like terraforming the above, i have some templates ready in my terraforming DPS main repository to try. They are pretty modular and also covering Avamar and Networker. Feel free to reach out to me on how to use.
Prepare for our First AKS Cluster
assuming you followed the Instructions from the PPDM Deployment Guide, we now will deploy our first AKS Cluster to Azure.
As we are using the Container Storage Interface to protect Persistent Volume Claims, we need to follow Microsoft´s guidance to Deploy Managed AKS Clusters using CSI. See Enable Container Storage Interface (CSI) drivers for Azure disks and Azure Files on Azure Kubernetes Service (AKS) (preview) for details.
AKS Cluster using CSI must be deployed from AZ CLI as the Date of this article.
If this is the first AKS Cluster using CSI in your Subscription, you will need to enable the feature using:
az feature register --namespace "Microsoft.ContainerService" \
 --name "EnableAzureDiskFileCSIDriver"
You can query the state using:
az feature list -o table \
--query "[?contains(name, 'Microsoft.ContainerService/EnableAzureDiskFileCSIDriver')].{Name:name,State:properties.state}"
Once finished, we register the Provider with:
az provider register --namespace Microsoft.ContainerServiceBut we also need to update our AZ CLI to support the latest extensions for AKS. Therefore, run:
az extension add --name aks-preview
az extension update --name aks-preview
Deploy the AKS Cluster
Deploying the AKS Cluster creates a Service Principal in the Azure AD on every run. You might want to use the same Service Principal again for Future Deployments, or Cleanup the SP after ( as it will not be deleted from AzureAD ).
If not already done, login to Azure from AZ CLI. Two Method´s, depending on your Workflow:
Using Device Login (good to Create the SP for RBAC):
az login --use-device-code --output tsvUsing a limited Service Principal, with already configured SP for AKS:
AZURE_CLIENT_ID=<your client id>
AZURE_CLIENT_SECRET=<your secret>
AZURE_TENANT_ID=<your Tenant ID>
az login --service-principal \
    -u ${AZURE_CLIENT_ID} \
    -p ${AZURE_CLIENT_SECRET} \
    --tenant ${AZURE_TENANT_ID} \
    --output tsv
So we are good to create our first AKS Cluster.
Make sure you are scoped to the correct Subscription:
RESOURCE_GROUP=<your AKS Resource Group>
AKS_CLUSTER_NAME=<your AKS Cluster>
AKS_CONFIG=$(az aks create -g ${RESOURCE_GROUP} \
  -n ${AKS_CLUSTER_NAME} \
  --network-plugin azure \
  --kubernetes-version 1.17.11 \
  --aks-custom-headers EnableAzureDiskFileCSIDriver=true \
  --subscription ${AZURE_SUBSCRIPTION_ID} \
#  --node-vm-size ${AKS_AGENT_0_VMSIZE} \
#  --service-principal ${AKS_APP_ID} \ <-- this when using
#  --client-secret ${AKS_SECRET} \ <-- this for using client secret
#  --vnet-subnet-id "/subscriptions/${AZURE_SUBSCRIPTION_ID}/resourceGroups/${RESOURCE_GROUP}/providers/Microsoft.Network/virtualNetworks/${RESOURCE_GROUP}-virtual-network/subnets/${RESOURCE_GROUP}-aks-subnet"  \ # <-- this when using existing subnet
  --generate-ssh-keys
)
Once the deployment is done, we can get the Kubernetes Config for kubectl using:
az aks get-credentials --resource-group ${RESOURCE_GROUP} --name ${AKS_CLUSTER_NAME}
In order to use Snapshots with the CSI Driver, we need to deploy the Snapshot Storageclass:
kubectl apply -f https://raw.githubusercontent.com/kubernetes-sigs/azuredisk-csi-driver/master/deploy/example/snapshot/storageclass-azuredisk-snapshot.yamlWith that, the Preparation for AKS using CSI is done. You can view your new StorageClasses with:
kubectl get storageclasses
Add Kubernetes Secret for PPDM
In order to connect to AKS from PPDM, we need to create Service Account with Role based access. A basic RBAC Template can be applied with:
kubectl apply -f  https://raw.githubusercontent.com/bottkars/dps-modules/main/ci/templates/ppdm/ppdm-admin.yml
kubectl apply -f  https://raw.githubusercontent.com/bottkars/dps-modules/main/ci/templates/ppdm/ppdm-rbac.yml
After, you can export the Token to be used for PPDM with:
kubectl get secret "$(kubectl -n kube-system get secret | grep ppdm-admin | awk '{print $1}')" \
-n kube-system --template={{.data.token}} | base64 -d
This is needed for the Credentials we Create in PPDM
Now sign in to PPDM and go to Credentials:
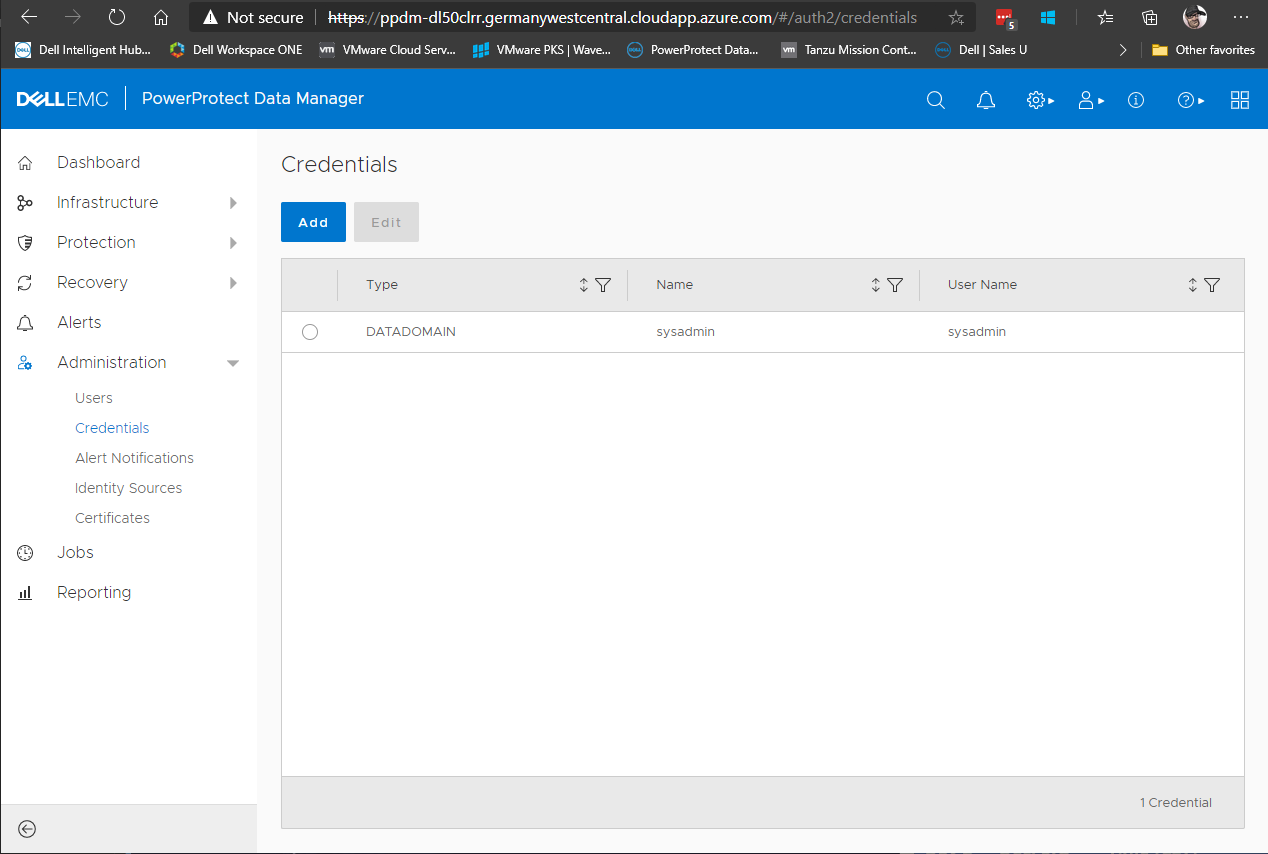
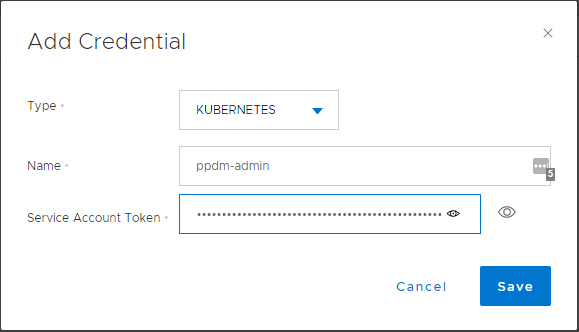
Add a Credential of Type Kubernetes, with the name of the secret we created in AKS, in the example it is ppdm-admin.
Copy the Service token in you got from above:
Add AKS Cluster to PPDM
Now we are good to add the new AKS Cluster to PPDM. Therefore, we go to the new Asset Sources Dashboard in PPDM:
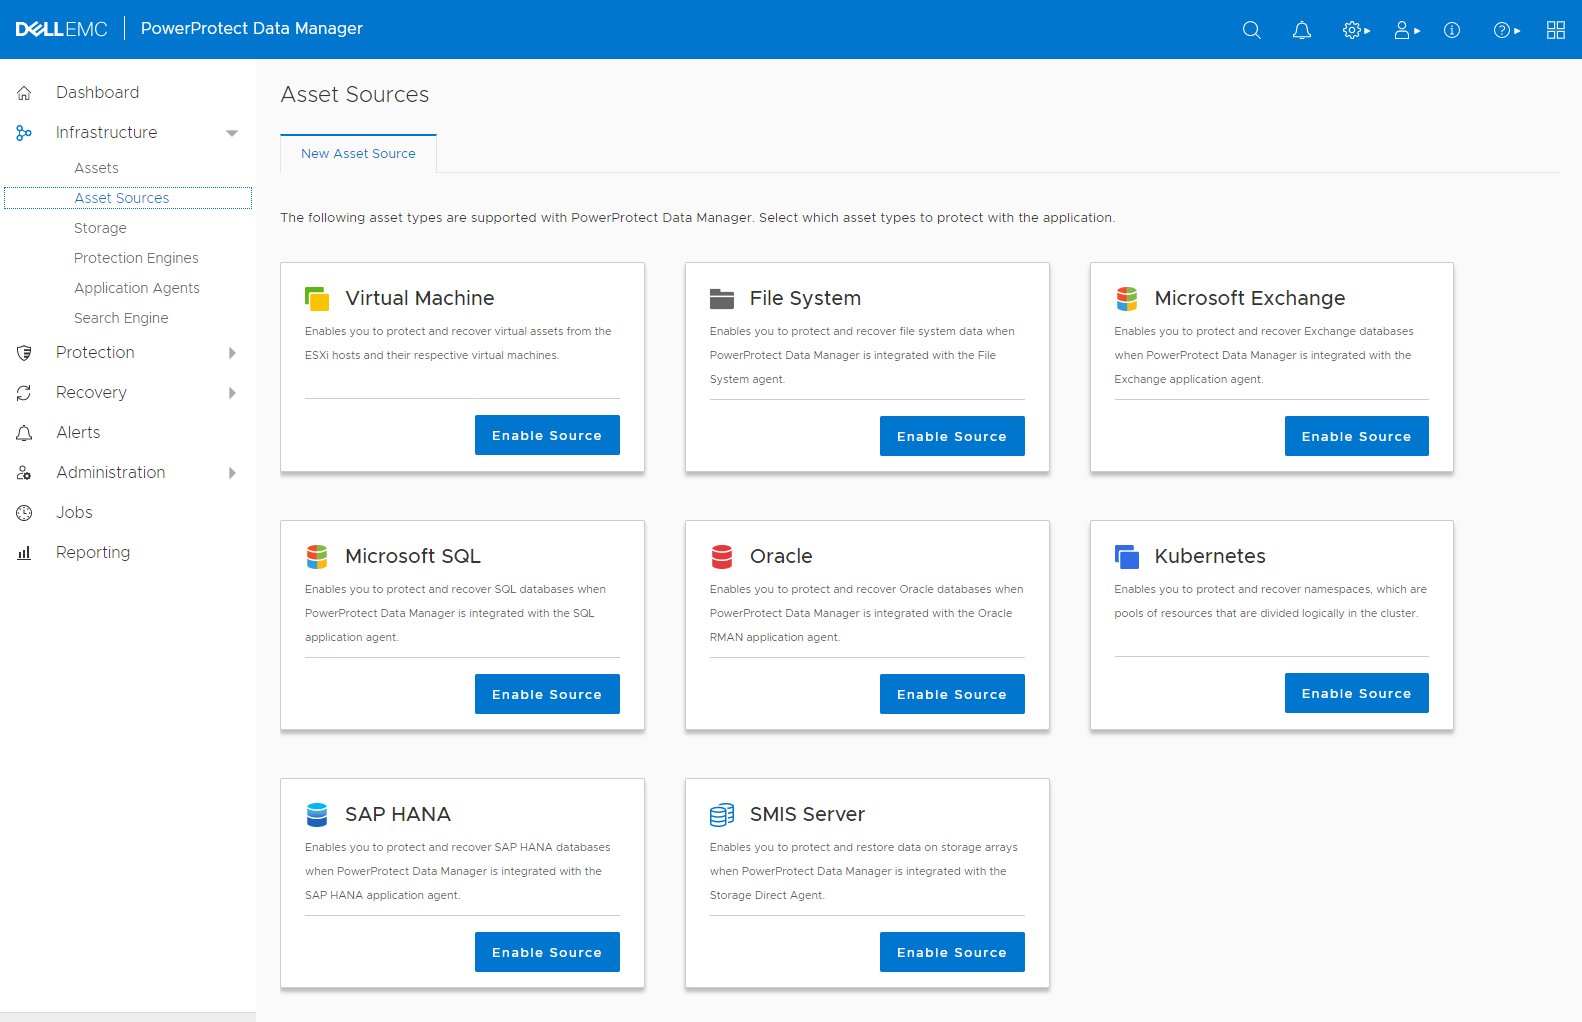
Click on the Kubernetes Source to enable Kubernetes Assets. After clicking OK on the Instructions, click Add on the Kubernetes
Fill in the Information for your AKS Cluster, and use the ppdm-admin Credentials:
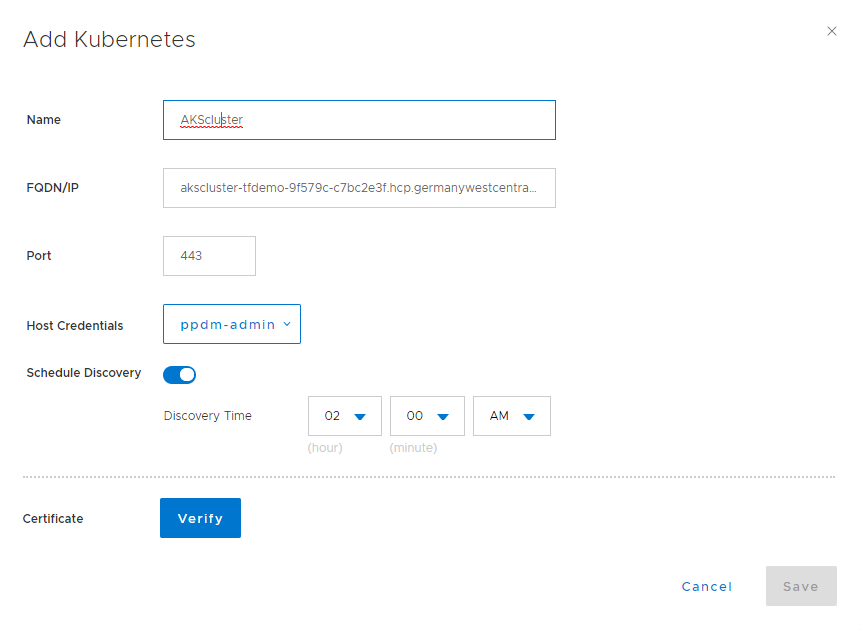
Click on Verify Certificate to import the AKS API Server:
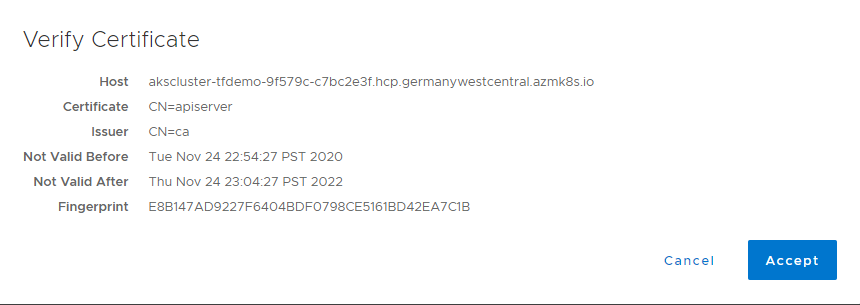
Then Click save to add the AKS Cluster. The AKS Cluster will be discovered automatically for us now, so go over to Assets:
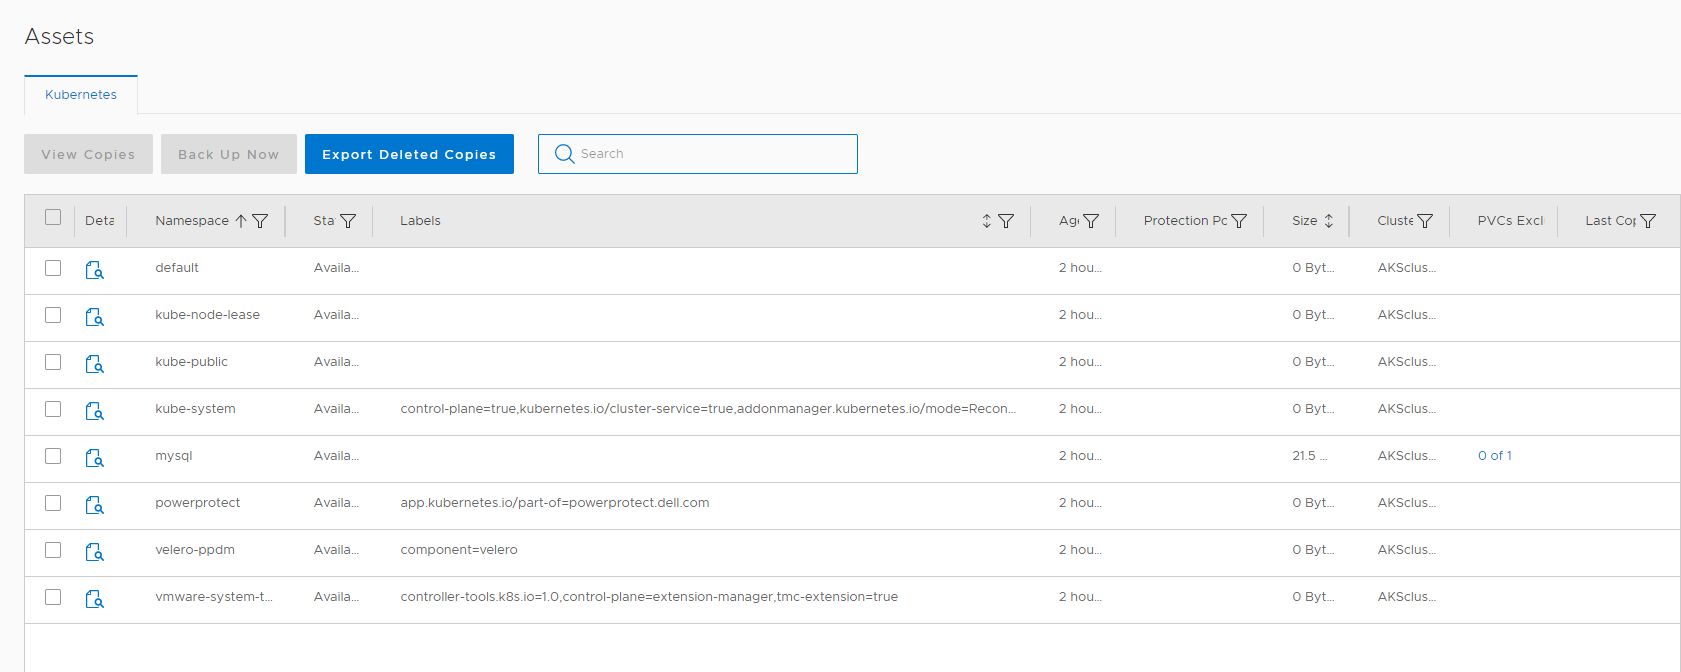
You will see that 2 new Namespaces have been deployed, velero-ppdm and powerprotect. We are leveraging upstream velero and added support for DataDomain Boost Protocol.
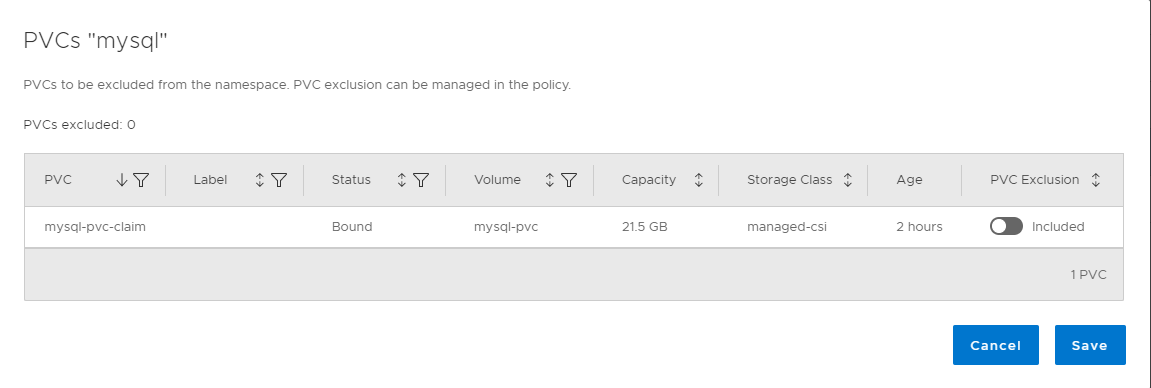
In my example, i already added a mysql application using the Storageclass managed-csi for PV Claim, you can use my Template from here:
NAMESPACE=mysql
kubectl apply -f https://raw.githubusercontent.com/bottkars/dps-modules/main/ci/templates/mysql/mysql-namespace.yaml
kubectl apply -f https://raw.githubusercontent.com/bottkars/dps-modules/main/ci/templates/mysql/mysql-secret.yaml --namespace ${NAMESPACE}
kubectl apply -f https://raw.githubusercontent.com/bottkars/dps-modules/main/ci/templates/mysql/mysql-pvc.yaml --namespace ${NAMESPACE}
kubectl apply -f https://raw.githubusercontent.com/bottkars/dps-modules/main/ci/templates/mysql/mysql-deployment.yaml --namespace ${NAMESPACE}
You can verify the Storage Class in PPDM by cliking on the “exclusions” link form the namespace vie in PPDM:
We now can create a Protection Policy. Therefore, go to Protection –> Protection Policies, and click Add to add your first policy
The step is similar to all other Protection Policy. Make sure to select
- Type Kubernetes
- Purpose Crash Consistent
- Select the Asset ( Namespace ) with the Managed CSI
- Add at least a Schedule for Type Backup

Once done, monitor the System Job to finish Configuring the Protection Policy:

We can now start our First Protection by clicking Backup Now on the Protection Policy:

Once the Backup Kicked in, you can monitor the job by viewing the Protection Jon from the Jobs Menu:
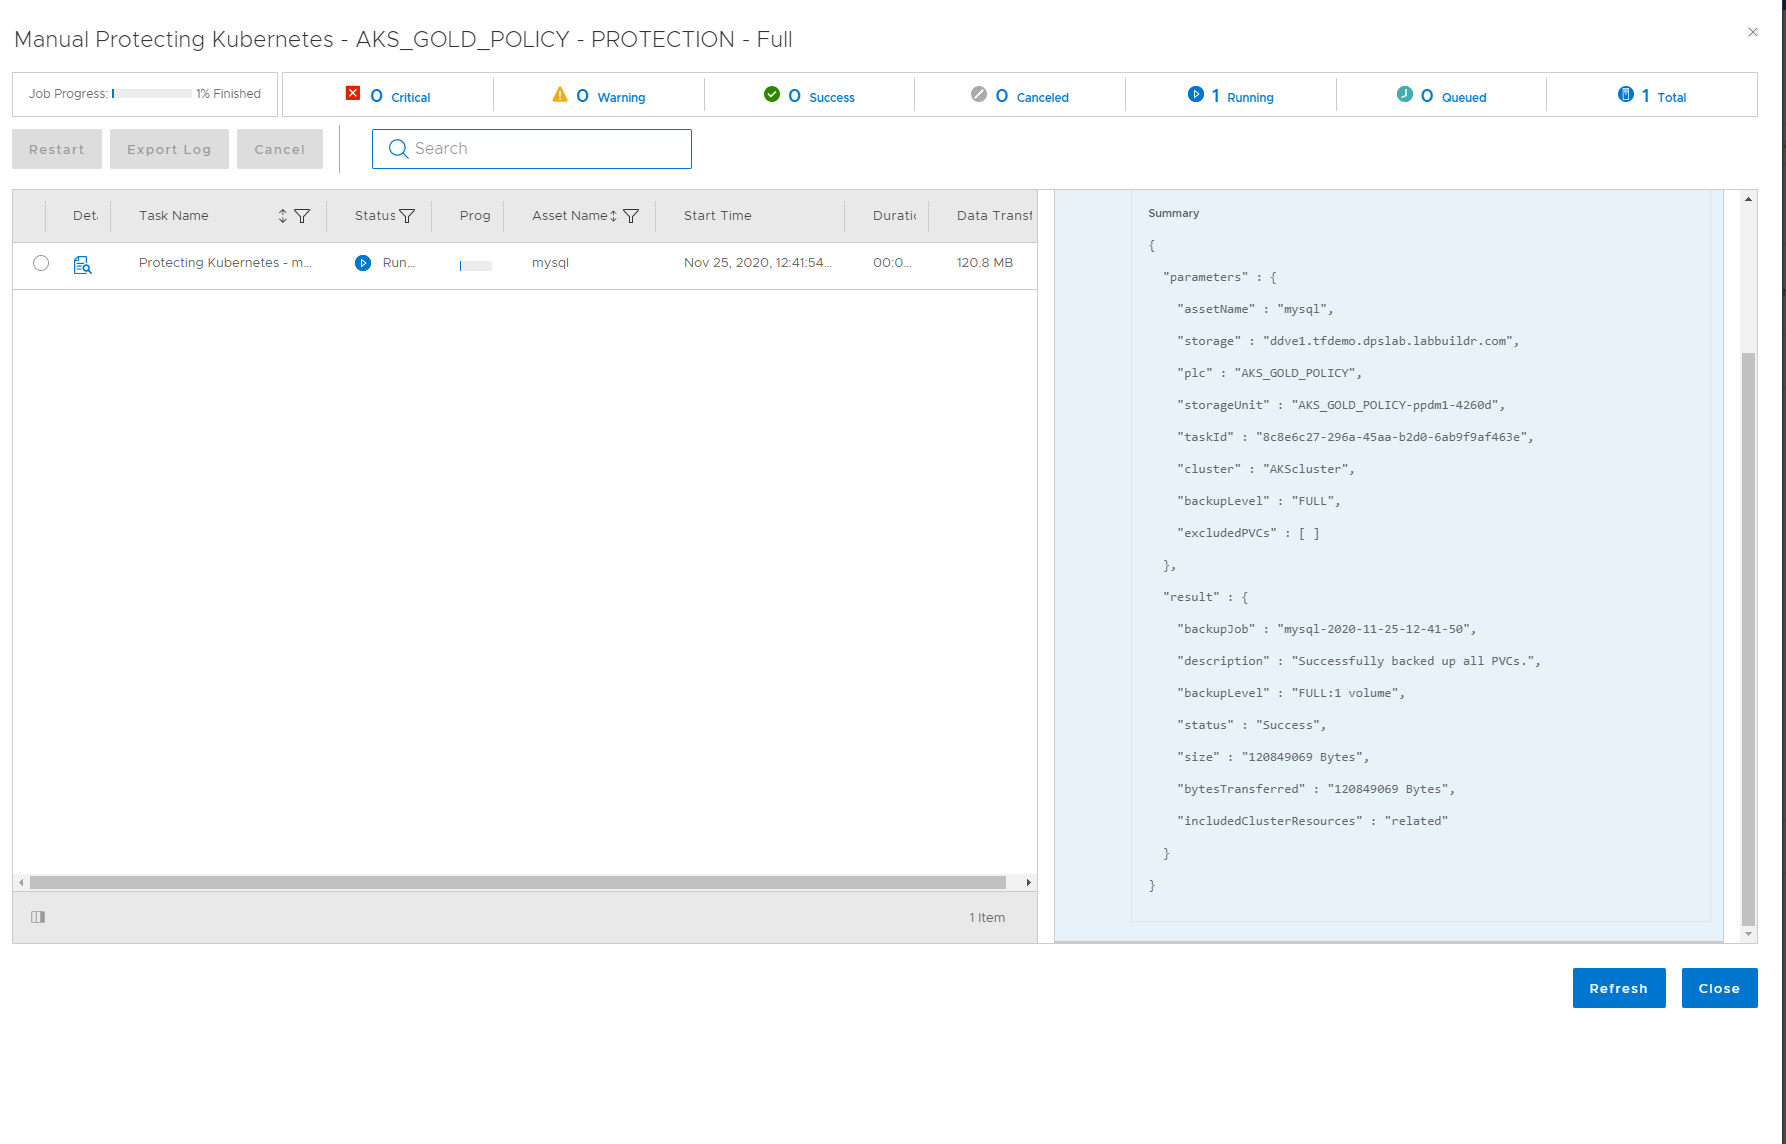
As a Kubernetes User, you can also use your favorite Kubernetes tools to monitor what is happening behind the Curtains.
In you Application namespace ( here, mysql ), PowerProtect will create a “c-proxy”, which is essentially a datamover to claim the Snapshot PV: I am using K9s to easy dive into Pods and Logs:
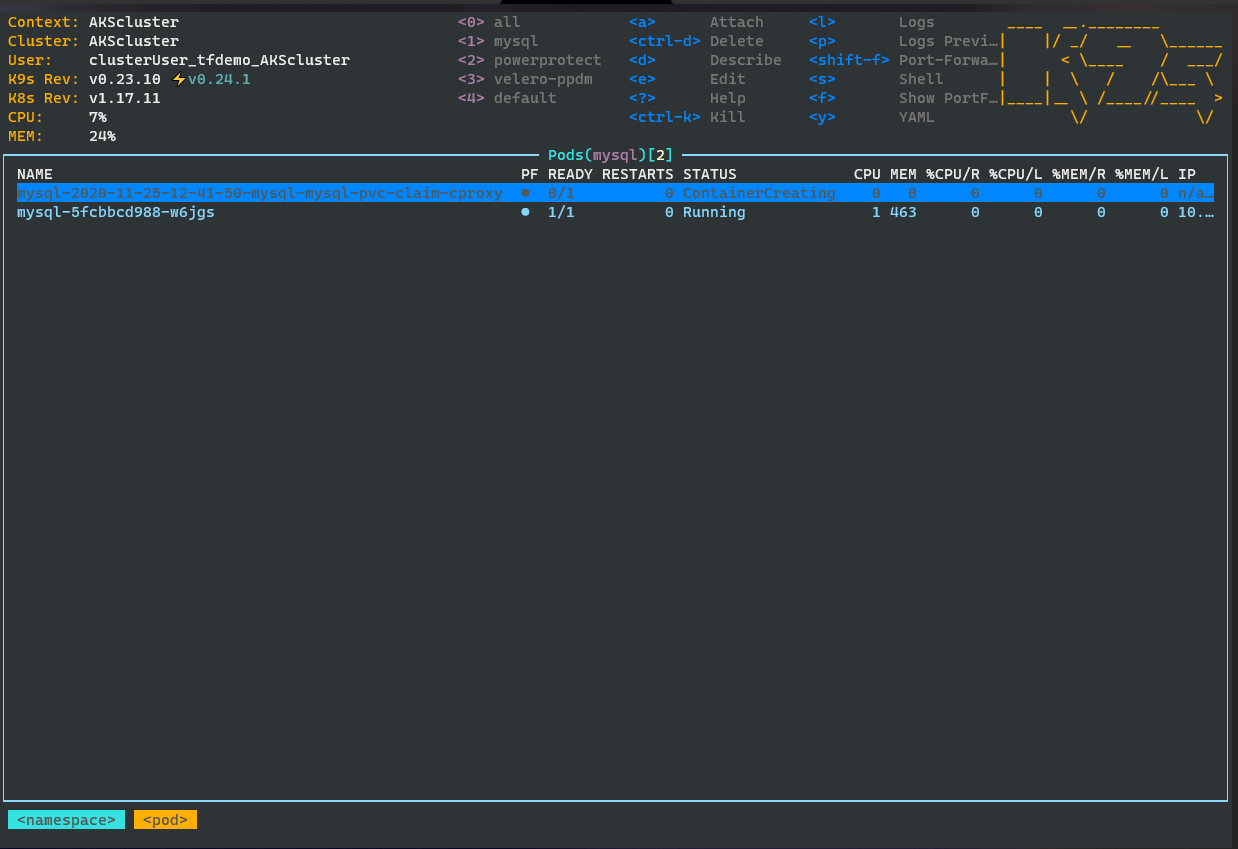
kubectl command:
kubectl get pods --namespace mysqlA PVC will be created for the MYSQL Snapshot. You can verify that by viewing the PVC´s:
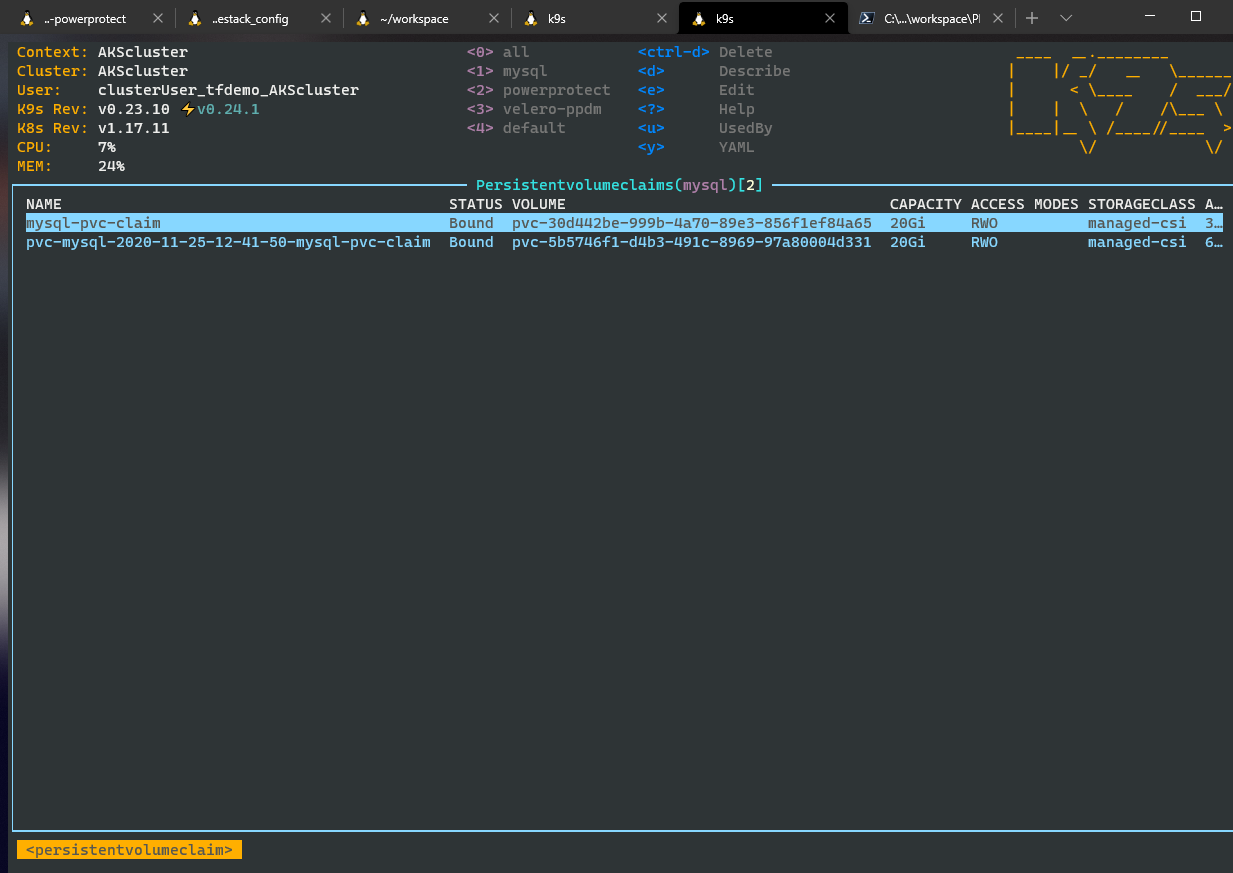
kubectl command:
kubectl get pvc --namespace mysqlSee the details of the snapshot claiming by c-proxy:
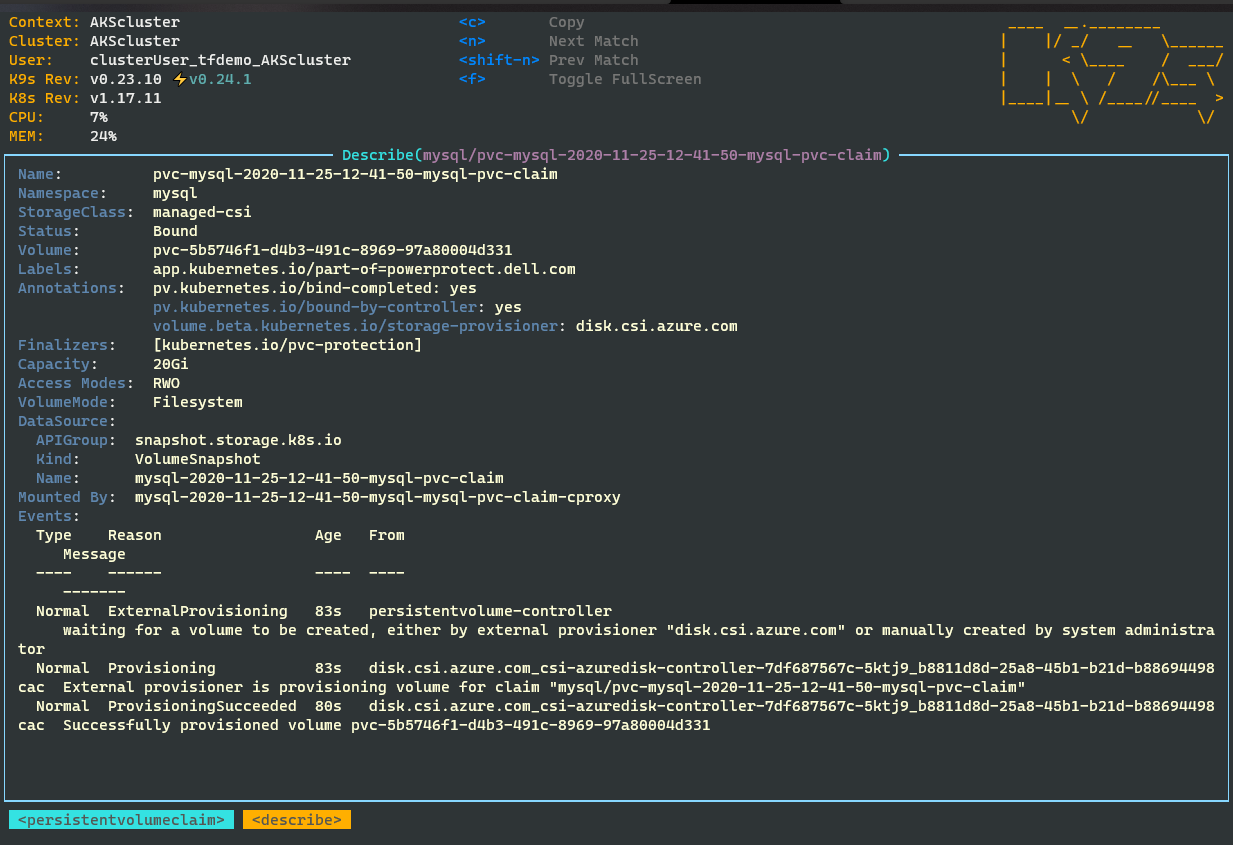
kubectl command:
kubectl describe pod/"$(kubectl get pod --namespace mysql | grep cproxy | awk '{print $1}')" --namespace mysqlYou can Browse your Backups now from PPDM UI by selecting assets –> Kubernetes Tab –>
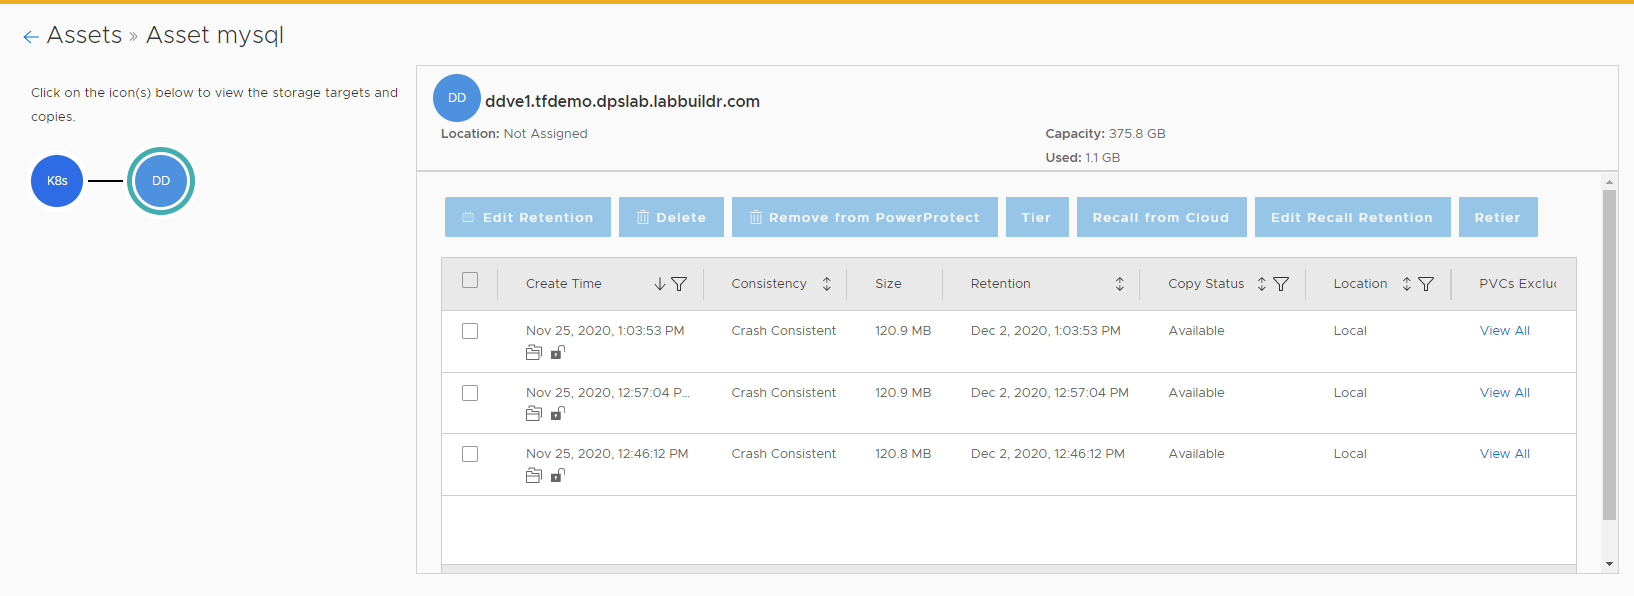
Also, as a Kubernetes User, you can use the
kubectl command :
kubectl get backupjobs -n=powerprotect
kubectl describe backupjobs/<you jobnumber> -n=powerprotect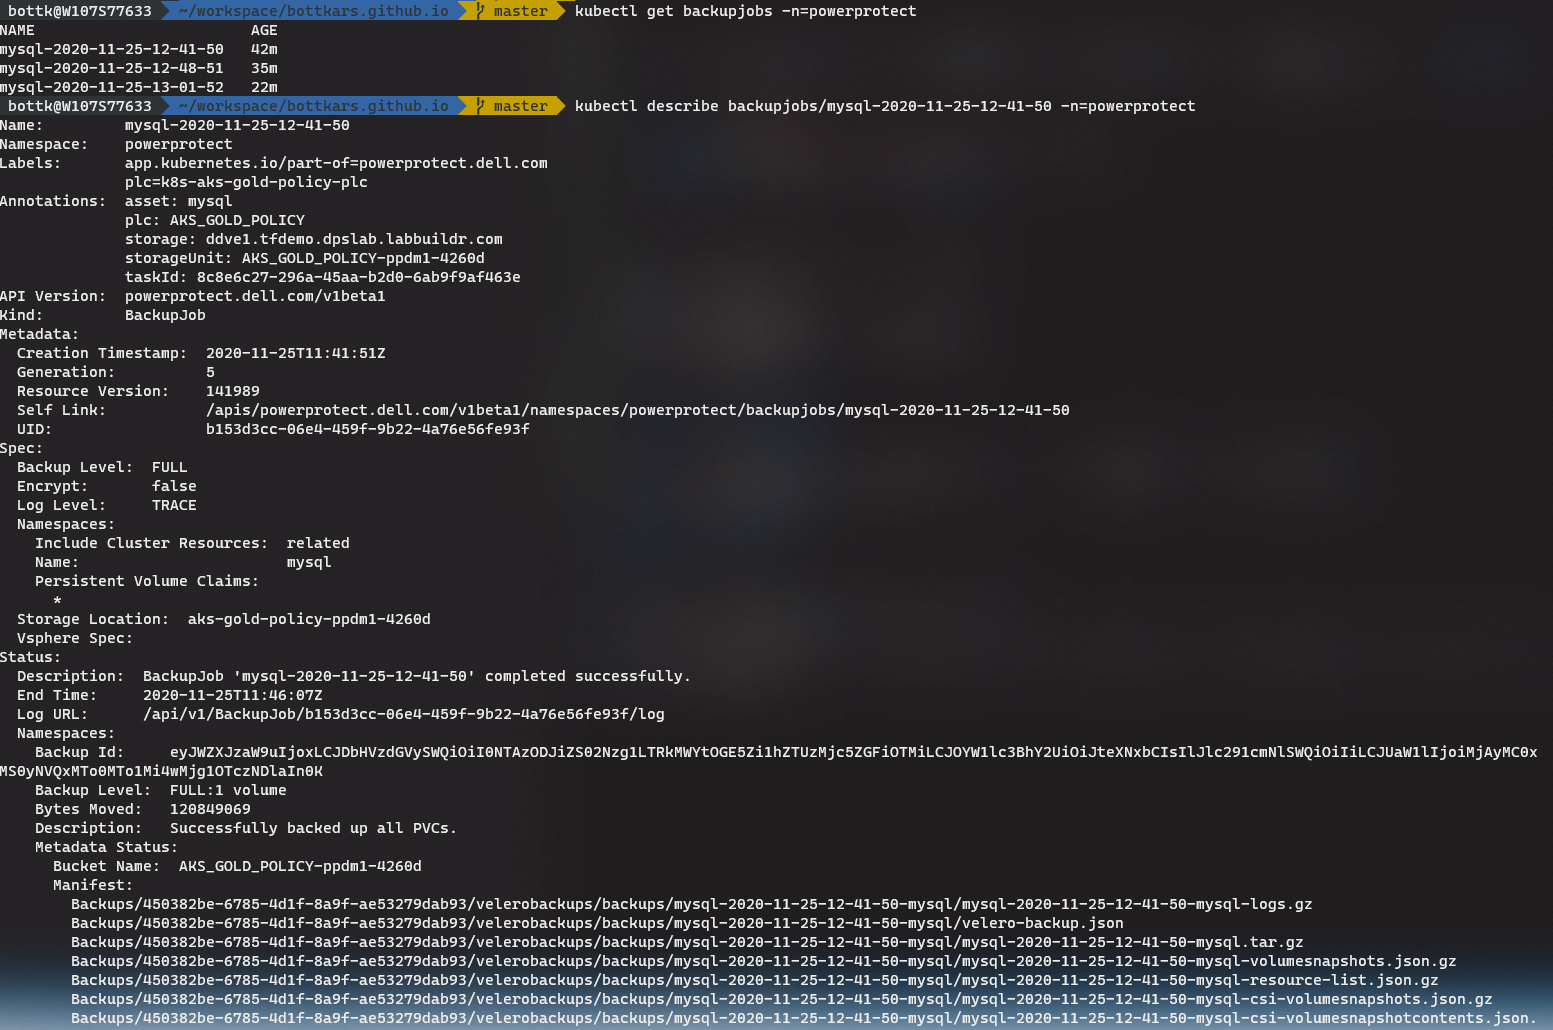
Automated Protection using Namespace Labels
One of the great features is the Automated Asset Selection for Kubernetes Assets using Namespace Labels. In the Previous Example we have created a Protection Policy and added a Kubernetes Namespace Asset to it. to be protected. No we are adding K8S assets automatically by using Protection Rules and Kubernetes Labels.
For that, we select Protection Rules on PPDM. On the Kubernetes Tab, we click on add to create a new Rule. Select your existing Policy and Click on Next. Configure an Asset filter with
- Field: Namespace Label Includes
in my example I am using the Label *ppdm_policy=ppdm_gold*
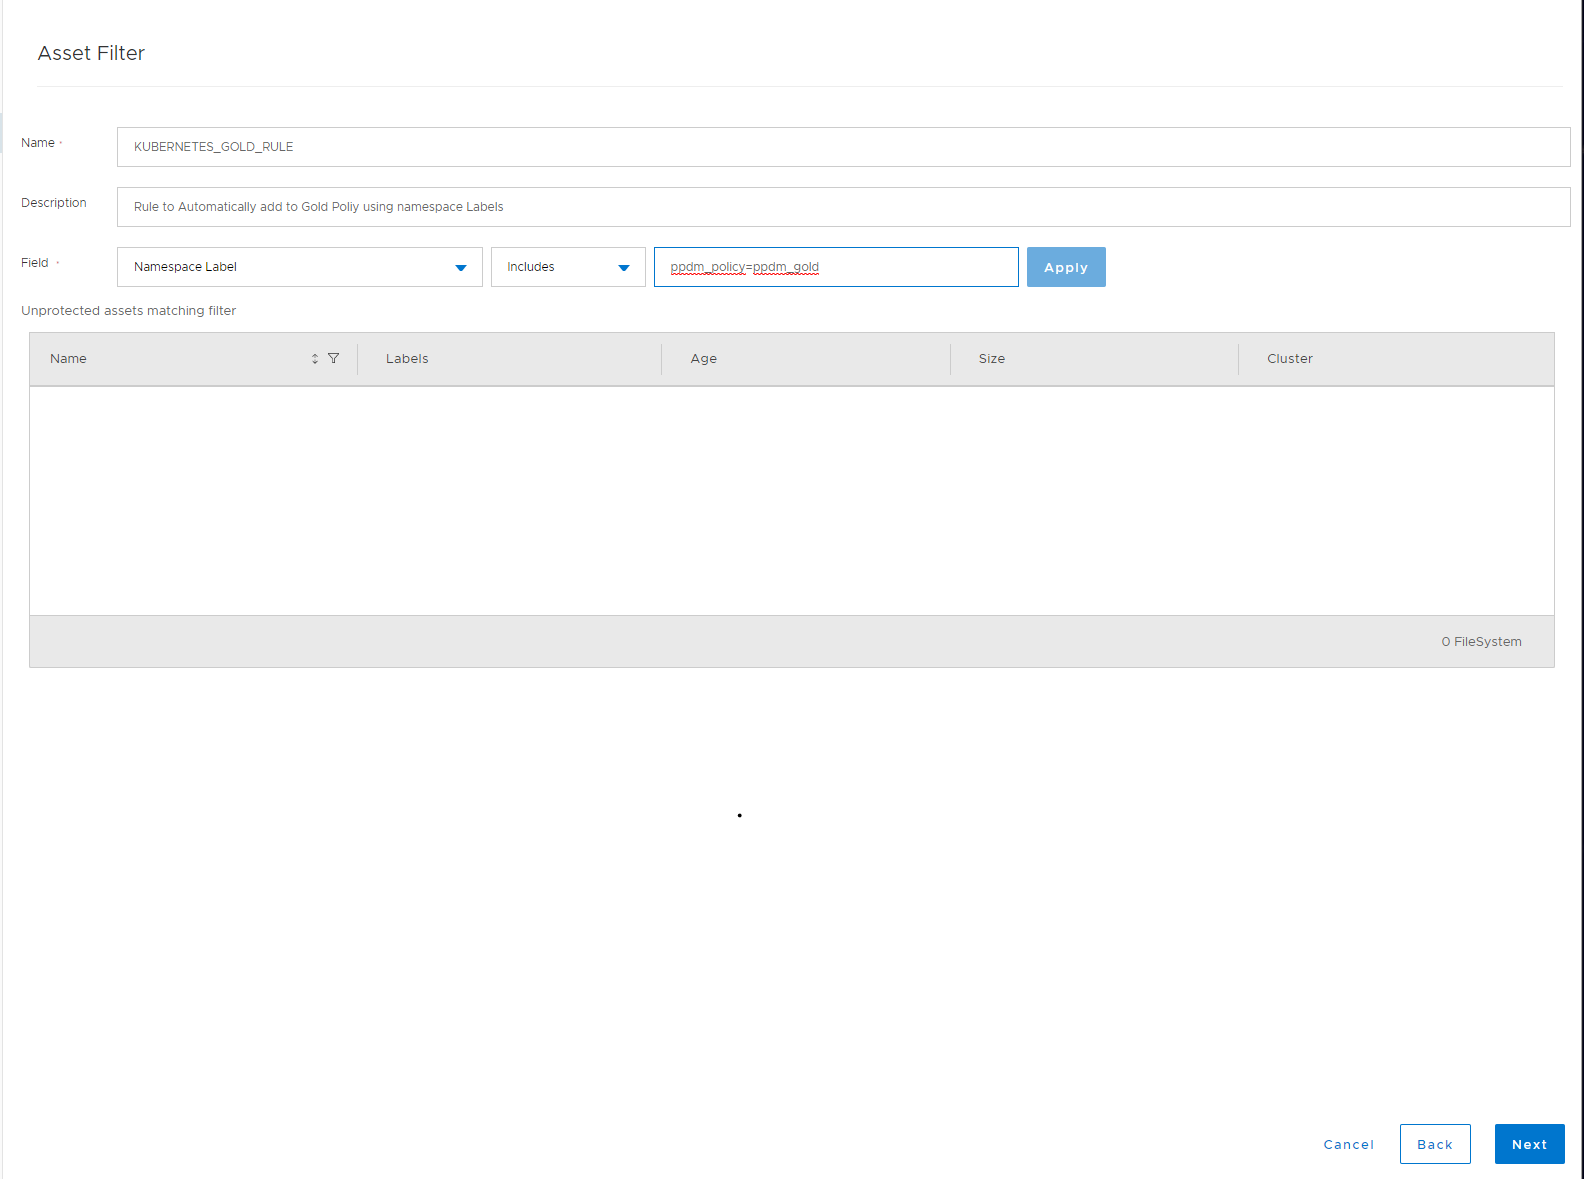
Now we need to create the Namespace and an Application I use a Wordpress deployment in my example. For this, create a new Directory on your machine and change into it Create the Namespace template:
NAMESPACE=wordpress
PPDM_POLICY=ppdm_gold
cat <<EOF >./namespace.yaml
apiVersion: v1
kind: Namespace
metadata:
  name: ${NAMESPACE}
  labels:
    ppdm_policy: ${PPDM_POLICY}
EOF
Create a Kustomization File:
WP_PASSWORD=<mysecretpassword>
cat <<EOF >./kustomization.yaml
secretGenerator:
- name: mysql-pass
  literals:
  - password=${WP_PASSWORD}
resources:
  - namespace.yaml
  - mysql-deployment.yaml
  - wordpress-deployment.yaml
Download my Wordpress Templates:
wget https://raw.githubusercontent.com/bottkars/dps-modules/main/ci/templates/wordpress/mysql-deployment.yaml
wget https://raw.githubusercontent.com/bottkars/dps-modules/main/ci/templates/wordpress/wordpress-deployment.yaml
with the 4 files now in place, we can run the Deployment with:
kubectl apply -k ./ --namespace ${NAMESPACE}i am using a Concourse Pipeline to do the above, but your out may look similar:
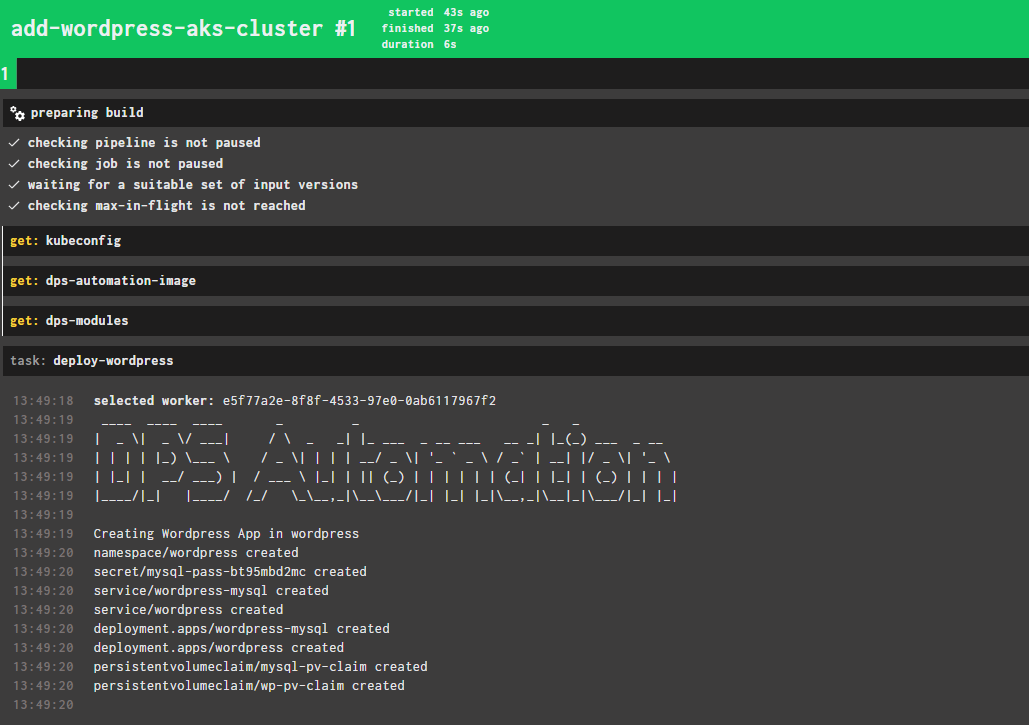
We can Verify the Namespace from K9s /kubectl/azure Now we need to go to you PPDM and manually re-discover the AKSCluster. (default every 15 Minutes) Once done, we go to Protection –> Protection Rules and manually run the Protection Rule we created earlier:

After Running, the new Asset is Assigned to the Protection Policy We now can go to our Protection Policy, and the Asset Counted should include the new Asset. You can Click edit to see / verify Wordpress has been Added :

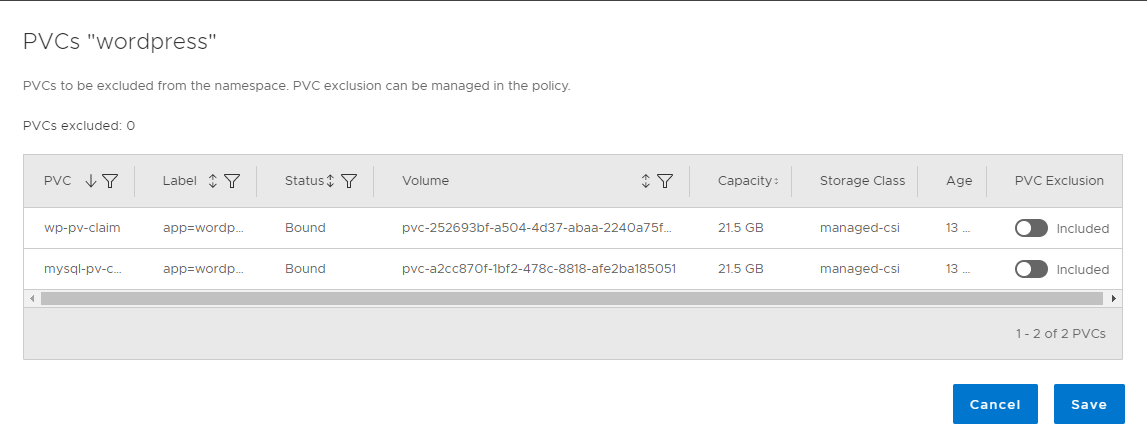
The “Manage Exclusions” link in PVC´s Excluded Column will show you the PVC´s in the Wordpress Asset. It should be 2 PVC´s of type managed-csi:
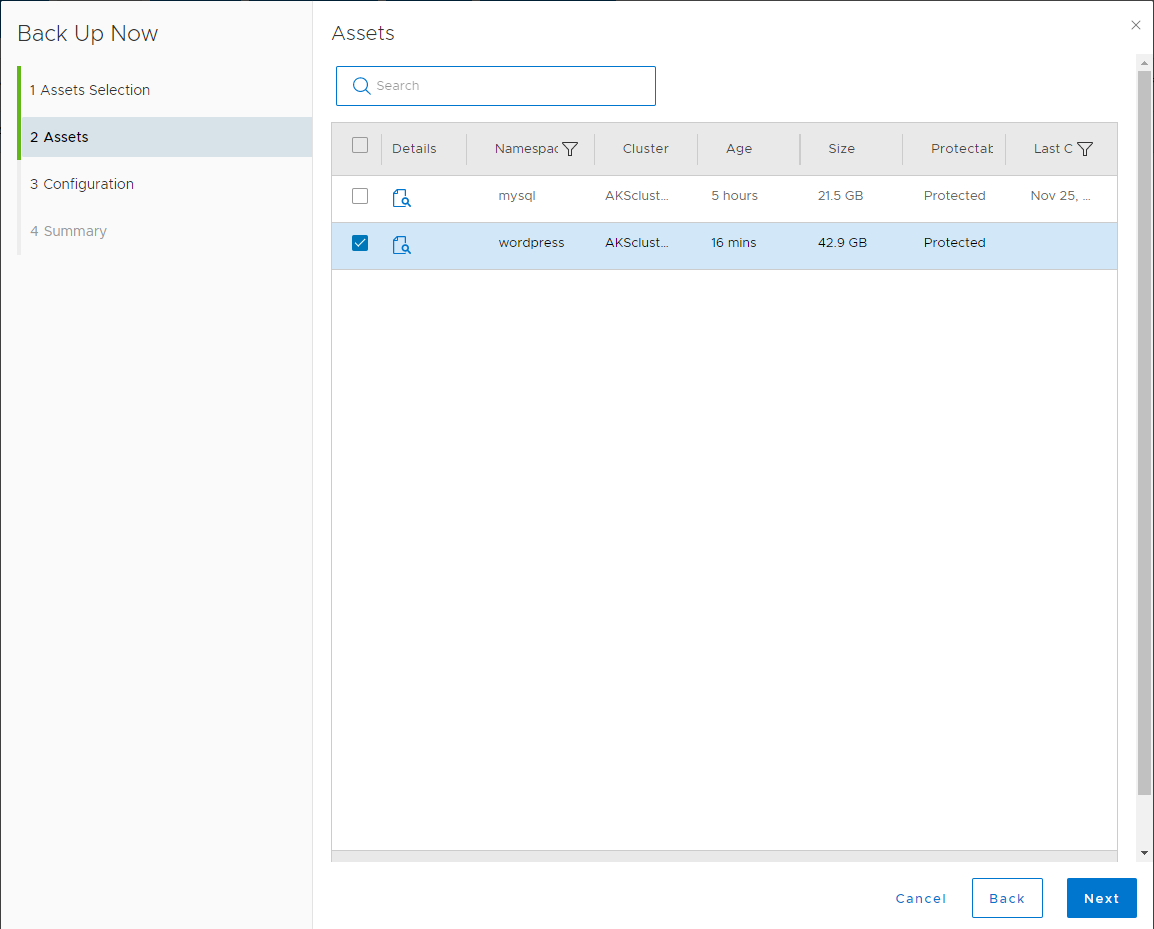
Run the Protection Policy as before, but now only select the New Asset to be Backed up:
Troubleshooting
Backups fail
In case your Backups fail, redeploy the powerprotect-controller by deleting the POD:
kubectl delete pod "$(kubectl get pod --namespace powerprotect | grep powerprotect-controller | awk '{print $1}')" --namespace powerprotect